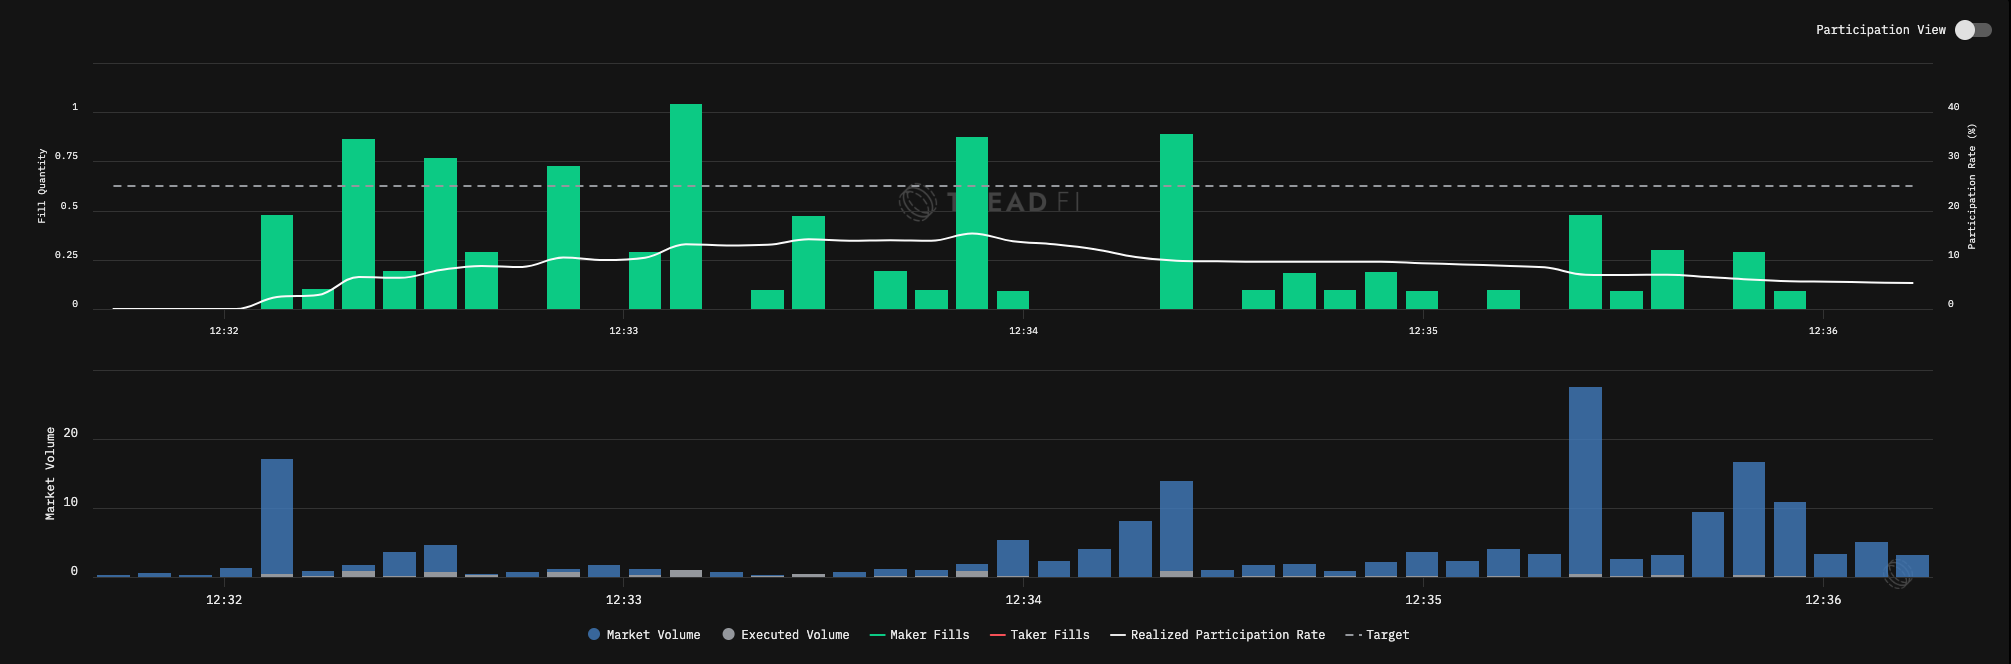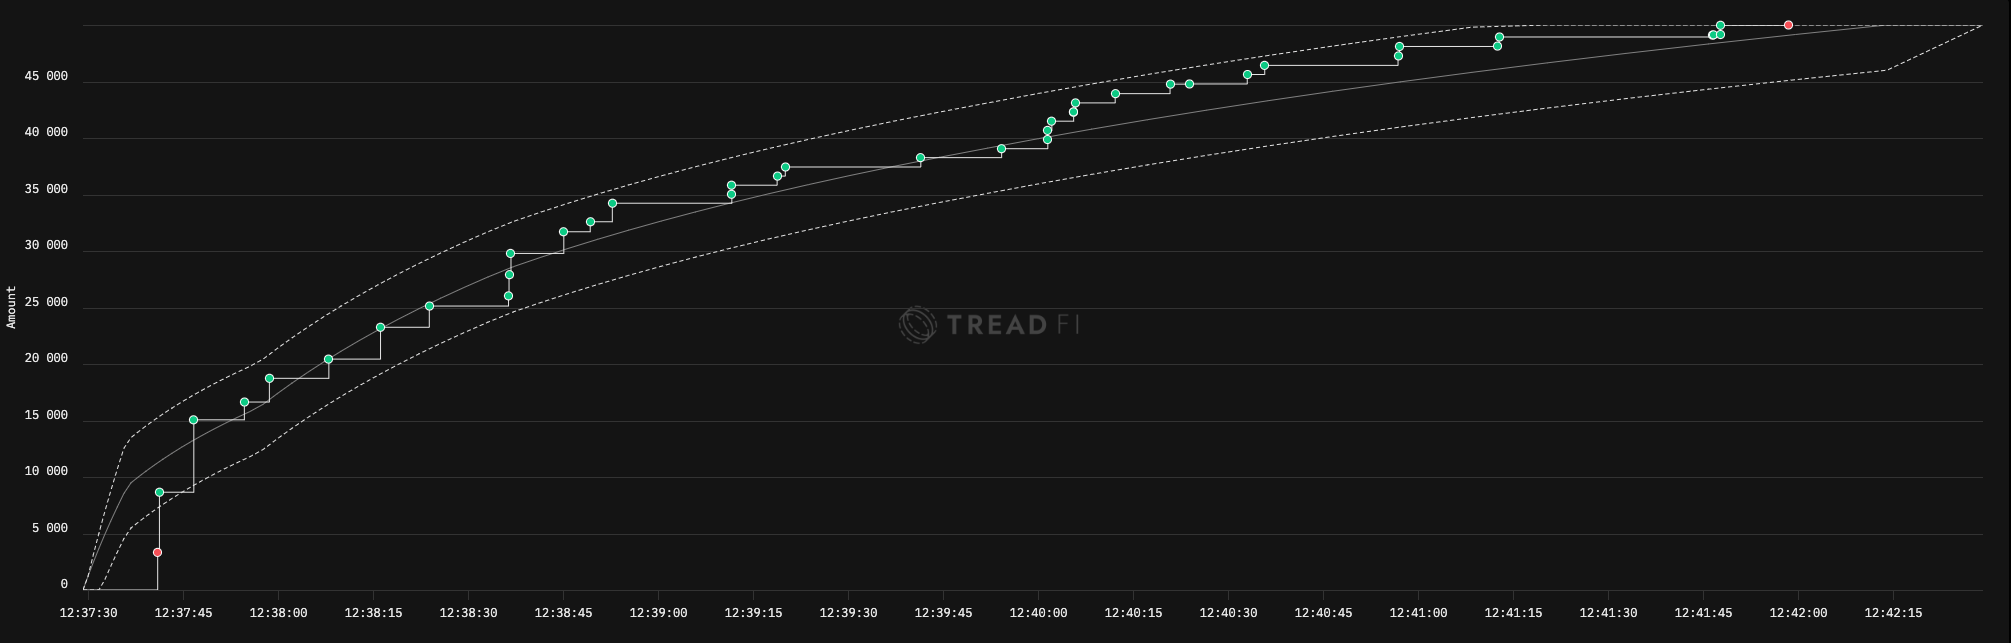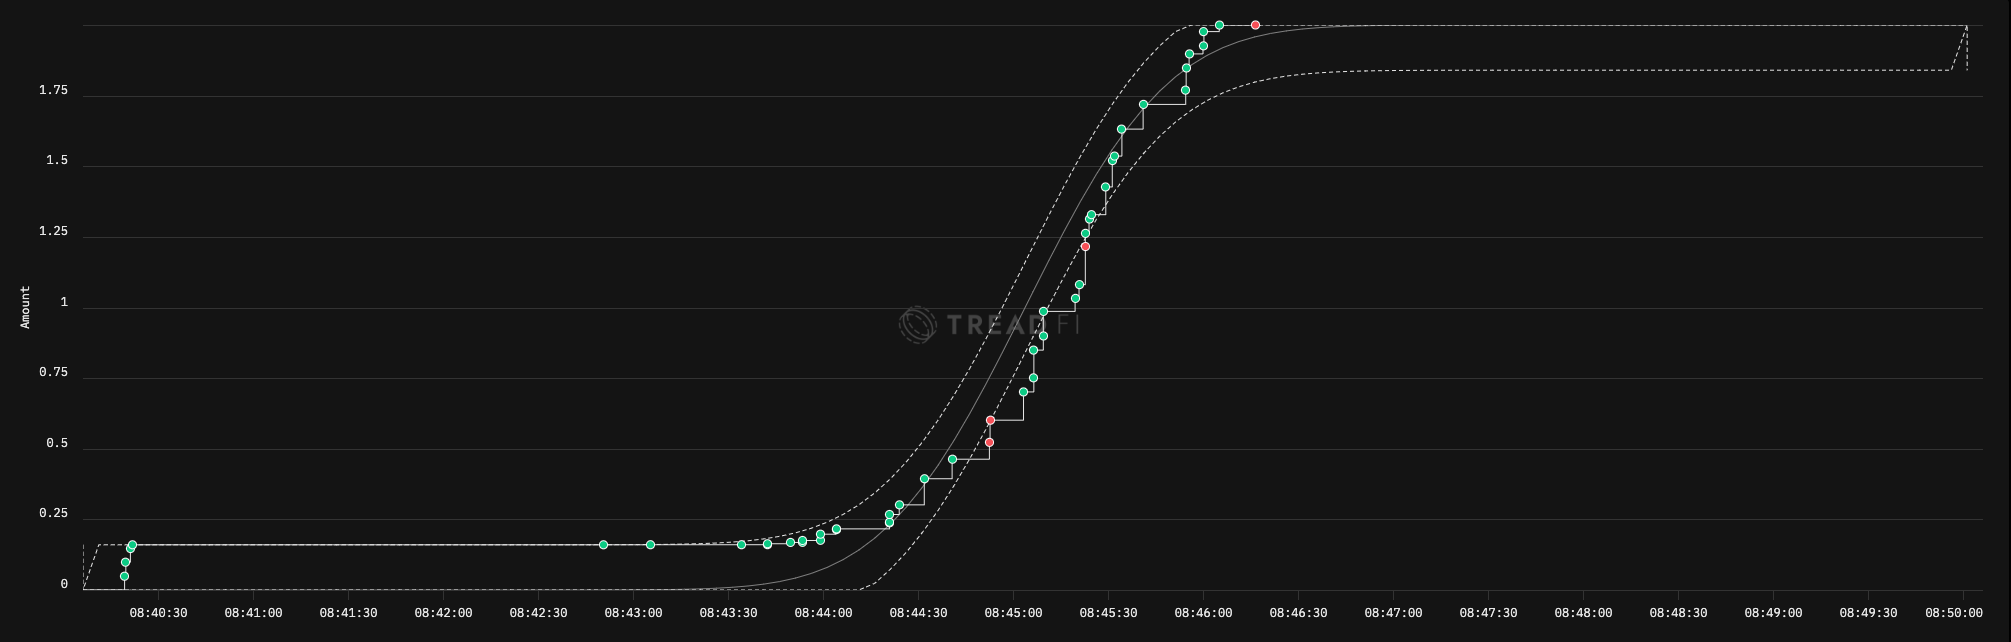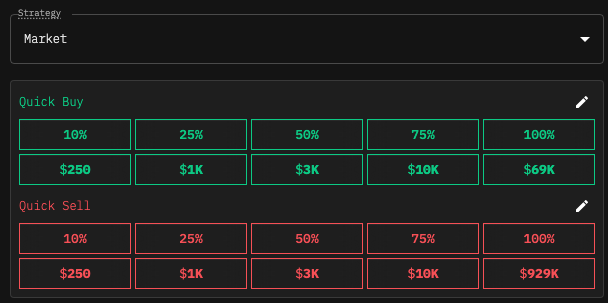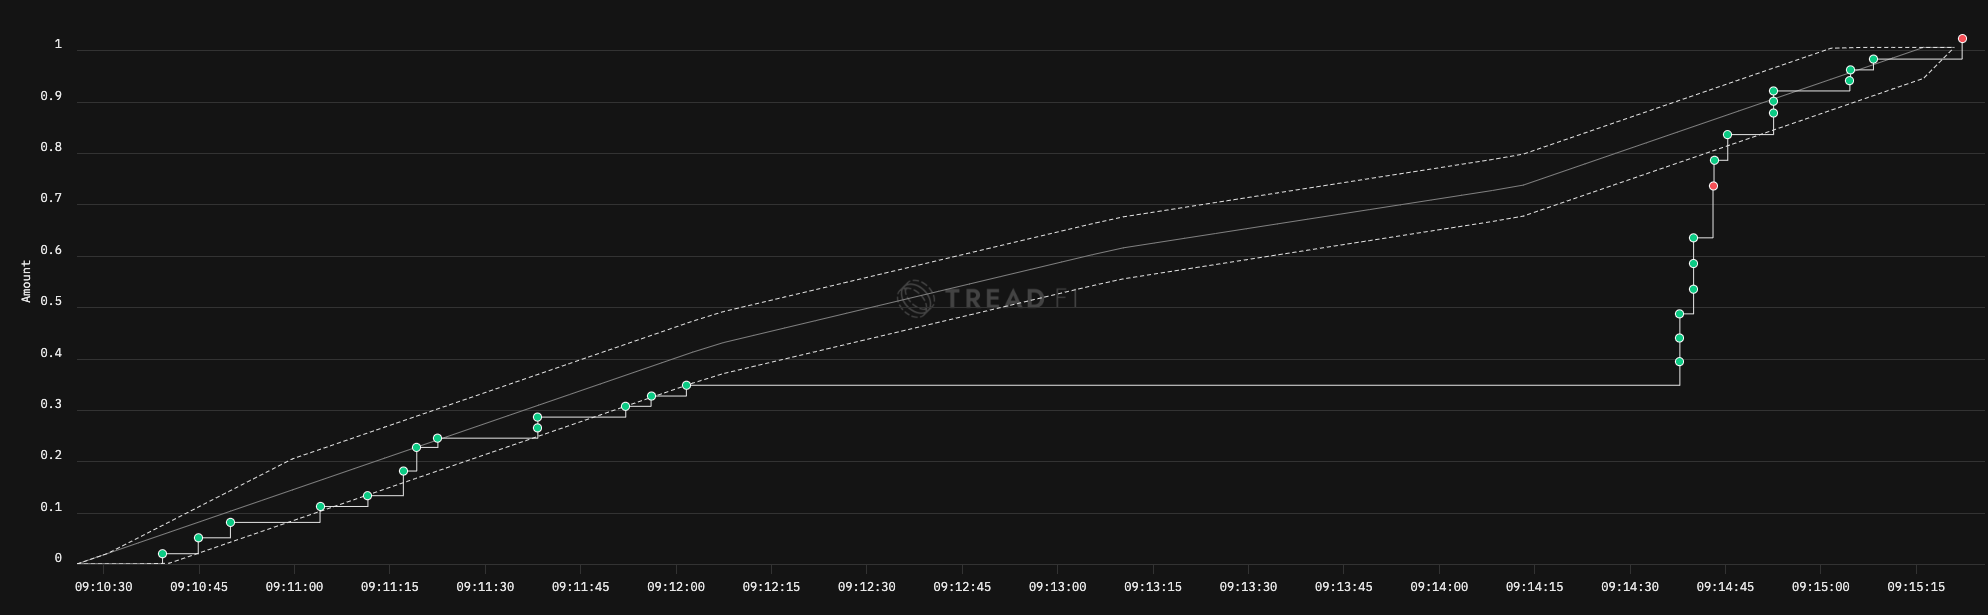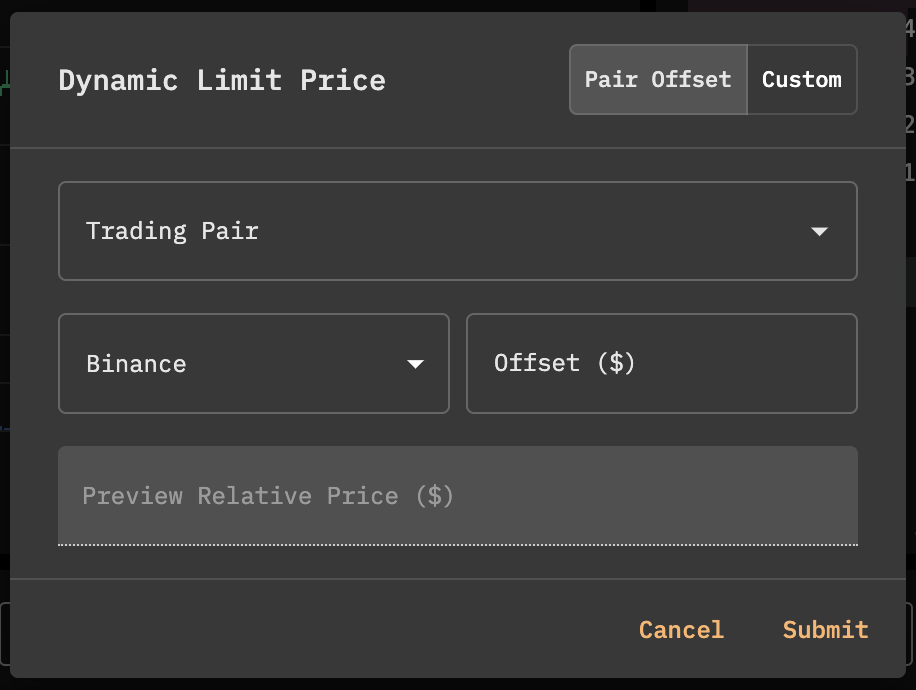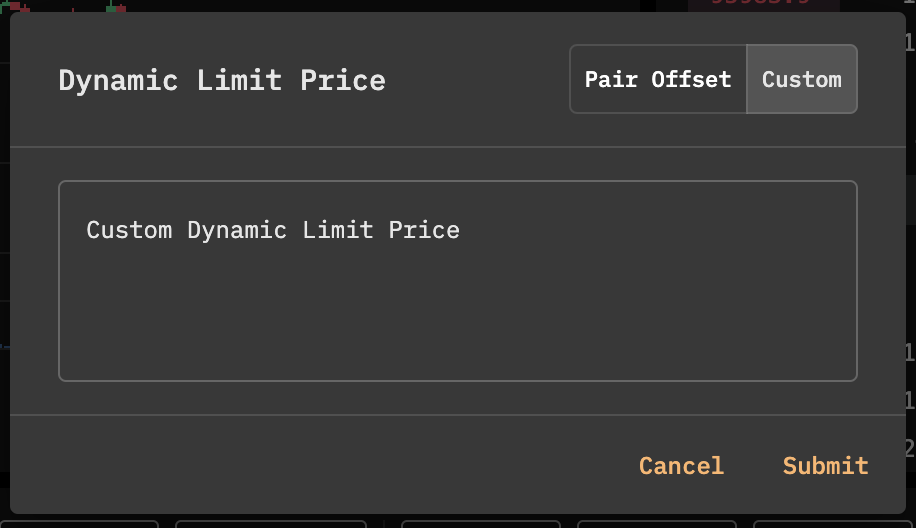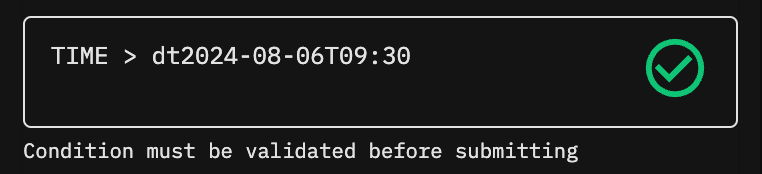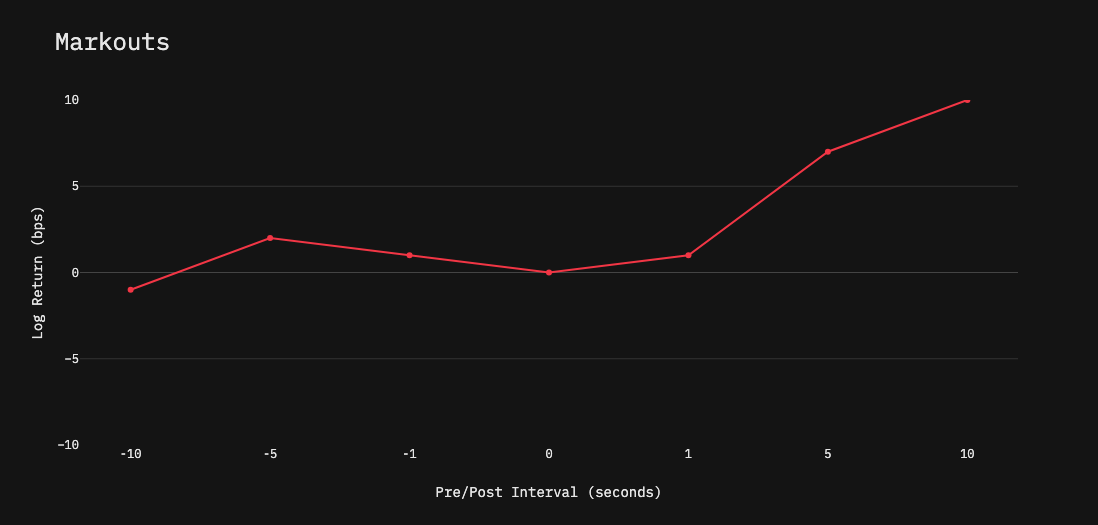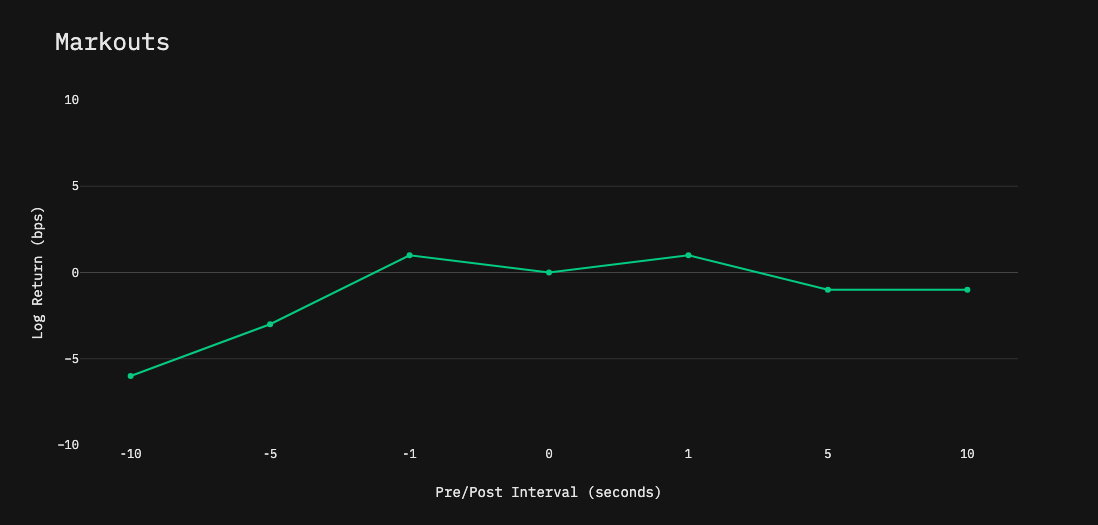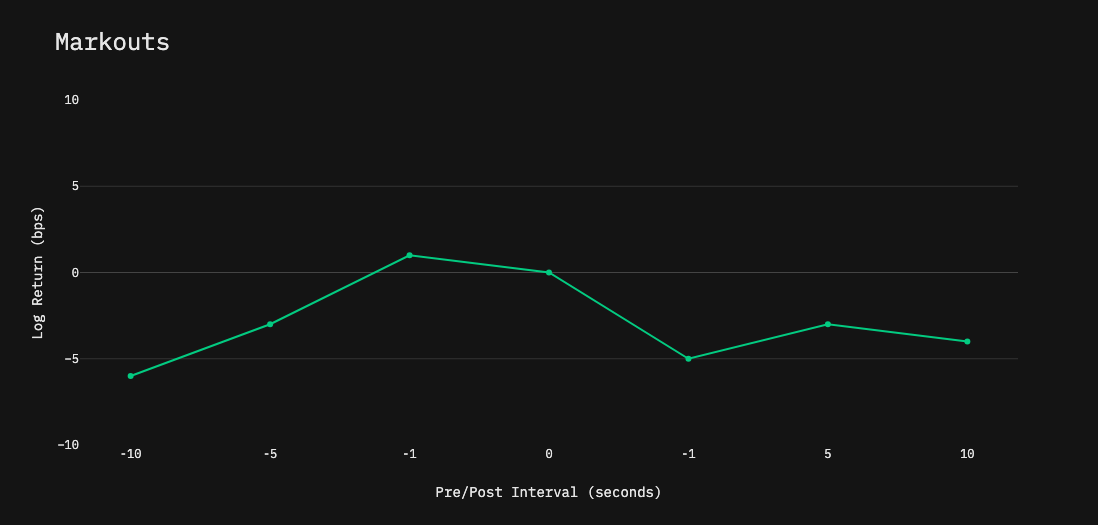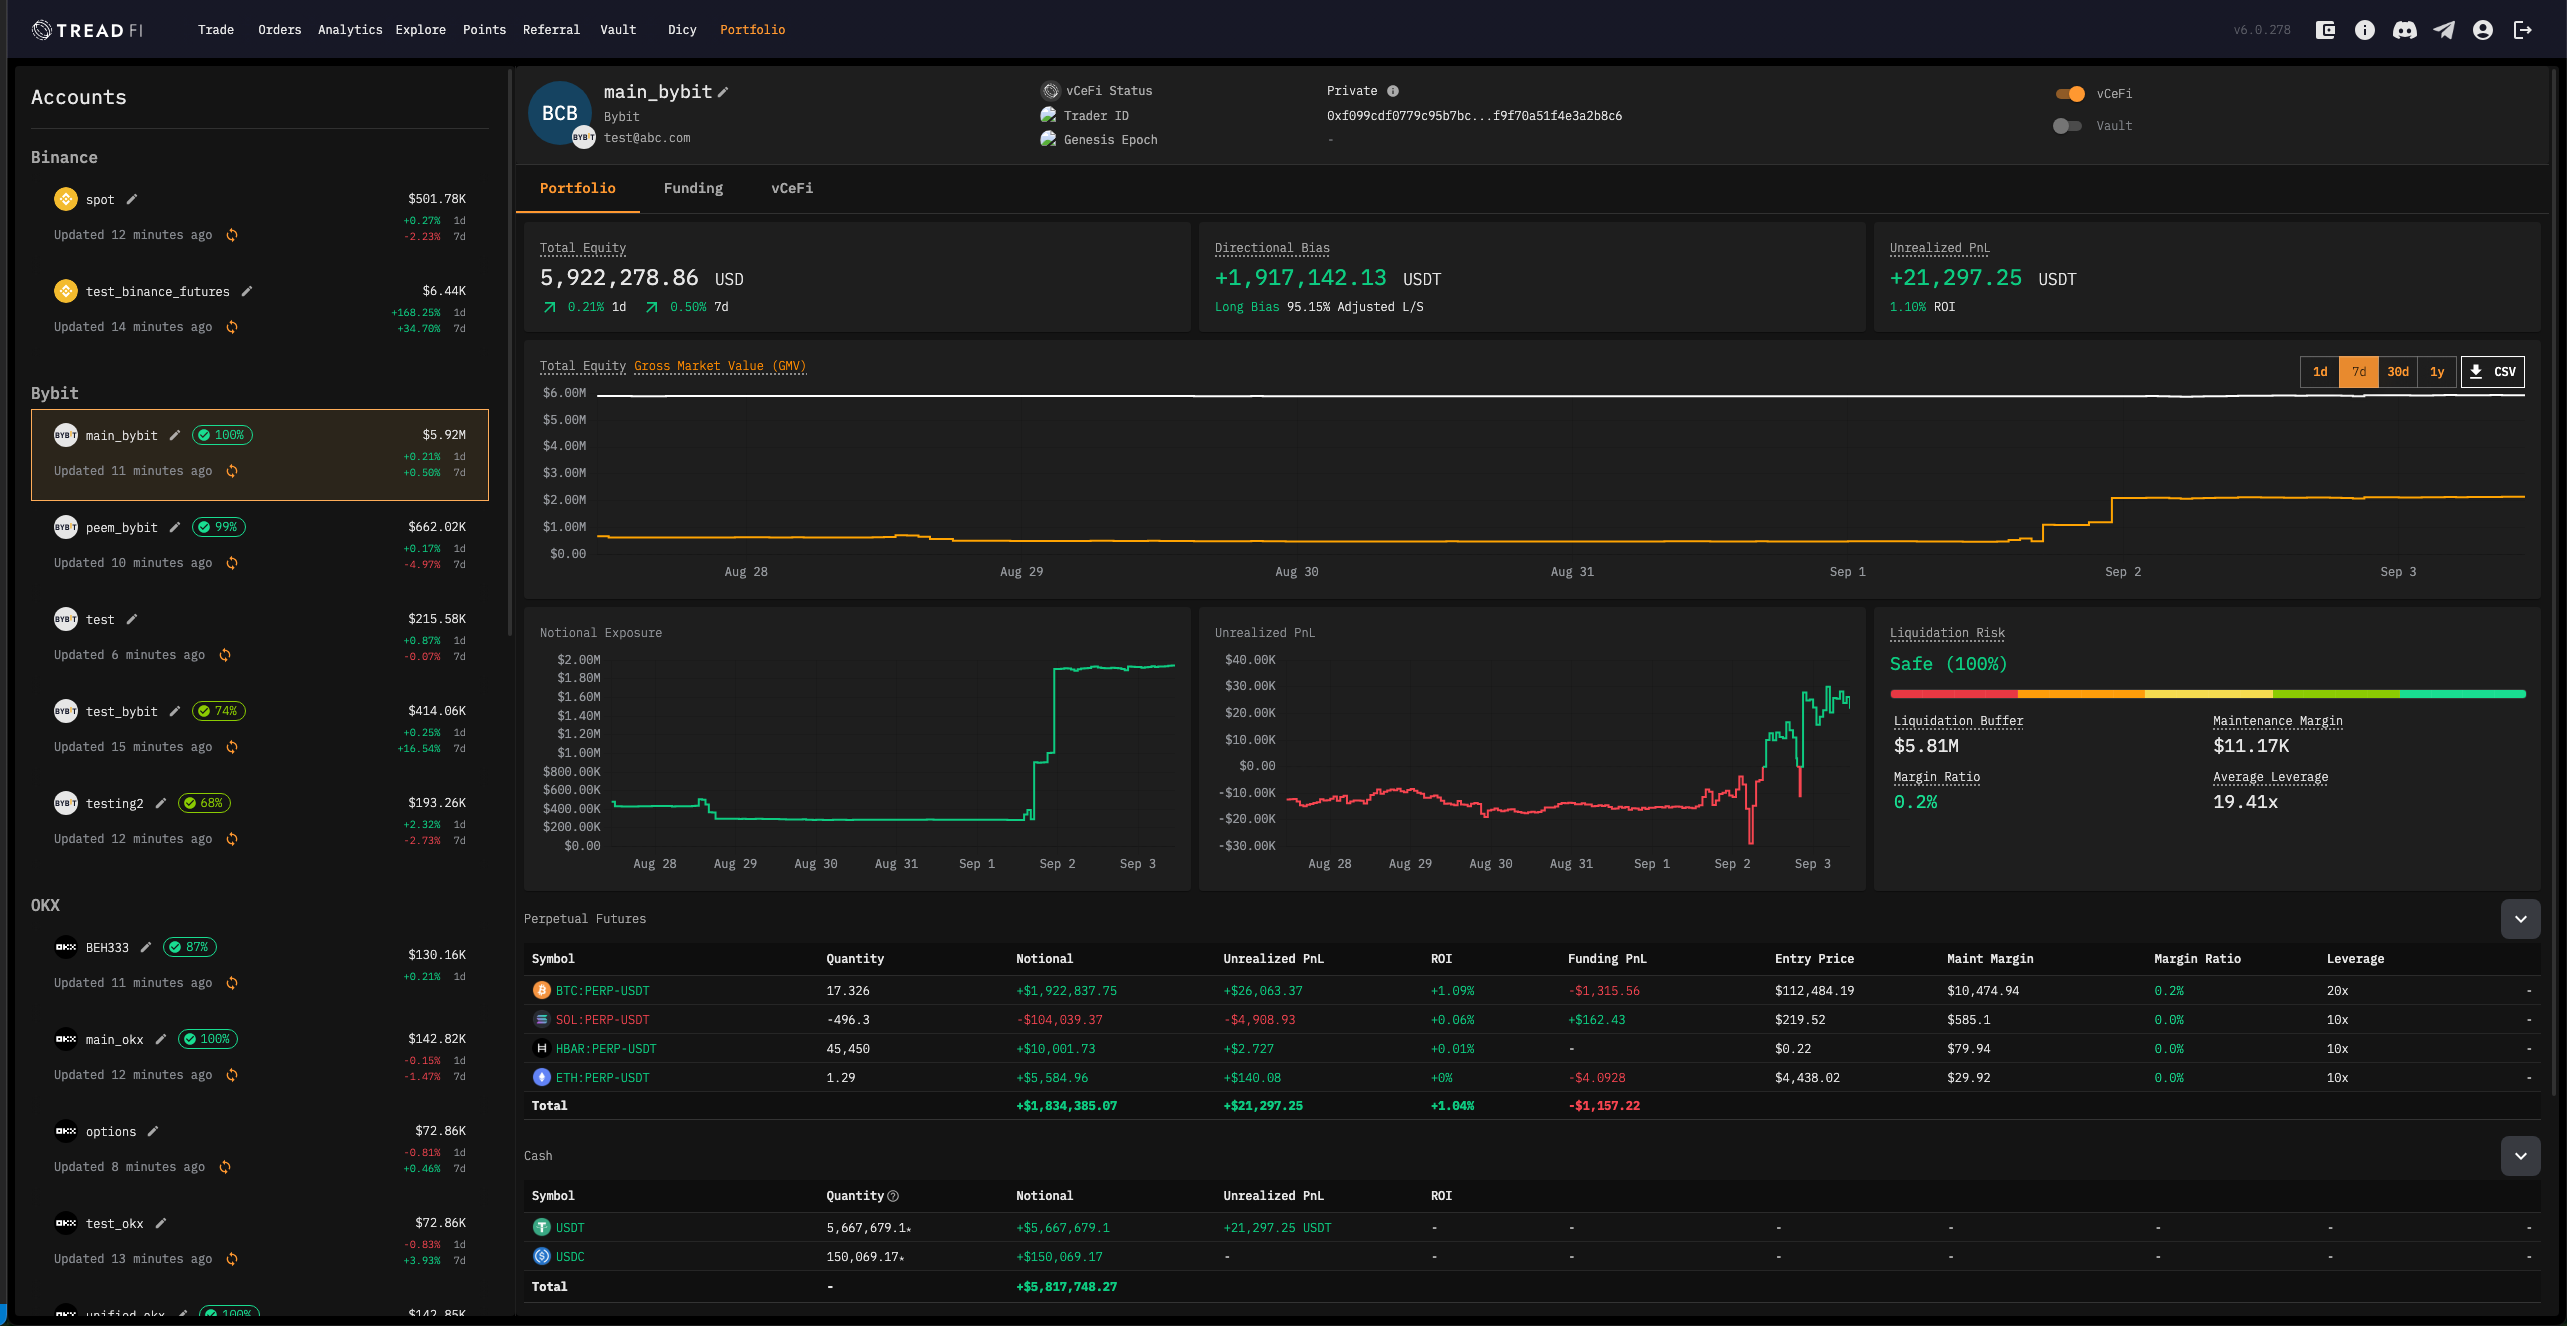
# Crypto Trading Terminal + OEMS

<figure><img src="/files/Ywh5w2u7r4vK28ZerEkZ" alt=""><figcaption></figcaption></figure>

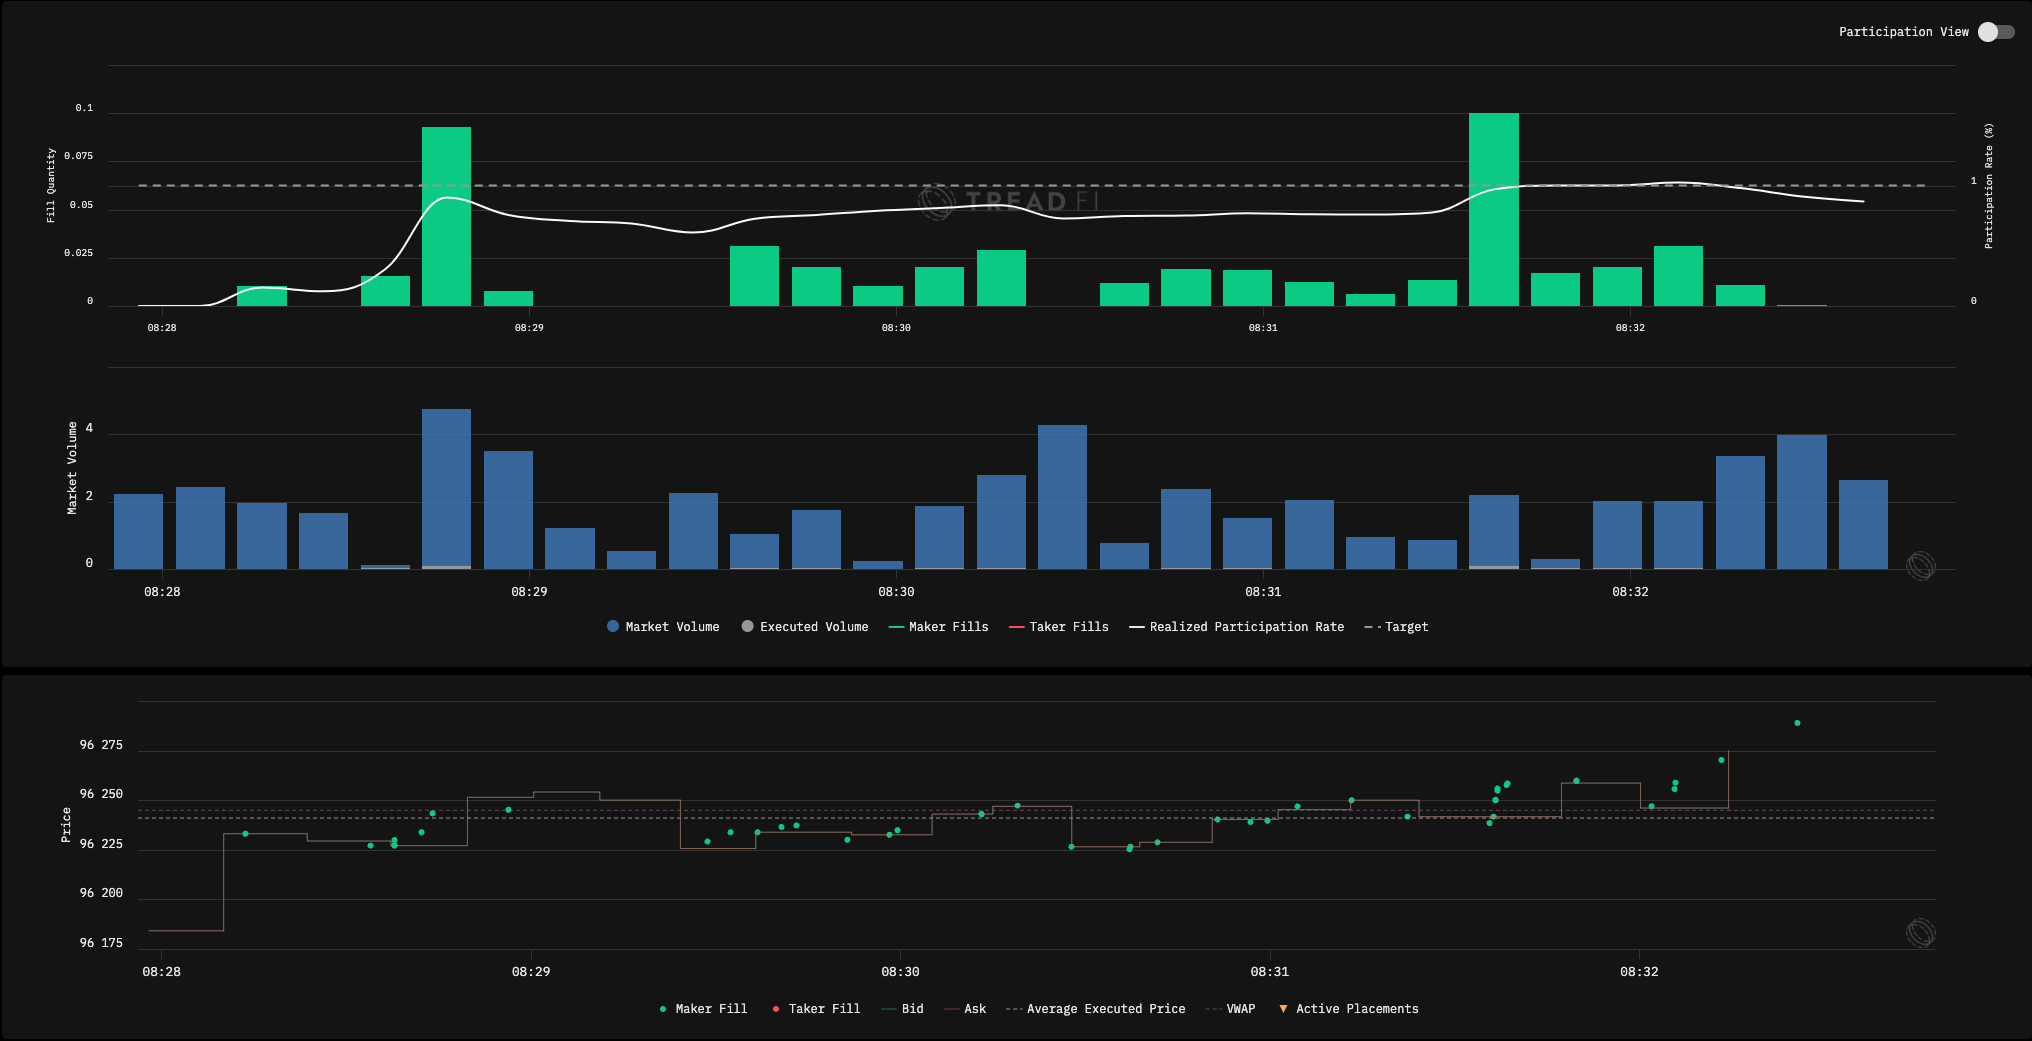
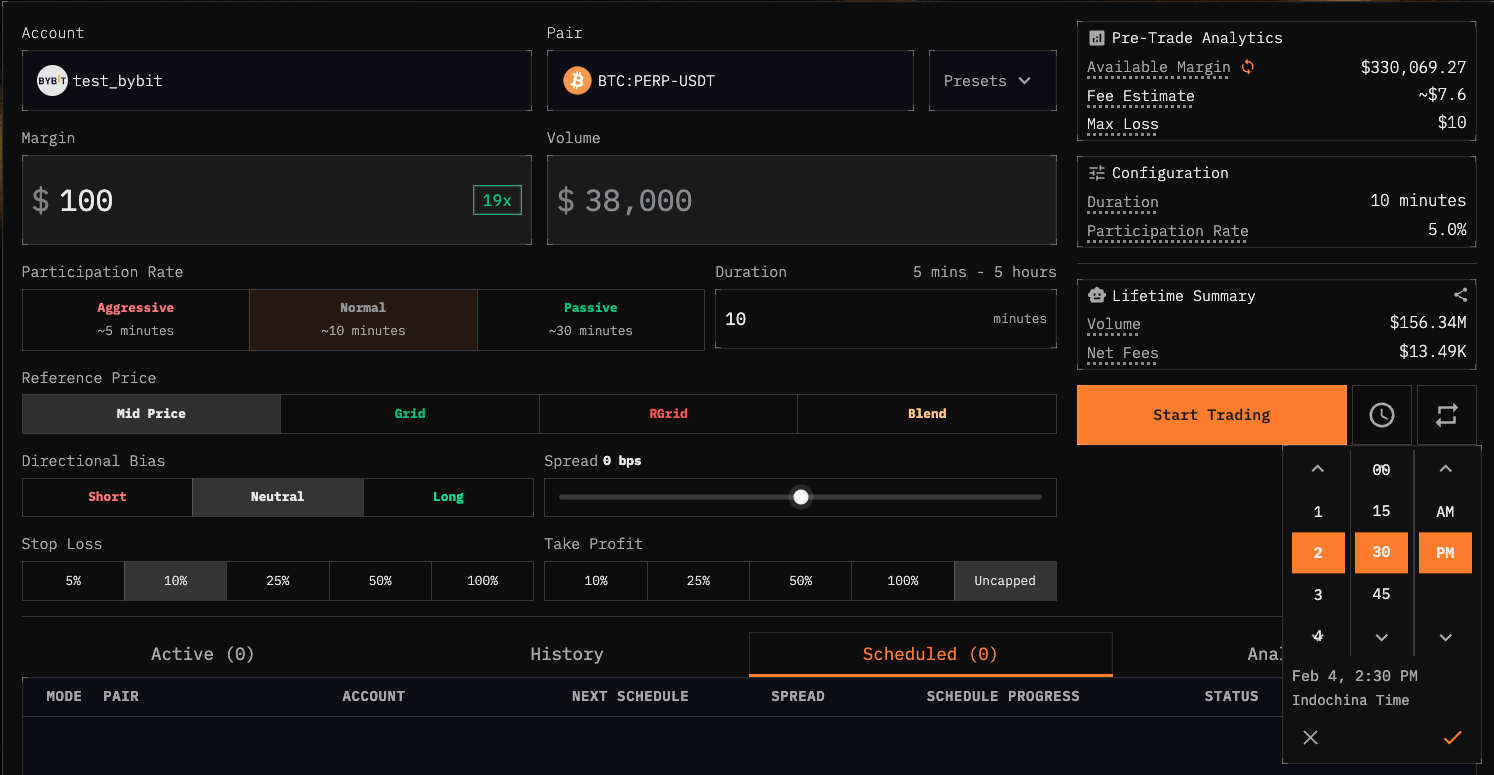
[tread.fi](http://tread.fi) is a high-performance algorithmic trading terminal and OEMS built for retail and institutional crypto traders. By integrating advanced execution algorithms, [tread.fi](http://tread.fi) empowers users to trade and market make across centralized exchanges, perp dexes, and on-chain swaps, while optimizing for minimal execution costs through smart order routing.

#### **Key Benefits**

* **Algorithmic Execution:** Automate trades with precision using industry-leading execution algorithms to reduce market impact and transaction costs.&#x20;
* **Automated Market Making:** Deploy institutional-grade market-making strategies in a few clicks. Capture spreads and provide liquidity through a [specialized bot](/bots/market-maker-bot) equipped with smart order routing to ensure limit orders remain competitive.
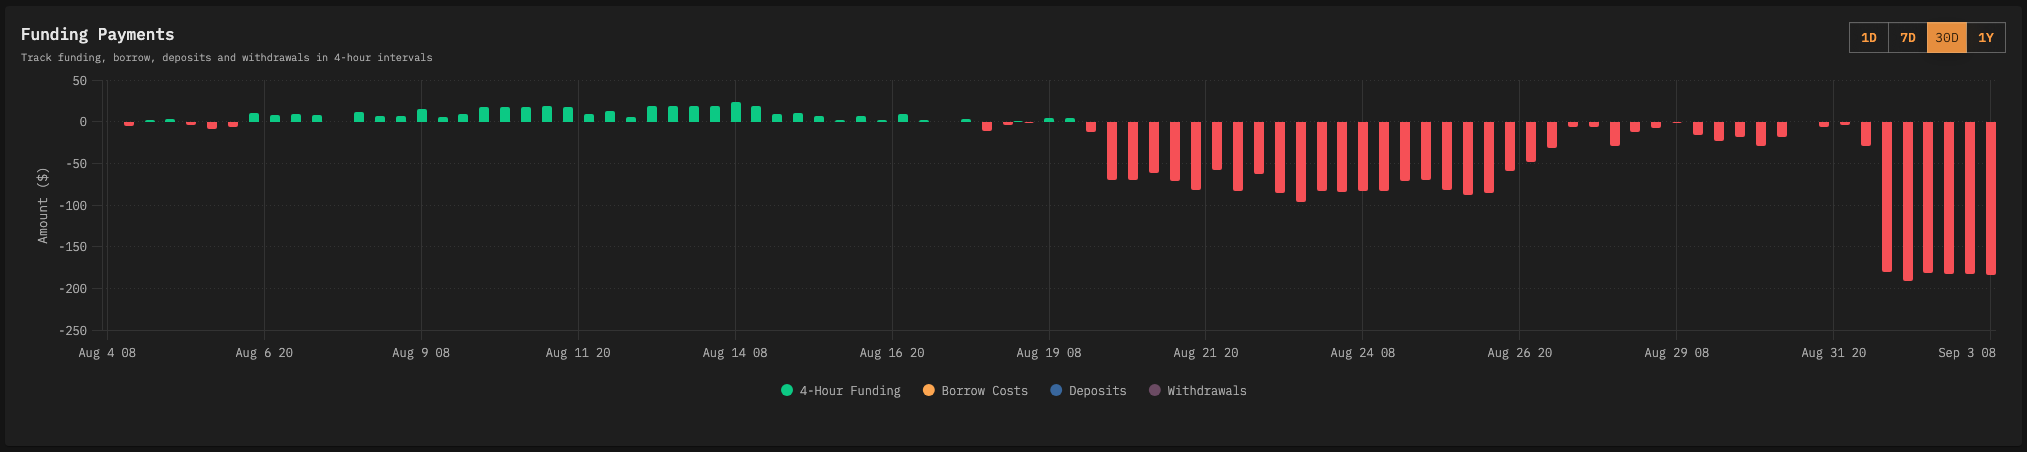
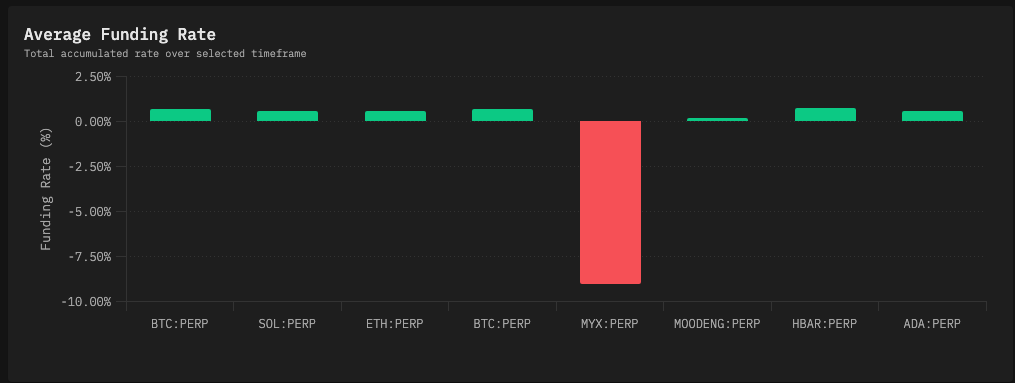
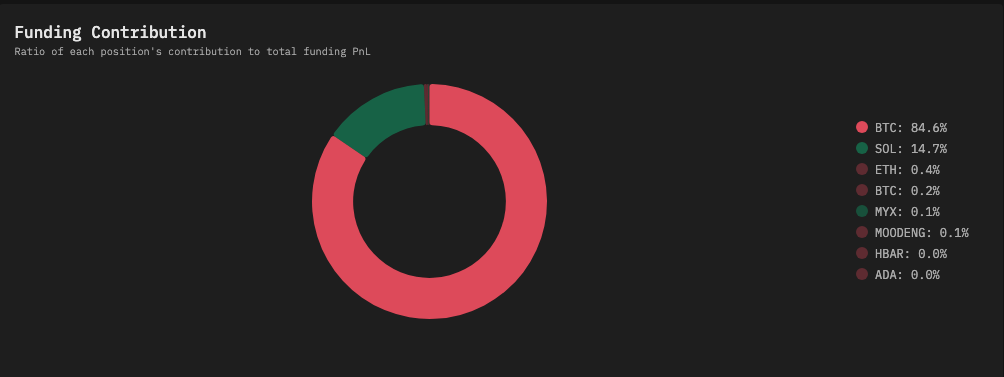
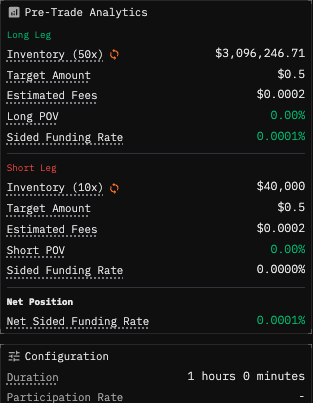
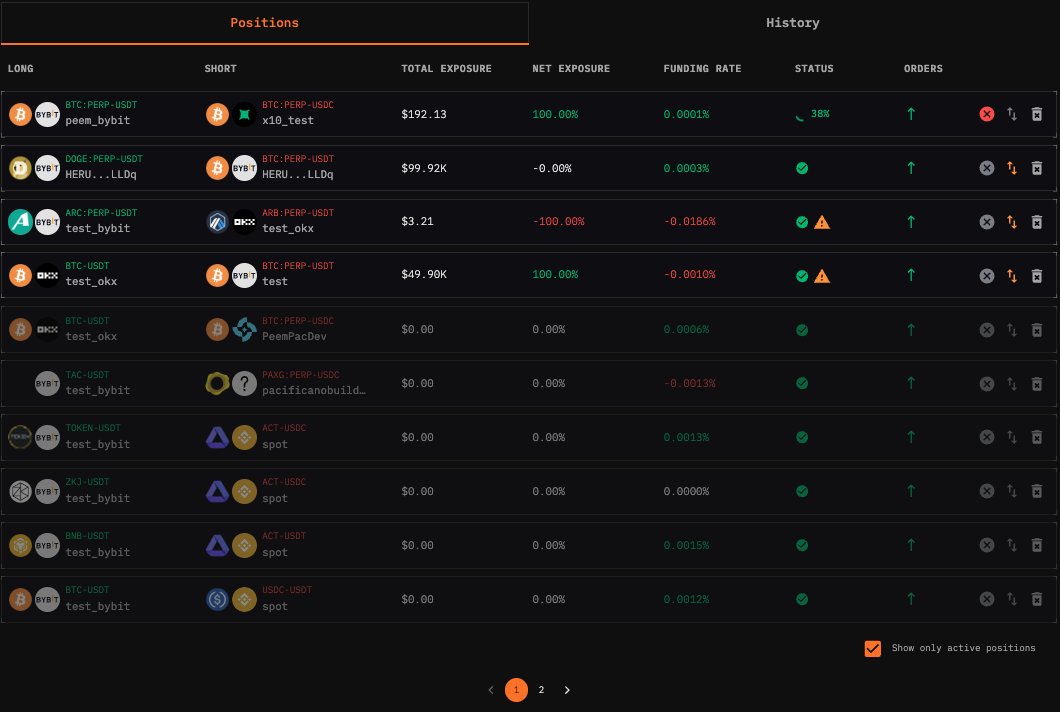
* **Funding Rate Arbitrage:** Earn funding rate yields while remaining delta-neutral. Execute and monitor both legs of long/short arbitrage trades through a [unified dashboard](/bots/delta-neutral-bot) with tools to manage delta and reverse positions in a few clicks.
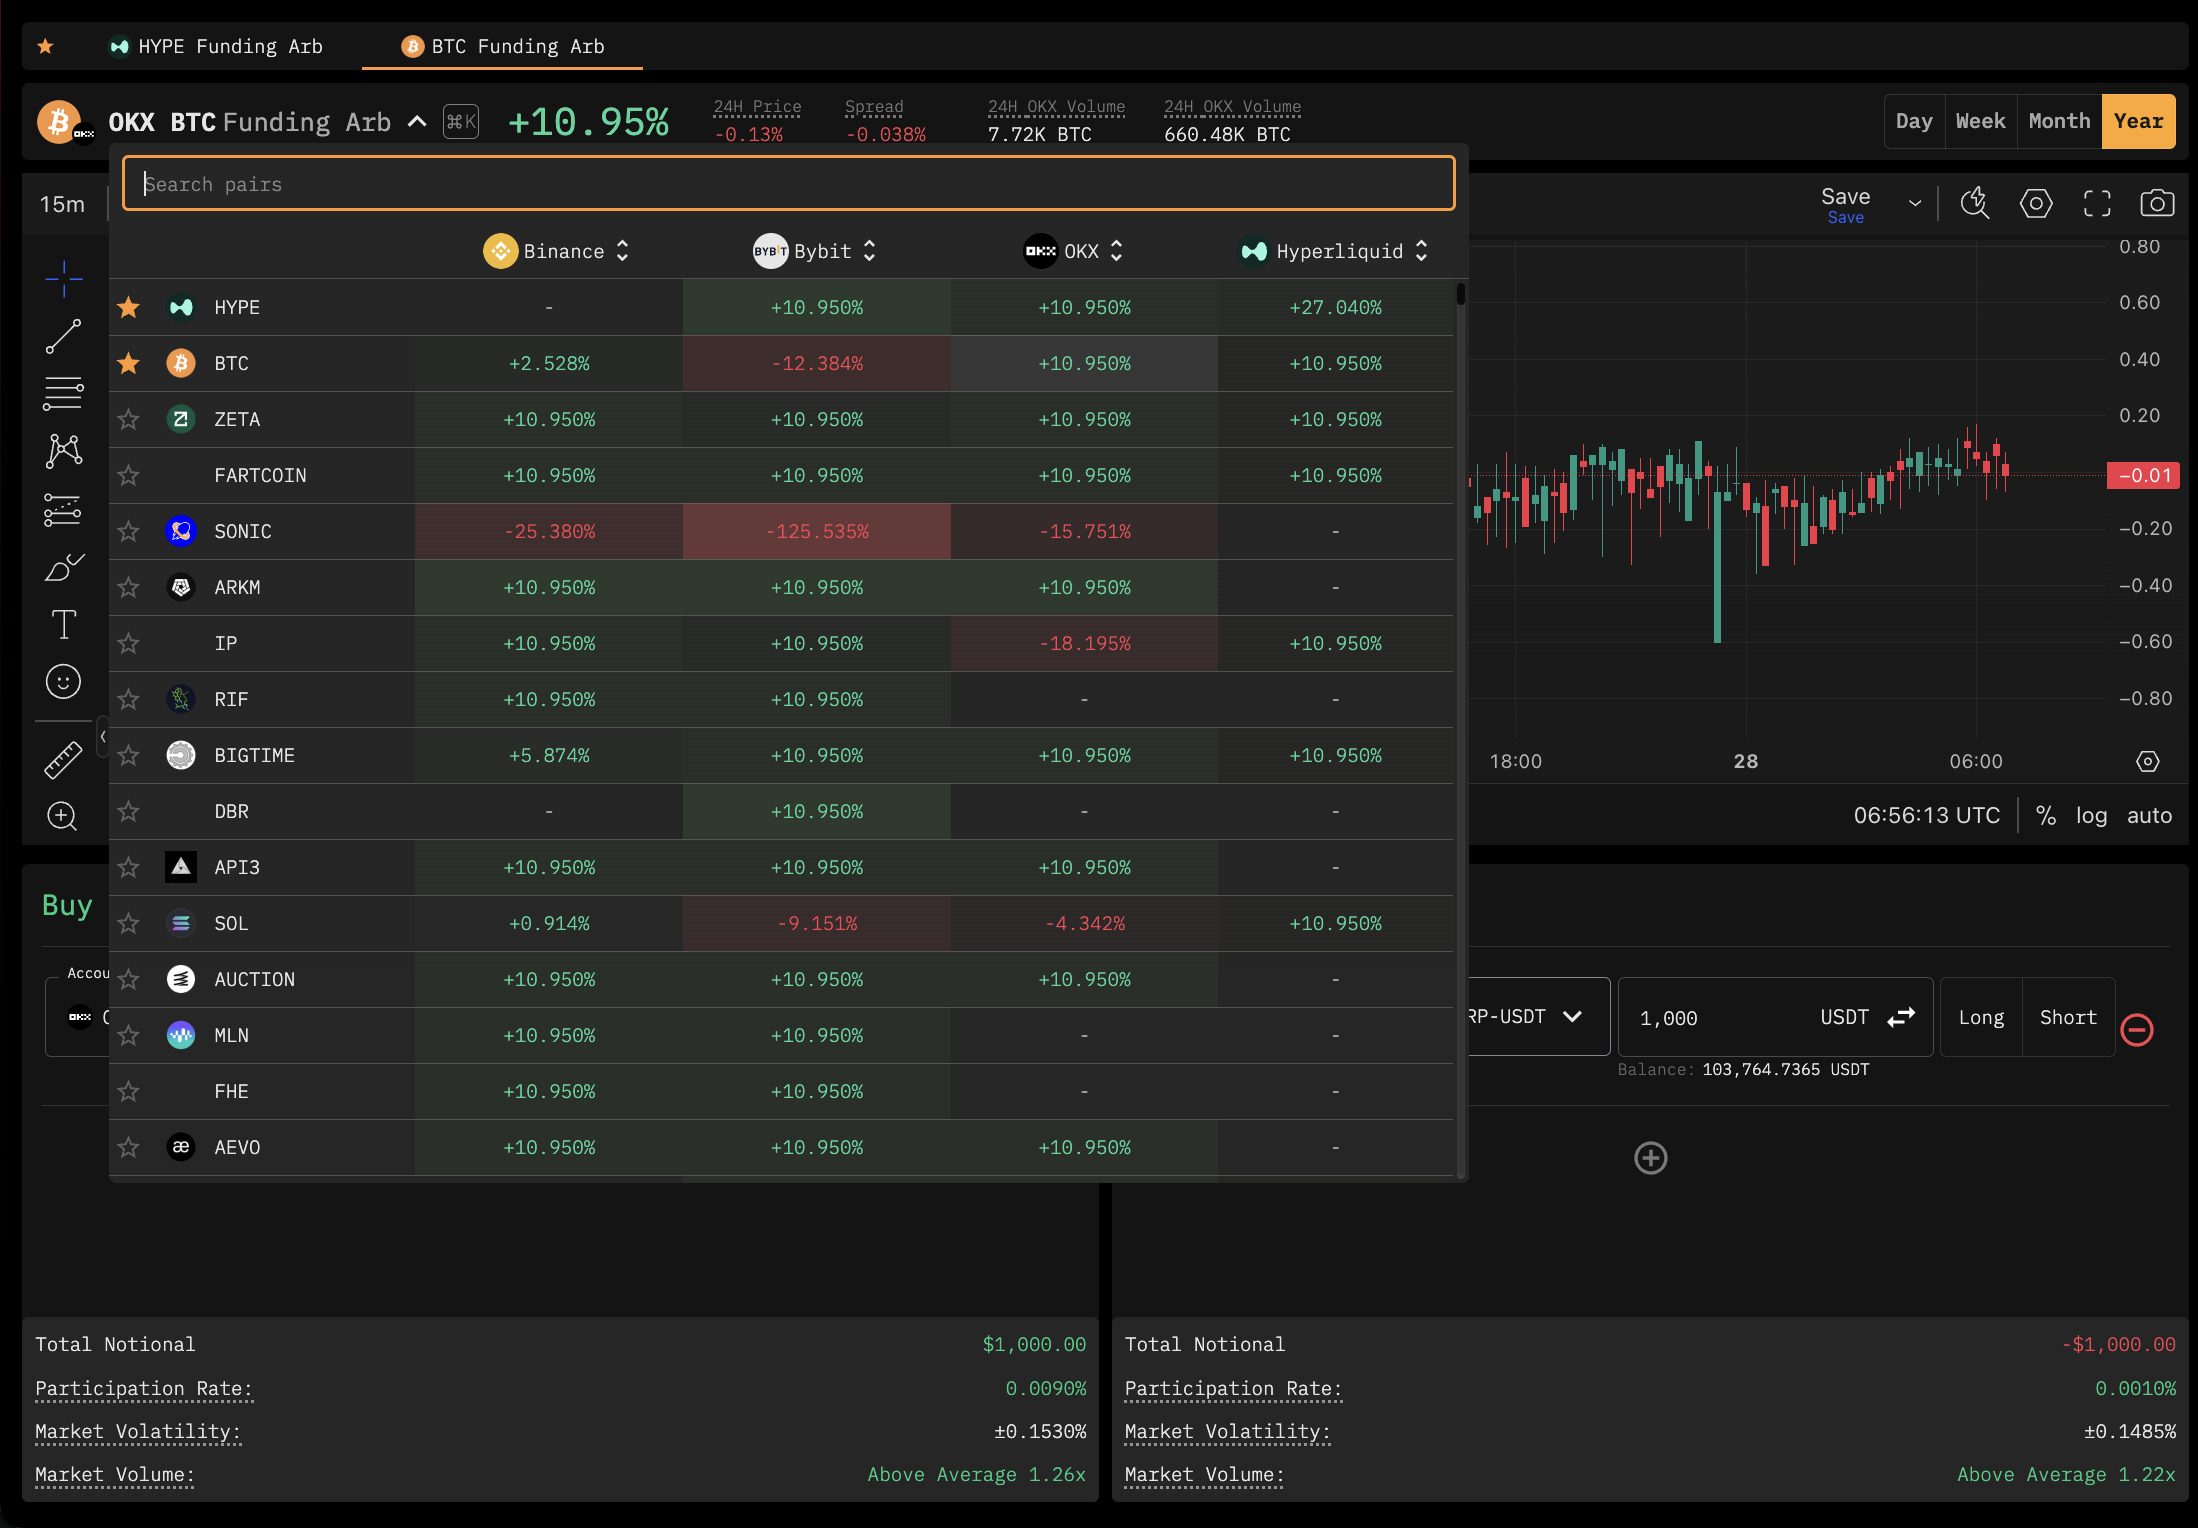
* **Unified Trading Terminal:** Connect and manage your entire portfolio through a single interface. Trade across centralized exchanges, Perpetual DEXs, and on-chain protocols, eliminating the need for multiple platforms to manage your off-chain and on-chain trading.
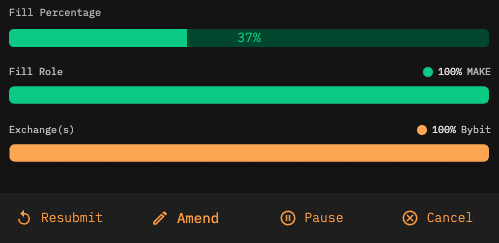
* **Execution Cost Efficiency:** Protect your profits by prioritizing maker fills and reducing unnecessary taker fees.
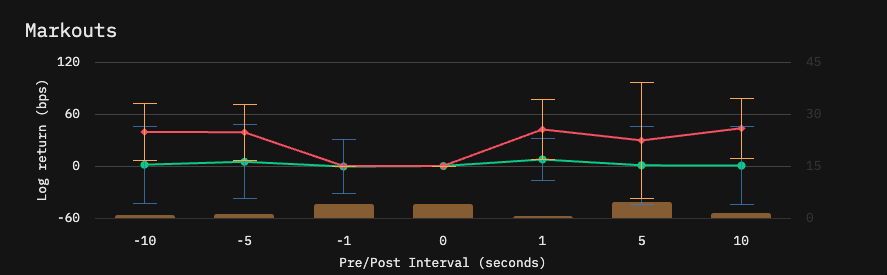
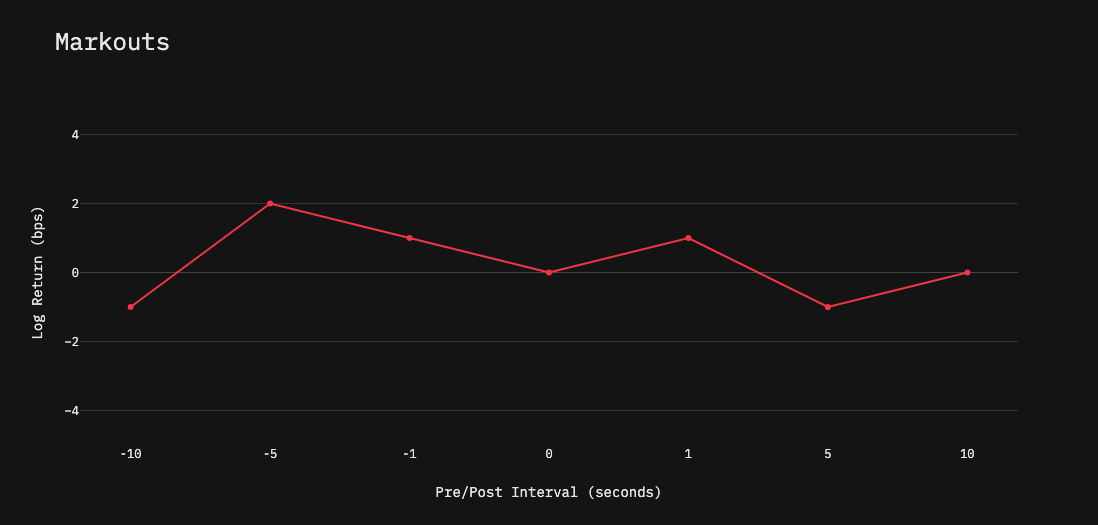
* **Execution Cost Transparency:** Monitor transaction costs and gain full visibility into order performance and execution quality.
* **Secure API and Websocket Integration:** Trade with confidence via high-performance API and Websocket integrations. All API keys are protected by industrial-grade encryption and secure authentication protocols.

#### **Platform & API Integration**

tread.fi provides both a **powerful trading platform** and a **comprehensive REST API**, allowing traders to:

* [**Execute algorithmic trades**](/creating-and-submitting-orders/submitting-your-first-order) directly through the web platform.
* [**Trade programmatically using the tread.fi REST API**](/interacting-with-the-api/api-reference) or integrate it into existing systems for **custom execution strategies and automation (only for Enterprise Plans)**


# Getting Started

<figure><img src="/files/qxzeHCsIp3qchdAld1Kt" alt=""><figcaption></figcaption></figure>

1. **Register** – [Sign up](https://app.tread.fi/account/signup/) with your email or connect your wallet.&#x20;

<figure><img src="/files/gupwvLmXdf2fzBcskPaD" alt=""><figcaption></figcaption></figure>

1. **If you signed up with your email please verify email** – Click the verification link sent to your inbox to confirm your email address.
2. **Connect Exchange API** – Link your exchange API key to enable trading. For step-by-step instructions, check out: [**Connecting to Exchanges**](/account-creation-and-api-key-connection/connecting-to-exchanges)

<figure><img src="/files/SdeiWmKWDF4yufNw9dO6" alt="" width="563"><figcaption><p>Click "Add key" to Connect Trading Account</p></figcaption></figure>

Once you've completed these steps, you're ready to start trading with tread.fi. For more information on submitting your first simple order, check out this [page](/creating-and-submitting-orders/submitting-your-first-order/algo-swap-mode).


# Connecting to Exchanges

### Supported Exchanges

* [**Aster**](/account-creation-and-api-key-connection/connecting-to-exchanges/aster)
* [**Binance**](/account-creation-and-api-key-connection/connecting-to-exchanges/binance)
* [**Bitget**](/account-creation-and-api-key-connection/connecting-to-exchanges/bitget)
* [**Bybit**](/account-creation-and-api-key-connection/connecting-to-exchanges/bybit)
* [**Deribit**](/account-creation-and-api-key-connection/connecting-to-exchanges/deribit)
* [**OKX**](/account-creation-and-api-key-connection/connecting-to-exchanges/okx)
* [**OKXDEX**](/dex-swaps-trading/dex-trading-wallet-setup)
* [**Gate**](/account-creation-and-api-key-connection/connecting-to-exchanges/gate)
* [**Hyperliquid**](/account-creation-and-api-key-connection/connecting-to-exchanges/hyperliquid)
* [**Nado**](/account-creation-and-api-key-connection/connecting-to-exchanges/nado)
* [**Pacifica**](/account-creation-and-api-key-connection/connecting-to-exchanges/pacifica)
* [**Paradex**](/account-creation-and-api-key-connection/connecting-to-exchanges/paradex)
* Coinbase International

Please refer to the comprehensive list [below](#supported-exchanges-products-and-account-types) for details on supported exchanges, products, and account types available for each corresponding exchange.

**Prerequisite.** You must first create an API key for the exchanges you wish to trade on. Refer to the exchange's specific instructions above.

### Linking to Exchanges on tread.fi

### Connecting Your Keys

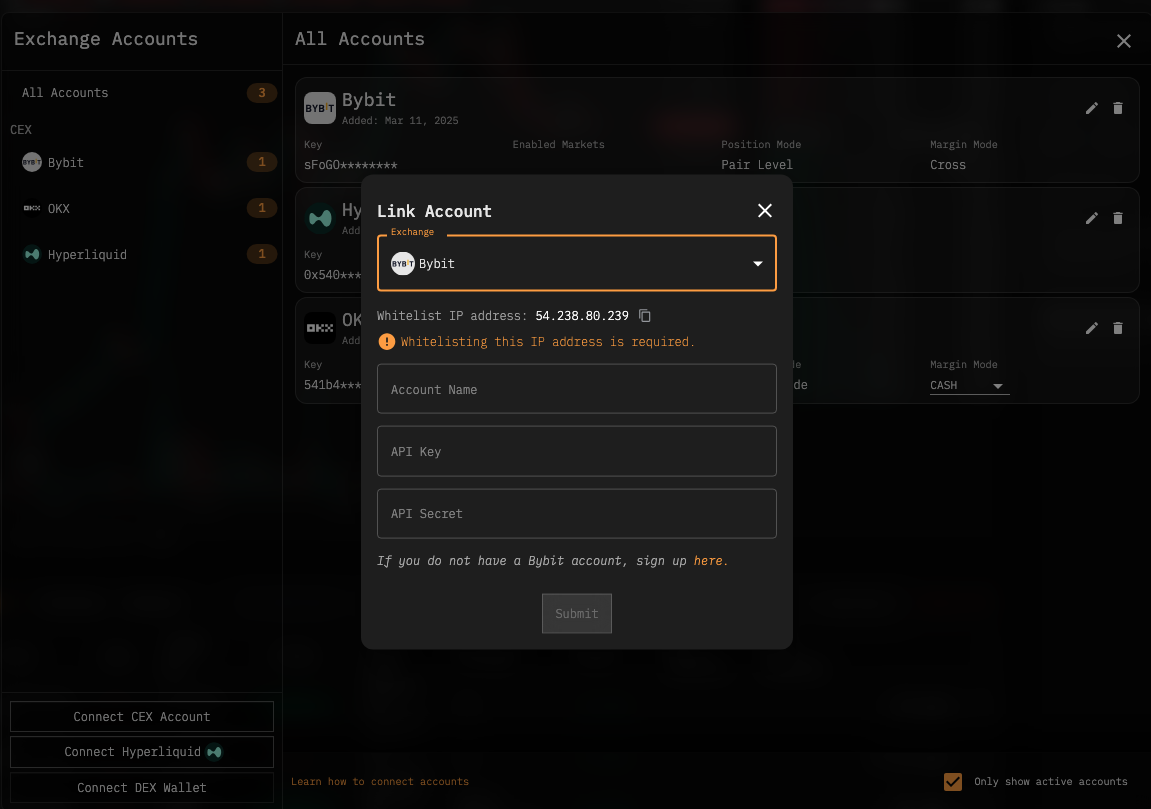
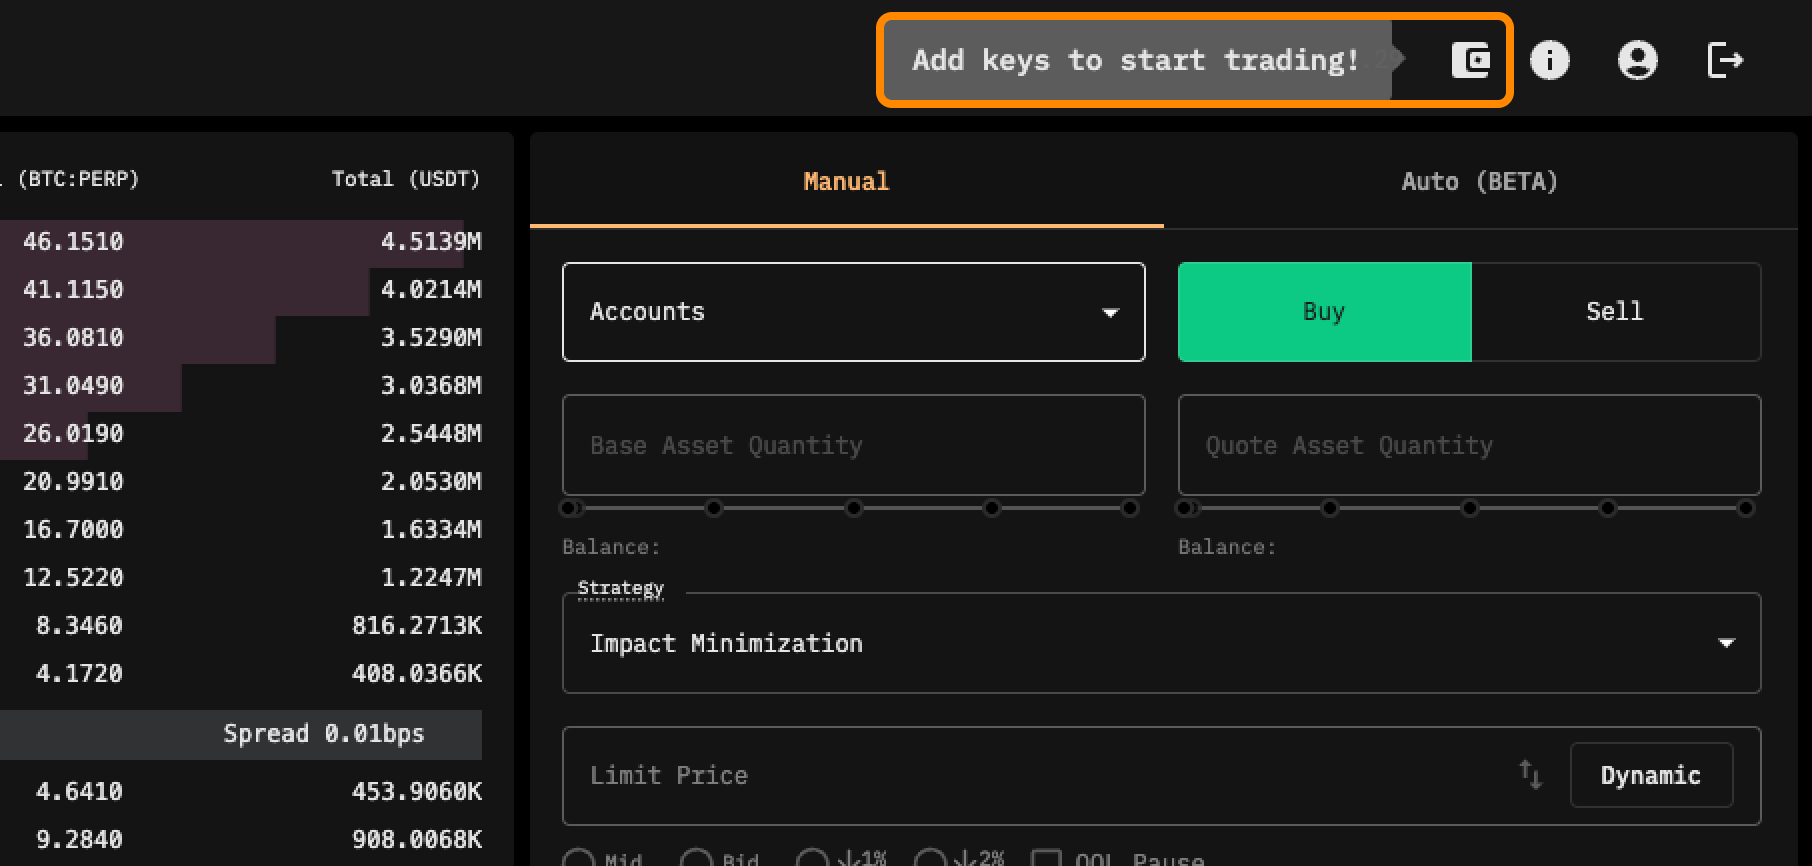
1. Access the **Key Management** menu by clicking the wallet icon on the top right.

<figure><img src="/files/WLTWqL96p7kyEuLW8O6v" alt=""><figcaption></figcaption></figure>

2. Select the type of exchange you would like to connect from the bottom right corner of the menu.

<figure><img src="/files/hT1vX9OltHhQyCp7BGVP" alt=""><figcaption></figcaption></figure>

3. Enter the required API credentials.

<figure><img src="/files/1LuH9XcF2bvYalnqdmla" alt=""><figcaption></figcaption></figure>

**Important:**&#x20;

* For Centralized Exchanges (CEX), you must whitelist our IP Address, please follow the steps to find the I.P. address to whitelist.&#x20;
* To do this, copy and paste the IP address displayed on the screen into the respective Exchange's API Management section.

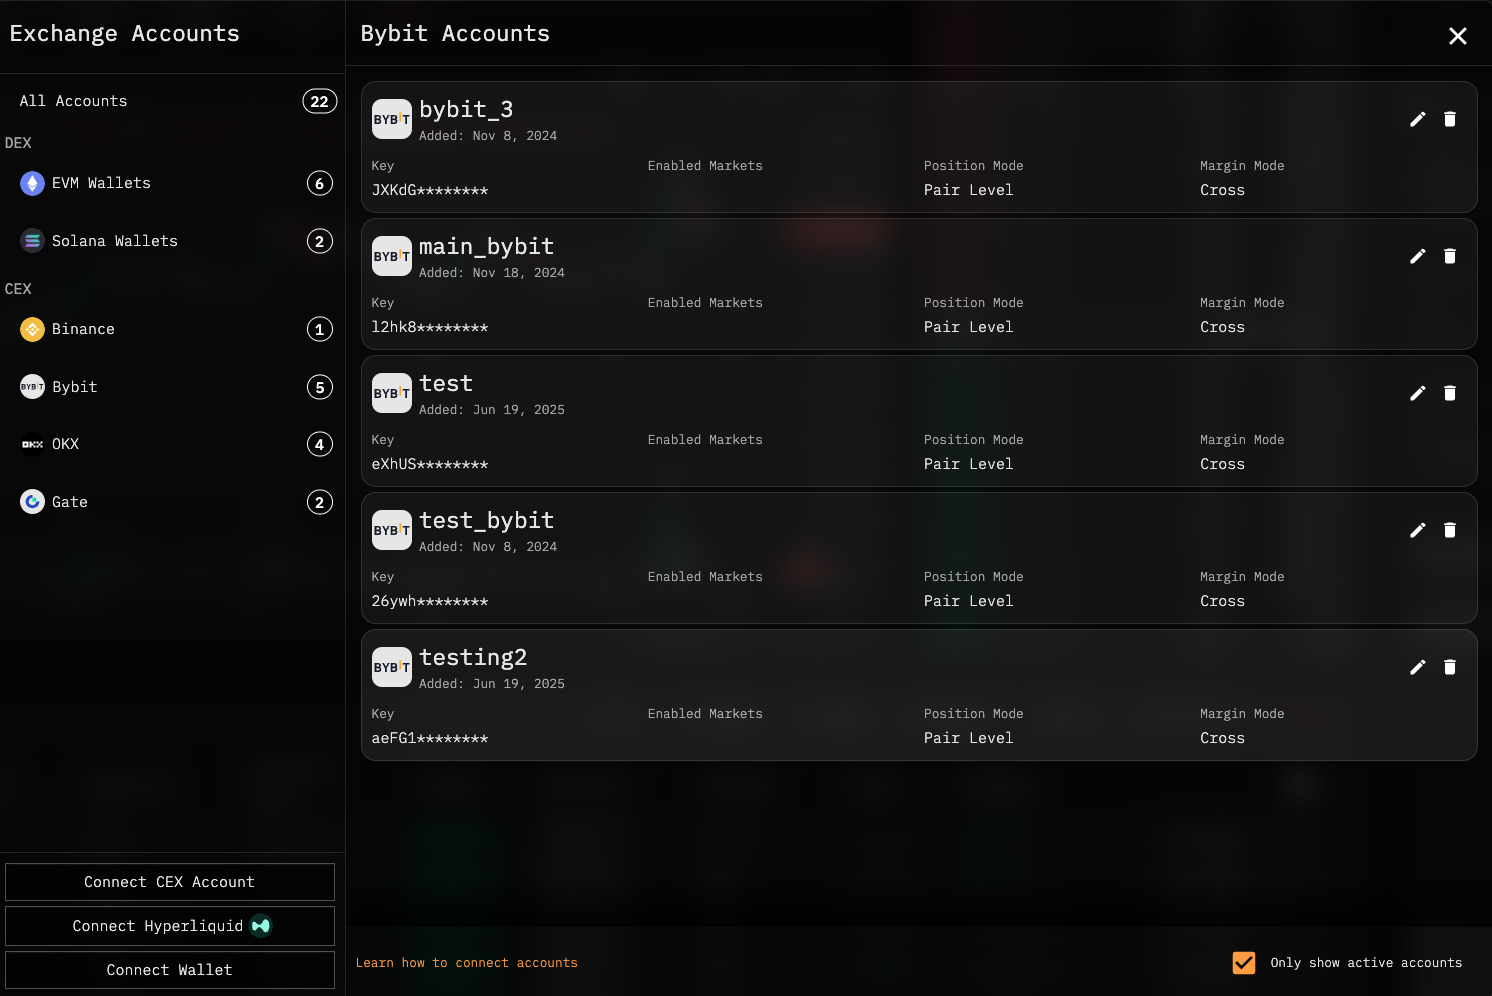
Once your keys are successfully connected, they will appear in your list of accounts on the **Key Management** page and the **Portfolio** page.

## Authorized Groups (Institutional Plan Only)

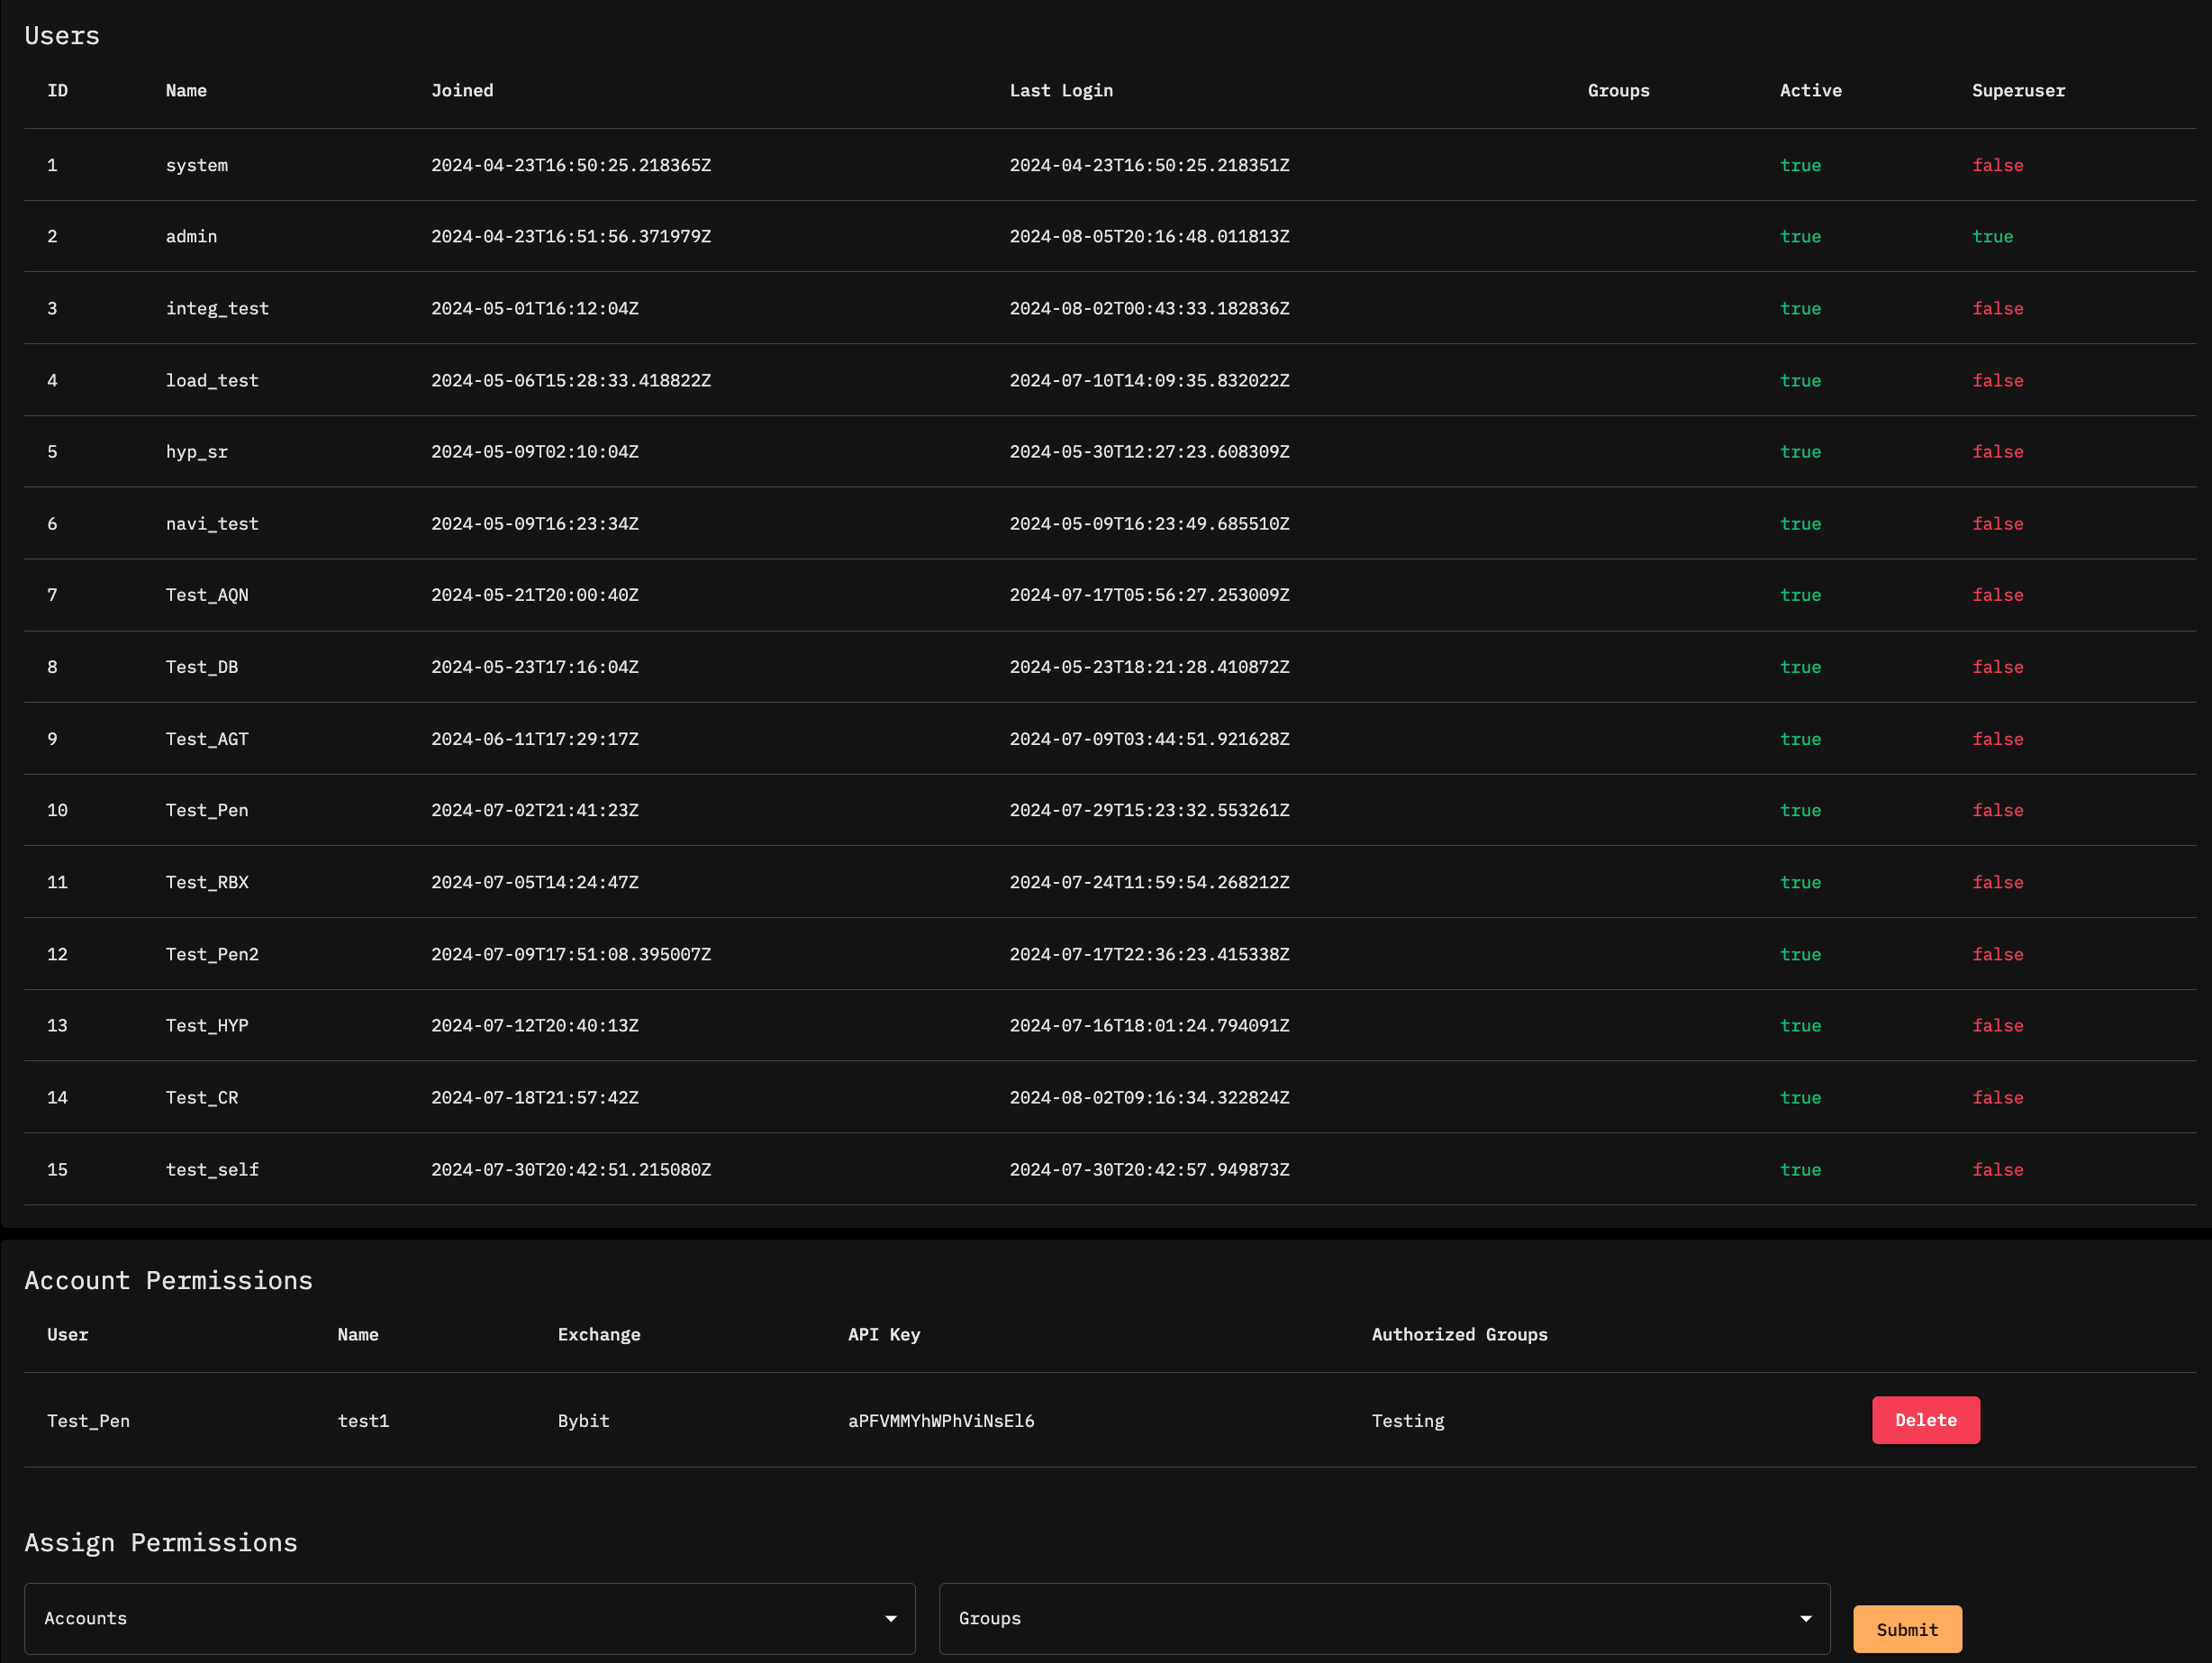
Superuser accounts can assign API keys to specific user groups.

<figure><img src="/files/TnsdktHJPDBCKqe813in" alt=""><figcaption></figcaption></figure>

1. Click **Admin Panel** from the account menu on the upper right.
2. Navigate to the **Assign Permissions** section.
3. Assign accounts to the appropriate user groups.

Users in authorized groups can now see balances and trade using the permissioned accounts. The authorized key will be displayed as `<owner>/<account_name>`. To revoke authorization, delete the permission row from the **Admin Panel** for the specific group and account.

### Supported Exchanges, Products and Account Types

<table><thead><tr><th width="167.33333333333331">Exchange</th><th width="195">Supported Asset Classes</th><th>Supported Account Types</th><th>Notes</th></tr></thead><tbody><tr><td>Aster</td><td>Perps</td><td></td><td></td></tr><tr><td>Binance</td><td>Spot<br>Perpetual Futures<br>Options</td><td><code>SPOT</code><br><code>PERP</code><br><code>OPTION</code></td><td></td></tr><tr><td>Binance PM (Portfolio Margin)</td><td></td><td><code>PORTFOLIO_MARGIN</code></td><td>Binance Portfolio Margin uses a distinct set of API endpoints, known as PAPI endpoints, which are separate from the regular Spot, Margin, and Futures APIs used on standard Binance accounts, and therefore it is treated as a separate exchange integration.</td></tr><tr><td>Bitget</td><td><p></p><p>Spot</p><p>Margin</p><p>USDT Futures</p><p>USDC Futures</p><p>COIN Futures</p></td><td><p></p><ul><li>Unified</li><li>Spot</li><li>Margin</li><li>Future</li><li>Perp</li></ul></td><td></td></tr><tr><td>Bybit</td><td>Spot<br>Perpetual Futures</td><td><code>Unified Margin</code></td><td></td></tr><tr><td>Deribit</td><td>Spot<br>Perpetual Futures<br>Dated Futures<br>Options</td><td><code>Cross Margin</code></td><td></td></tr><tr><td>Coinbase Exchange</td><td>Spot</td><td><code>SPOT</code></td><td>Margin/Leverage <strong>not supported</strong><br><sub>Note: Coinbase Exchange is not to be confused with the retail Coinbase App/Platform.</sub> </td></tr><tr><td>OKX</td><td>Spot<br>Perpetual Futures<br>Options</td><td><p><code>CROSS</code> (default)</p><p><code>ISOLATED</code><br><code>CASH</code><br><code>SPOT_ISOLATED</code></p></td><td>Quantities on OKX are adjusted to be 1:1 with base asset quantity. There is no need to convert to contract size.<br>Margin mode is configurable with the <code>margin_mode</code> parameter.</td></tr><tr><td>OKXDEX</td><td>Spot (DEX Contract Addresses)</td><td></td><td>Please refer to specific DEX-specific <a href="/pages/FpQxrD3TOITawoFgrPar">documentation</a></td></tr><tr><td>Gate.io</td><td>Spot<br>Perpetual Futures</td><td><code>SPOT</code><br><code>PERP</code><br><code>UNIFIED</code></td><td>Futures/unified accounts are configurable in-app</td></tr><tr><td>Hyperliquid</td><td>Spot<br>Perpetual Futures</td><td><p><code>CROSS</code></p><p><br><br><br></p></td><td><p>Connect via wallet-connection only instead of API Keys. Ensure your Hyperliquid account has funds before connecting.</p><p>Visit Hyperliquid to deposit if needed.</p></td></tr><tr><td>Bitget</td><td>Spot</td><td><code>SPOT</code></td><td>Accounts can be linked to track portfolio but trading is not yet supported</td></tr><tr><td>Pacifica</td><td>Perps</td><td></td><td></td></tr><tr><td>Paradex</td><td>Perps</td><td><code>CROSS</code></td><td></td></tr></tbody></table>


# Aster

## API Key Creation

<figure><img src="/files/ye5TJrvBuxV0WE7FczPb" alt=""><figcaption></figcaption></figure>

#### Access Aster API Management

* On Aster, Navigate to 'More'
* Select [API Management](https://www.binance.com/en/my/settings/api-management)

<figure><img src="/files/AnZunYL8Y8ATXFm3FQ49" alt=""><figcaption></figcaption></figure>

* Select Create API (API will suffice, no need for Pro API)
* Set a name for your own reference.&#x20;

#### \[IMPORTANT] Whitelisting IP Address

* Under **IP access restrictions,** select restrict access to trusted IPs only and paste in **54.238.80.239 and click confirm**
  * <sub>To verify this is the most up-to-date IP to whitelist, navigate to the tread.fi's</sub> [<sub>Key Management</sub>](#linking-api-key-to-tread.fi) <sub>menu by clicking on the wallet icon on the top and clicking on connect Connect Aster Wallet. Make sure you have already created an acount and logged in.</sub>

<figure><img src="/files/Xh2bKhbfEXq3QtUIF0ev" alt=""><figcaption></figcaption></figure>

* After adding the IP address, you will now be able to edit the other API restrictions, navigate to app.tread.fi

### Linking API Key to tread.fi&#x20;

<figure><img src="/files/rUyAbYdJ8sYBQriwEbIq" alt=""><figcaption></figcaption></figure>

* Open up tread's Key Management menu. From the app.tread.fi home page, it can be accessed by clicking on the wallet icon on the top right.
* Click Connect Aster Account
* Set a name for this key for your own reference.
* Copy and Paste the API Key and Secret from Aster into the respective boxes.
* Click submit.

<br>


# Aftermath

**Prerequisites**

* **A Sui wallet** compatible with Tread's wallet connector (e.g. Sui Wallet, Suiet, Phantom with Sui support).
* **An Aftermath perpetuals account.** Create one at [aftermath.finance](https://aftermath.finance) before linking. If the wallet has no perpetuals account, Tread will return *"No Aftermath perpetuals account found for this wallet."*
* **A funded Gas Pool.** Aftermath uses Gas Pools to sponsor transaction fees so you can trade without holding SUI. You must:

  * Set up a Gas Pool at [aftermath.finance/gas-pool](https://aftermath.finance/gas-pool) (or [testnet.aftermath.finance/gas-pool](https://testnet.aftermath.finance/gas-pool) on testnet).
  * Deposit a supported token (e.g. SUI) so the pool balance is greater than zero.

  Tread will surface *"No Gas Pool found"* or *"Your Gas Pool is empty"* if this step is skipped.

**Linking Your Aftermath Account**

**Open Up the** [**Key Management**](https://app.tread.fi/key_management) **menu on tread.fi**

* This can be accessed by clicking on the wallet icon on the top right corner on app.tread.fi after you have logged in.
* Click **Connect Aftermath**
* Set your desired name for this exchange account.
* Connect the same wallet you used to create your Aftermath account.
* Click Submit and proceed with wallet signing and confirmation.

#### Builder Fee Notice

No additional fees for Aftermath are imposed by Tread as of 23rd April 2026. We reserves the right to amend, modify, or change these fees at any time and without notice.


# Binance

{% embed url="<https://www.youtube.com/watch?v=-sWEOzK3xCg>" %}

## Important Note

This is specifically for regular Binance, not **Binance Portfolio Margin and Binance Portoflio Margin Pro program.** \
\
**For further details please see:**<br>

{% content-ref url="/pages/bPVwAWAZNRxvc7fTs6Zf" %}
[Binance Portfolio Margin](/account-creation-and-api-key-connection/connecting-to-exchanges/binance/binance-portfolio-margin)
{% endcontent-ref %}

{% content-ref url="/pages/GBq6V8AXI6B1yepMPOe9" %}
[Binance Portfolio Margin Pro](/account-creation-and-api-key-connection/connecting-to-exchanges/binance/binance-portfolio-margin-pro)
{% endcontent-ref %}

## Prerequisites

Before proceeding with API Key creation please ensure the following:

1. Ensure you have completed KYC Verification with Binance **(This is for Binance.com, we do not support Binance.us or any other region specific Binance)**
2. Ensure you have enabled futures trading if you are going to be trading perpetual  futures contracts. For more information please refer to this guide from [Binance](https://www.binance.com/en/support/faq/detail/360033772992).
   1. <sub>***Please note:***</sub><sub>*&#x20;*</sub><sub>*&#x20;*</sub><sub>*API Keys created before you have enabled futures trading on your Binance account will not allow you to enable futures trading for this key. You must have futures trading enabled on your Binance account before you create the key.*</sub>
3. Ensure your account is funded.

## API Key Creation

<figure><img src="/files/bztMFZfnB3fUEoXtcums" alt=""><figcaption><p><a href="https://www.binance.com/en/my/settings/api-management">Binance's API Management</a></p></figcaption></figure>

#### Access Binance API Management

* On Binance.com, Navigate to User Icon
* Select Account
* Select [API Management](https://www.binance.com/en/my/settings/api-management)
* Select Create API

#### Choose API Key Type

* You will be prompted to choose the type of API Key. Select **System-generated** to automatically provide both the API Key and Secret Key and select next.
* Set a Name for this API Key and proceed to 2-Factor Authentication

#### Setting Permissions

* Click **Edit Restrictions**
* **Important:** Under **IP access restrictions,** select restrict access to trusted IPs only and paste in **54.238.80.239 and click confirm**
  * <sub>To verify this is the most up-to-date IP to whitelist, navigate to the tread.fi's API Key Management</sub> [<sub>page</sub>](https://app.tread.fi/key_management)<sub>. Make sure you have already created an acount and logged in.</sub>
  * <sub>Click Link Exchange API Key, the IP is located at the bottom of the Link API Key dialog box.</sub>

<figure><img src="/files/VWqxSR8pCZpSuba8Z5XM" alt=""><figcaption></figcaption></figure>

* After adding the IP address, you will now be able to edit the other API restrictions, enable the following:
  * Enable Reading
  * Enable Spot & Margin Trading
  * Enable Futures (if you intend to trade them)
* Once complete click save and complete security verification requirements.

### Linking API Key to tread.fi&#x20;

<figure><img src="/files/clszqMHZFbMEZkKaFKqV" alt=""><figcaption></figcaption></figure>

* Open up tread's Key Management menu. From the app.tread.fi home page, it can be accessed by clicking on the wallet icon on the top right.
* Click Connect CEX Account
* Select Binance from the Exchange dropdown
* Set a name for this key for your own reference.
* Copy and Paste the API Key and Secret from Binance into the respective boxes.
* Enable the asset types you want to trade.&#x20;
  * **Note:** If you did not enable these on Binance as mentioned in the previous step, these checkboxes will not allow you to trade those assets.&#x20;
* Click submit.

<br>


# Binance Portfolio Margin

### Prerequisites

* Complete KYC on Binance.com (regional variants such as Binance.US are not supported).
* Enable Portfolio Margin on your Binance account **before** creating the API key you plan to connect. Binance tags PM-enabled keys differently from standard keys, and the tag is applied at creation time.
* Be aware of an irreversible change: the moment you enable Portfolio Margin on your Binance account, the **Enable Futures** permission is stripped from every existing API key on that account and cannot be re-enabled. Any integrations relying on those old keys for futures will break. Plan key rotations accordingly.
* Fund the PM account's margin wallet. Tread reads the margin wallet balance, not the regular spot wallet.

### Step 1 - Create the API key on Binance

1. Log in to Binance, then go to **User Icon → Account → API Management → Create API**.
2. Choose **System generated** so Binance issues the key and secret for you.
3. Label the key.

### Step 2 - Set permissions

Enable the following on the new key:

* **Enable Reading**
* **Enable Spot & Margin Trading**
* **Enable Portfolio Margin Trading** (this is the checkbox that routes the key to Binance's PM endpoints)

Do **not** enable Futures here. Under Portfolio Margin, trading no longer goes through the standalone futures (fapi/dapi) endpoints, so the toggle is not needed.

#### Restrict to trusted IPs

Under IP access restrictions, select **Restrict access to trusted IPs only** and paste: `54.238.80.239`&#x20;

You can verify the current IP on your [Key Management](https://app.tread.fi/key-management) page.

### Step 3 - Register the key on TAAS

1. In tread, open **Wallets → Connect Exchange**.
2. From the exchange dropdown, select **Binance Portfolio Margin** (not plain Binance).
3. Paste the API key and secret.
4. Toggle on the asset types you plan to trade.
5. Save. You should now see your PM margin wallet balance on the Portfolio page.

### Troubleshooting

| Symptom                                         | Likely cause                                                                                                     |
| ----------------------------------------------- | ---------------------------------------------------------------------------------------------------------------- |
| No balance shows after connecting               | Funds are in the spot wallet, not the PM margin wallet. Transfer into PM on Binance.                             |
| Order rejected with a permissions error         | **Enable Portfolio Margin Trading** was not ticked when the key was created. Recreate the key.                   |
| Futures orders fail on an unrelated integration | Expected. Enabling PM on your Binance account permanently removes Futures permission from all pre-existing keys. |


# Binance Portfolio Margin Pro

Binance Portfolio Margin (PM) Pro is an invite-only Binance program with a different margining model from standard Portfolio Margin. If you are on standard PM, use Binance Portfolio Margin instead.

**Important:** PM Pro connections are registered under the **Binance** exchange connector on tread, **not** under **Binance PM**. If you previously connected PM Pro credentials under Binance PM, you must unregister and re-register them through the Binance connector.

### Prerequisites

* You must already be enrolled in Binance's PM Pro program. Enrollment is handled directly with Binance.
* PM Pro on tread supports **Cross Margin only**. Isolated Margin positions are not compatible and will not appear in the PM Pro wallet view.
* If you hold PM Pro credentials already connected as "Binance PM", unregister them first (see Step 1).

### Step 1 - Unregister existing PM Pro credentials (if applicable)

If your PM Pro keys are currently connected under the **Binance PM** connector on tread:

1. Go to **Key Management**.
2. Find the existing PM Pro connection listed under Binance PM.
3. Click **Unregister** and confirm.

Skip this step if you are connecting PM Pro for the first time.

### Step 2 - Create the API key on Binance

1. Log in to Binance, then go to **User Icon → Account → API Management → Create API**.
2. Choose **System generated**.
3. Label the key, for example `TAAS-PMPro`.

### Step 3 - Set permissions

Enable the following on the new key:

* **Enable Reading**
* **Enable Spot & Margin** (required, this is what gives PM Pro access to the cross-margin wallet used for trading)
* **Enable Portfolio Margin Trading**

#### Restrict to trusted IPs

Under IP access restrictions, select **Restrict access to trusted IPs only** and paste: `54.238.80.239`

### Step 4 - Register on TAAS

1. In TAAS, open **Wallets → Connect Exchange**.
2. From the exchange dropdown, select **Binance** (regular Binance, not Binance PM).
3. Paste the API key and secret.
4. Save. Your margin wallet balance should now appear on the **Portfolio** page.

### Step 5 - Enable Spot Leverage for spot margin trading

If you plan to trade spot on margin (not just derivatives), you need to tell tread to route orders through leverage:

1. Open the order entry form.
2. Expand **Strategy Parameters** (sometimes labeled **Advanced Settings**).
3. Toggle on **Spot Leverage**. Without this toggle, spot orders will be placed as unleveraged spot, even if your PM Pro account has borrow capacity available.

### Key constraints

* **Cross Margin only.** Isolated positions are invisible to tread under PM Pro.
* **Connector matters.** PM Pro lives under the **Binance** connector. Do not use **Binance PM**.
* **Spot Leverage is opt-in per order.** Enable it in Strategy Parameters when you want margin to apply to spot.

### Troubleshooting

| Symptom                               | Likely cause                                                            |
| ------------------------------------- | ----------------------------------------------------------------------- |
| Balance is missing or wrong           | Positions are in Isolated Margin. Move them to Cross Margin on Binance. |
| Connected under Binance PM by mistake | Unregister there and re-register under the Binance connector.           |
| Spot order placed without leverage    | **Spot Leverage** was not toggled on under Strategy Parameters.         |


# Bitget

### Creating a Bitget API Key

For API Key creation, please refer to Bitget's official [documentation](https://www.bitget.com/api-doc/common/quick-start).

### Linking Your API Key to tread.fi&#x20;

* Open up tread's Key Management menu. From the app.tread.fi home page, it can be accessed by clicking on the wallet icon on the top right.
* Click Connect CEX Account

<figure><img src="/files/wJWNYypB3vL2DAgIgLCo" alt=""><figcaption></figcaption></figure>

* Select Bitget from the Exchange dropdown
* Set a name for this key for your own reference.
* Copy and Paste the API Key and Secret from Bitget into the respective boxes.
* Click submit.


# Bybit

{% embed url="<https://youtu.be/1xTjGjOsZyM?si=gI6yFXO2E7inOY7W>" %}

### Create sub-account

#### Navigate to Subaccounts

* Once you’re logged in, navigate to your profile icon in the top-right corner.
* Click ”Subaccounts” from the dropdown menu.

<figure><img src="https://lh7-rt.googleusercontent.com/docsz/AD_4nXcMwHCTpFq1aaQSMOqT_fHYYwE1vPqE1zahyC0_vGJ0uO9p3ICt9czxLAqE1QkFmZFju9EhVik34Y2ZYb_d2x-vNSsOIvfRGEVVLH9S2Q_0Y7Qrn40nb7U-3r9vSlPhJc6494rUDVk5GnWcCIrkMU63Yuaq?key=0Y_t4MkkxDXunkOK3-fvXw" alt=""><figcaption></figcaption></figure>

#### Create a New Sub-Account

* On the Subaccount management page, click ”Create Subaccount”.

<figure><img src="https://lh7-rt.googleusercontent.com/docsz/AD_4nXcwPyWe3JCAJIoaFnd8UmFHOrljRlRgdbAvST9tZ_ZnFAoGYmbnrV-t3Z4G21cqnYinFzGMAYccQ-QOXkXHEbcK6Ej-9lzZ6bUF8zreVDvJ-w2czqN7S1f_N5CVd864_mI5Zl7EGlq1nghEfApU8Az5b3XZ?key=0Y_t4MkkxDXunkOK3-fvXw" alt=""><figcaption></figcaption></figure>

#### Choose Standard Sub-Account

* You will be prompted to select the sub-account type. Choose Standard Subaccount to allow for general-purpose use and trading.

<figure><img src="https://lh7-rt.googleusercontent.com/docsz/AD_4nXfbN0MigddCxqHIjamzKv1F-a5n2Qjd6KzBm4CzOVxB8JDmfiVBGOGSBOE4QZF2PUvsW1Wf8YZvA1-UJ0npgYPmahoLsLSSqYYxnJAxJmIoybP13bBkvcwse_19ugTCE_OChJxD7rRB58qxhORYDZrUmQVF?key=0Y_t4MkkxDXunkOK3-fvXw" alt=""><figcaption></figcaption></figure>

#### Set Up Sub-Account Details

* Enter a nickname for your sub-account to help you easily identify it and click “Confirm”.
* You also have the option to add and set a required password for this subaccount.

<figure><img src="https://lh7-rt.googleusercontent.com/docsz/AD_4nXdnksU0b_faUS5dtMR1wYPO-k9DqtkYOgPmIRkSNDlikOrYZoLmuJhQu-iZt3tw8MPlKnuZmBY_ZgHbDD2yH5AiS__1FQtJWMqFvBuIyKDuX0OfsiHXEvIvuDvOCCxZG1JZEOe4QbhxXqPMh8lyGKMdpr4?key=0Y_t4MkkxDXunkOK3-fvXw" alt=""><figcaption></figcaption></figure>

#### Complete Security Verification

* Complete the verification process by entering the code sent to your registered email.
* If 2FA (Two-Factor Authentication) is enabled on your account, you’ll need to enter the authentication code as well.
* Once done, click “Next Step”.

<figure><img src="https://lh7-rt.googleusercontent.com/docsz/AD_4nXfPSkLylDNN1G3l1bV8HrhZB3VAilbaGz9rDwcFxFMlTZtu3bg8BZV_xU7m9w6Ob4BHnKWd3hOG959EczrDdNsH2jkUA8KwjLt2oFuQDlhRbu4CtFnkRmg1Miu6tCF4j0IibS_PTvvDNU74Q_lnADRoUNtr?key=0Y_t4MkkxDXunkOK3-fvXw" alt=""><figcaption></figcaption></figure>

### Create API Key for sub-account

#### Navigate to API Management via Subaccount

* Return to the Subaccounts section of your dashboard.
* In the list, find the newly created subaccount. Next to the subaccount details, click on ”Management”.

<figure><img src="https://lh7-rt.googleusercontent.com/docsz/AD_4nXcmiqFBSGkqsSgVKreEmz30HTVUmH-3ne6mLXanHAwgL_y4E9iyOJPfXxXzY5Cc8n_NodgYeV6xgNd3rzsl5NhQYDf6DjXssPdO09eCWSB7cskZ0lFUeQ3WD75w0ldLwlXnlgu70fHxm4vIuEyQLOBJQJg4?key=0Y_t4MkkxDXunkOK3-fvXw" alt=""><figcaption></figcaption></figure>

#### Create New API Key

* From the API Management section of your subaccount, click ”Create New Key” to initiate the creation of a new API key.

#### Choose API Key Type

* Select System-generated API Keys to automatically provide both the API Key and Secret Key, offering a secure and hassle-free setup recommended for most users.

#### Configure API Key Settings

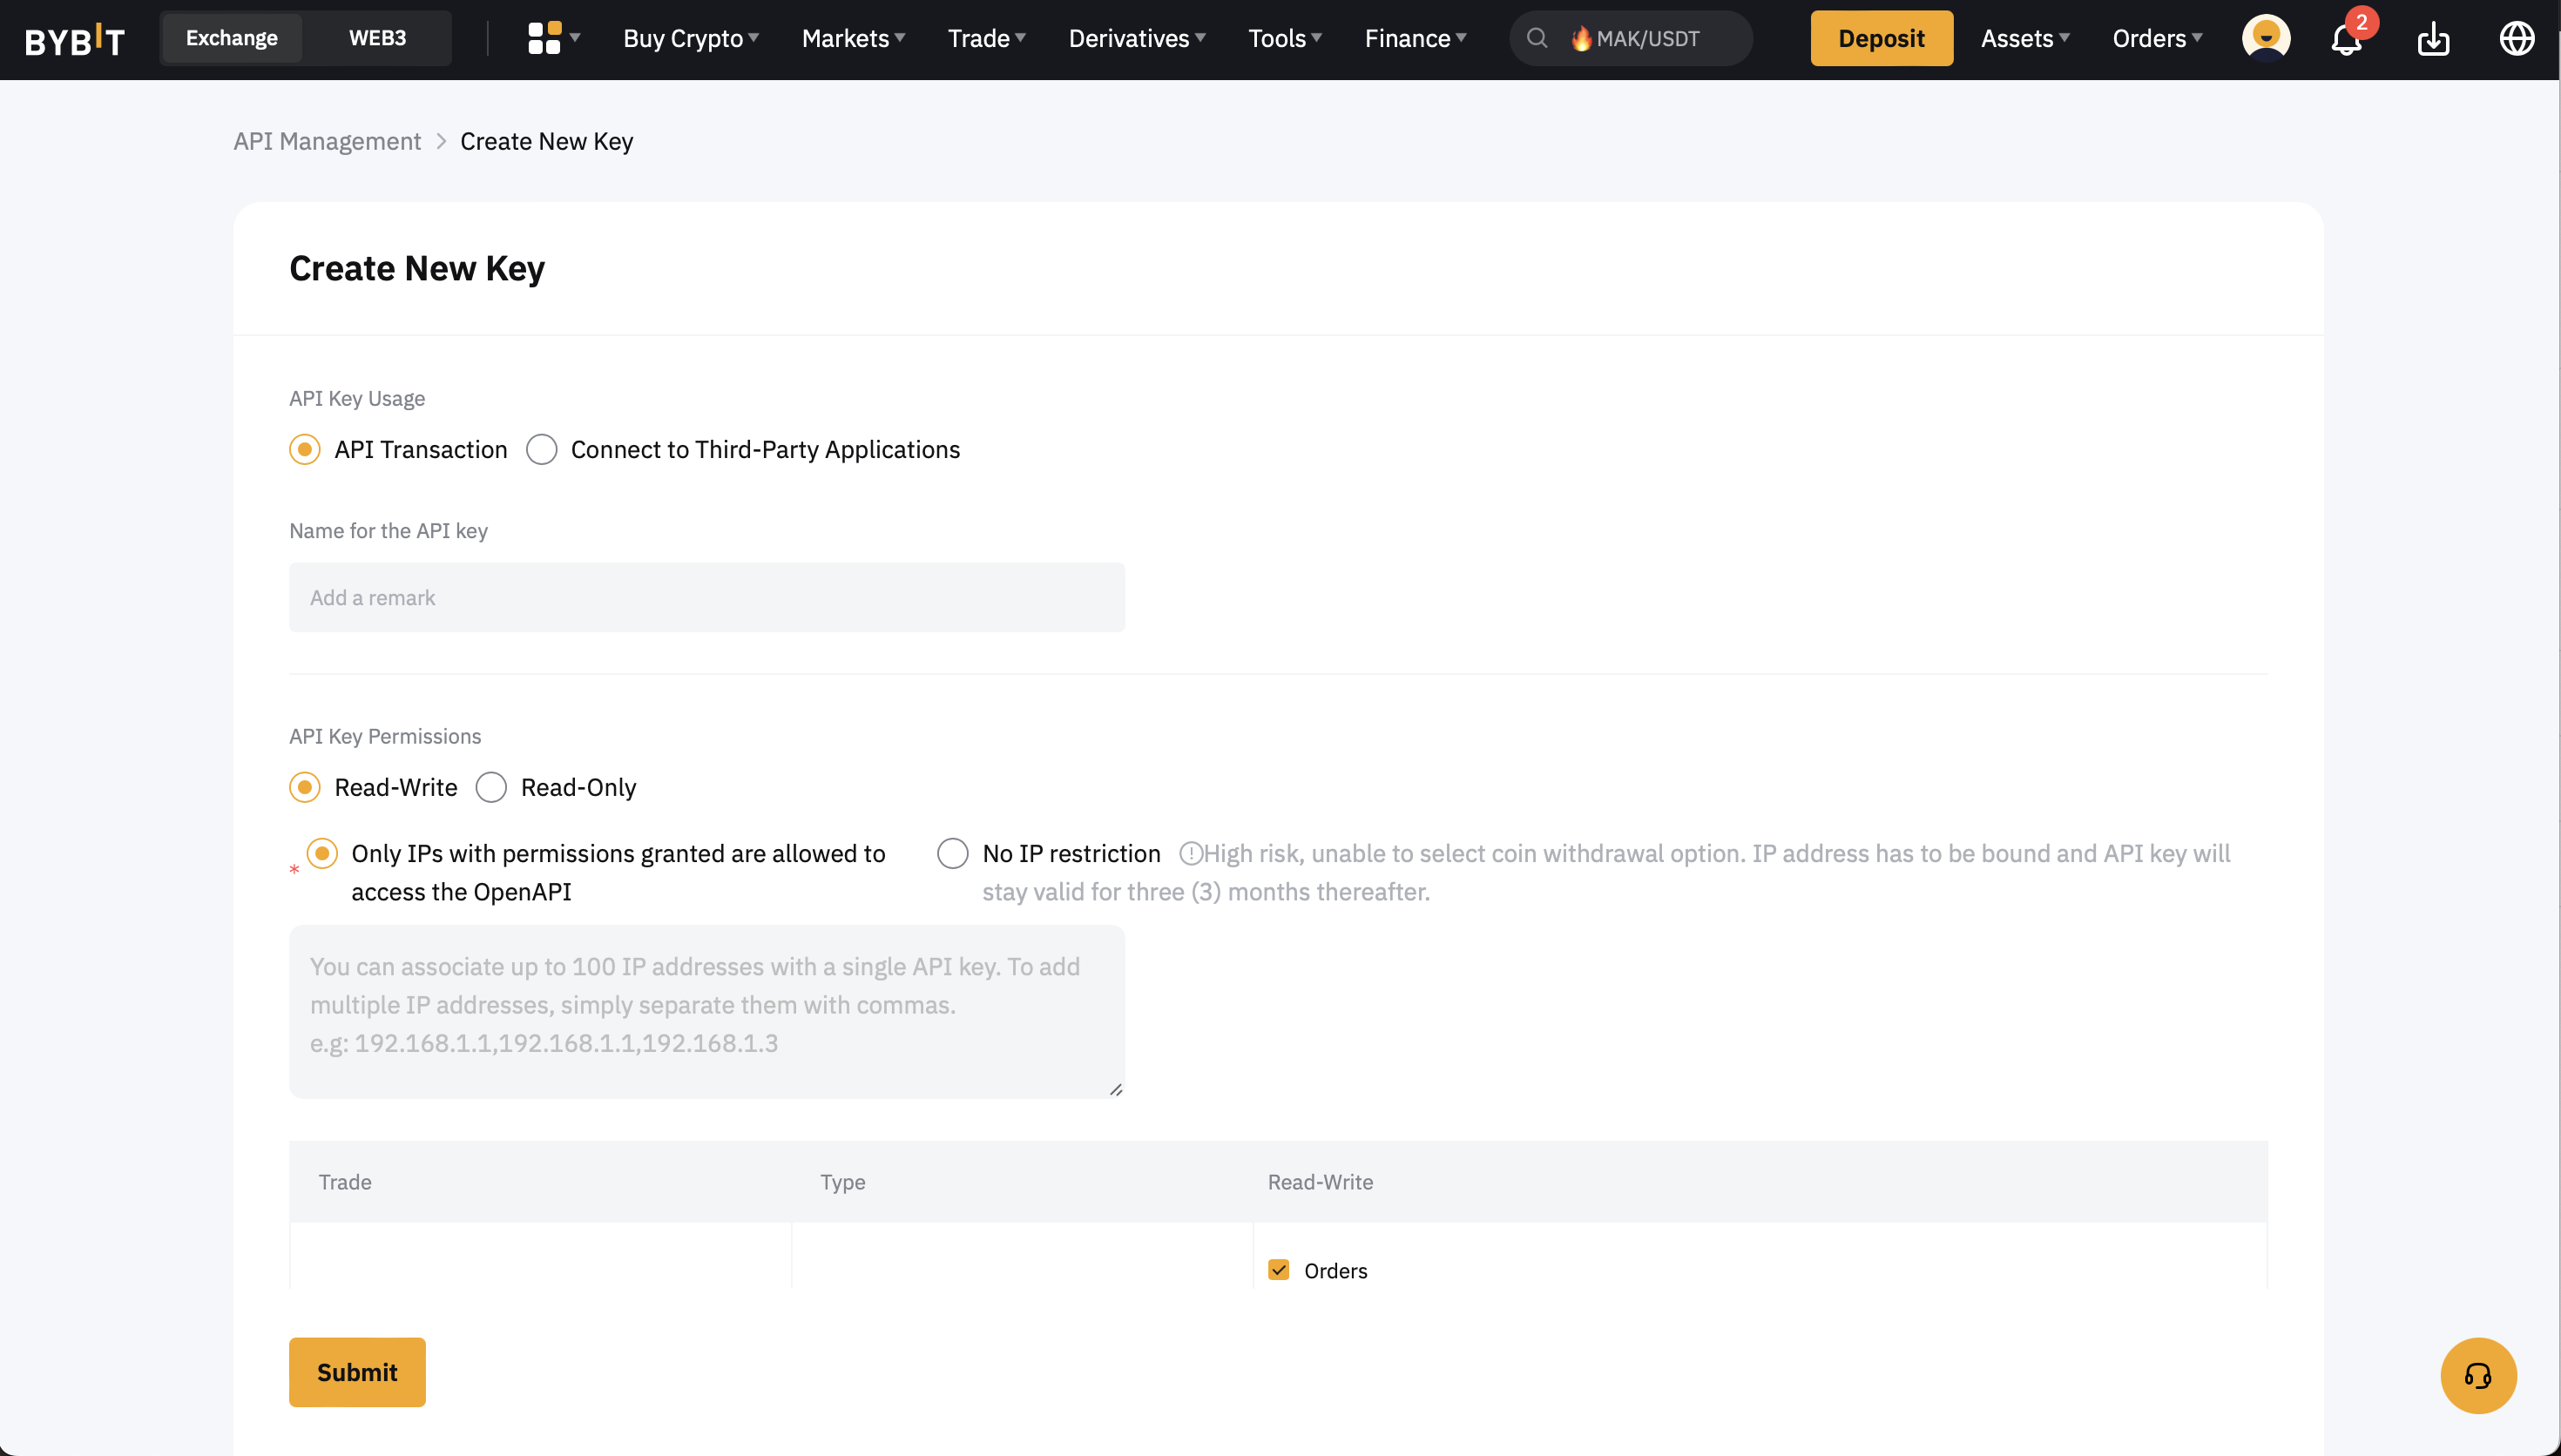
* Specify the key's name
* Choose the API key permissions:&#x20;
  * `Read-Write`
* Select "Only IPs with permissions granted are allowed to access the OpenAPI" and enter the TaaS server's IP address: `54.238.80.239`
  * This IP address can be located: app.tread.fi , selecting the wallet icon, and Connect CEX Account.
* Once configured, click "Submit".

<figure><img src="/files/zUkAQSFavApiQIb0L8T4" alt=""><figcaption></figcaption></figure>

#### Security Verification

* Enter the 2FA code for security verification to proceed with the API key creation.

#### Review and Confirm

* Review all details and click "Understood" to finalize your API key setup. Keep your API key and secret confidential.

### Linking API Key to tread.fi&#x20;

<figure><img src="/files/cdmS1Iec55aqJg0rOJOg" alt=""><figcaption></figcaption></figure>

* Open up tread's Key Management menu. From the app.tread.fi home page, it can be accessed by clicking on the wallet icon on the top right.
* Click Connect CEX Account

<figure><img src="/files/HlOkC9LKxKKB3dG2vmtc" alt=""><figcaption></figcaption></figure>

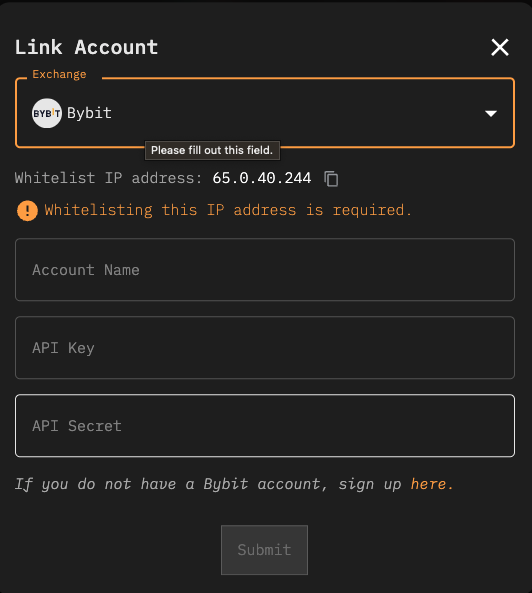
* Select Bybit from the Exchange dropdown
* Set a name for this key for your own reference.
* Copy and Paste the API Key and Secret from Bybit into the respective boxes.
* Click submit.

<figure><img src="https://lh7-rt.googleusercontent.com/docsz/AD_4nXcxPKL5LuLWoy8DhaDHamKZHxvlg_XxfPWItdQAsszl7-i0PaGiYD1VCKxBeewjJBQUxbITppwpIrG5JuE6TM_I9P4BPOEM7eijX6gi6DPdUrhHYBW1QDER5NuRZEBfkap2GxjrOICcVywn-NCJS7Oe01XN?key=0Y_t4MkkxDXunkOK3-fvXw" alt=""><figcaption></figcaption></figure>

<br>


# Deribit

{% embed url="<https://www.youtube.com/watch?ab_channel=treadfi&v=pQwKpKdWb-I>" %}

### Create sub-account

#### Navigate to Subaccounts

* Once you’re logged in, navigate to your profile icon in the top-right corner.
* Click ”Subaccounts” from the dropdown menu.

#### Create a New Subaccount

* On the Subaccounts page, click ”Add a New Subaccount”.

#### Edit a New Subaccount

* Find the newly created subaccount. Next to the subaccount details, click on the pencil icon.

#### Separate login details for subaccounts

* Add email address/change name of the account/allows separate login/set a password/email address notifications and margin warnings/set up two factor authentication for the subaccount.

### Create API key for sub-account

#### Access API Management

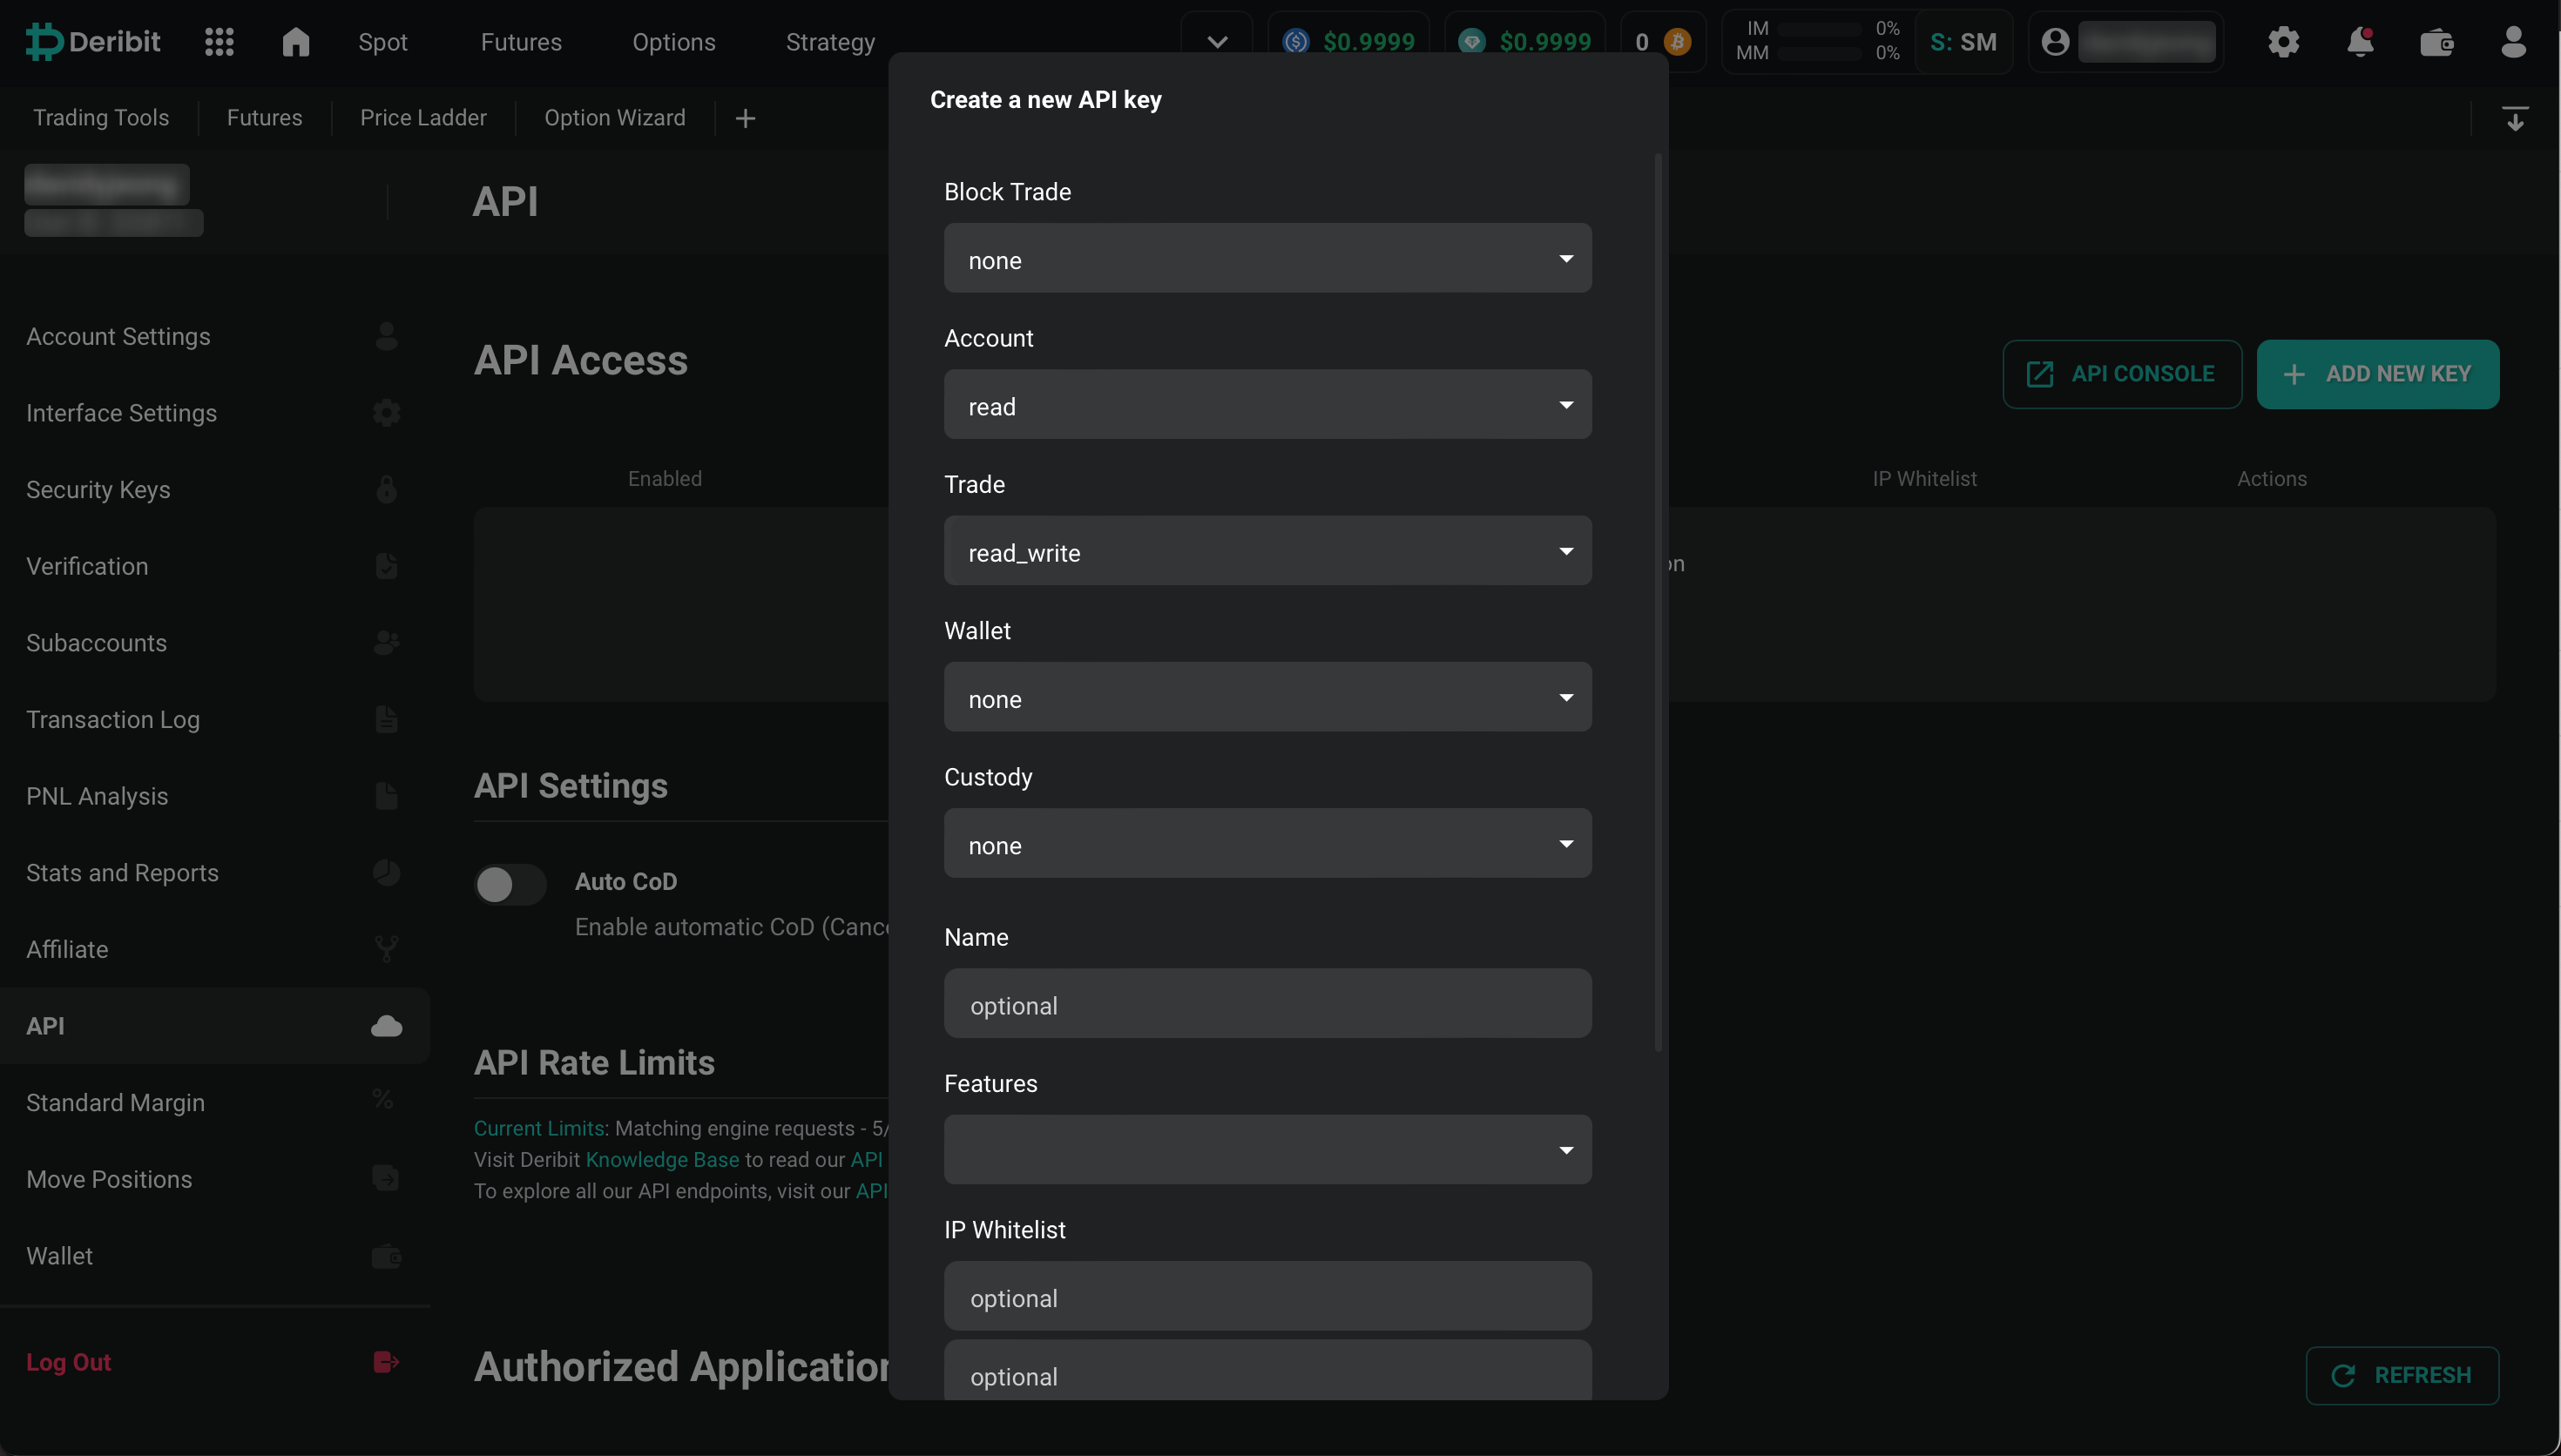
* On the API Management screen, click "ADD NEW KEY".

#### Configure API Key Settings

* Set Account to `read`
* Set Trade to `read_write`
* Enter the IP address of the TaaS server to restrict API access using this key to requests coming from its address: `54.238.80.239`
* Once done, click "Create a new API key".

<figure><img src="/files/78X2JxndBZrRfGQ0OhkP" alt=""><figcaption></figcaption></figure>

### Linking API Key to tread.fi&#x20;

<figure><img src="/files/cdmS1Iec55aqJg0rOJOg" alt=""><figcaption></figcaption></figure>

* Open up tread's Key Management menu. From the app.tread.fi home page, it can be accessed by clicking on the wallet icon on the top right.
* Click Connect CEX Account
* Select Deribit from the Exchange dropdown
* Set a name for this key for your own reference.
* Copy and Paste the API Key and Secret from Deribit  into the respective boxes.
* Click submit.

<figure><img src="https://lh7-rt.googleusercontent.com/docsz/AD_4nXcxPKL5LuLWoy8DhaDHamKZHxvlg_XxfPWItdQAsszl7-i0PaGiYD1VCKxBeewjJBQUxbITppwpIrG5JuE6TM_I9P4BPOEM7eijX6gi6DPdUrhHYBW1QDER5NuRZEBfkap2GxjrOICcVywn-NCJS7Oe01XN?key=0Y_t4MkkxDXunkOK3-fvXw" alt=""><figcaption></figcaption></figure>

<br>


# Extended

**If you do not have an Extended account, sign up** [**here**](https://app.extended.exchange/join/TREADFI) **or with our referral code TREADFI**

#### **Link your Extended Account to tread.fi**

* Navigate to **Key Management** menu on tread.fi. This can be accessed by clicking on the wallet icon on the top right corner on app.tread.fi after you have logged in.

<figure><img src="/files/y4UJhvHzM7O2vxadDbh9" alt=""><figcaption></figcaption></figure>

* Click **Connect Extended on tread.fi**
* Connect the same wallet you used to connect to Extended
* (Optional) Set a reference name for this exchange account.

<figure><img src="/files/tzz6P7EkO0h5tl7ea5Ac" alt=""><figcaption></figcaption></figure>

* **(Optional) Sub-accounts or vaults:** If you have sub-accounts you can select specific sub account you want to connect.

### Builder Fee Notice

A 2 basis (0.02%) points builder fee applies to Extended trades executed via our tread.fi


# OKX

{% embed url="<https://youtu.be/hKvlD0sdoi4?si=0pYqDXf2lIOjKe5->" %}

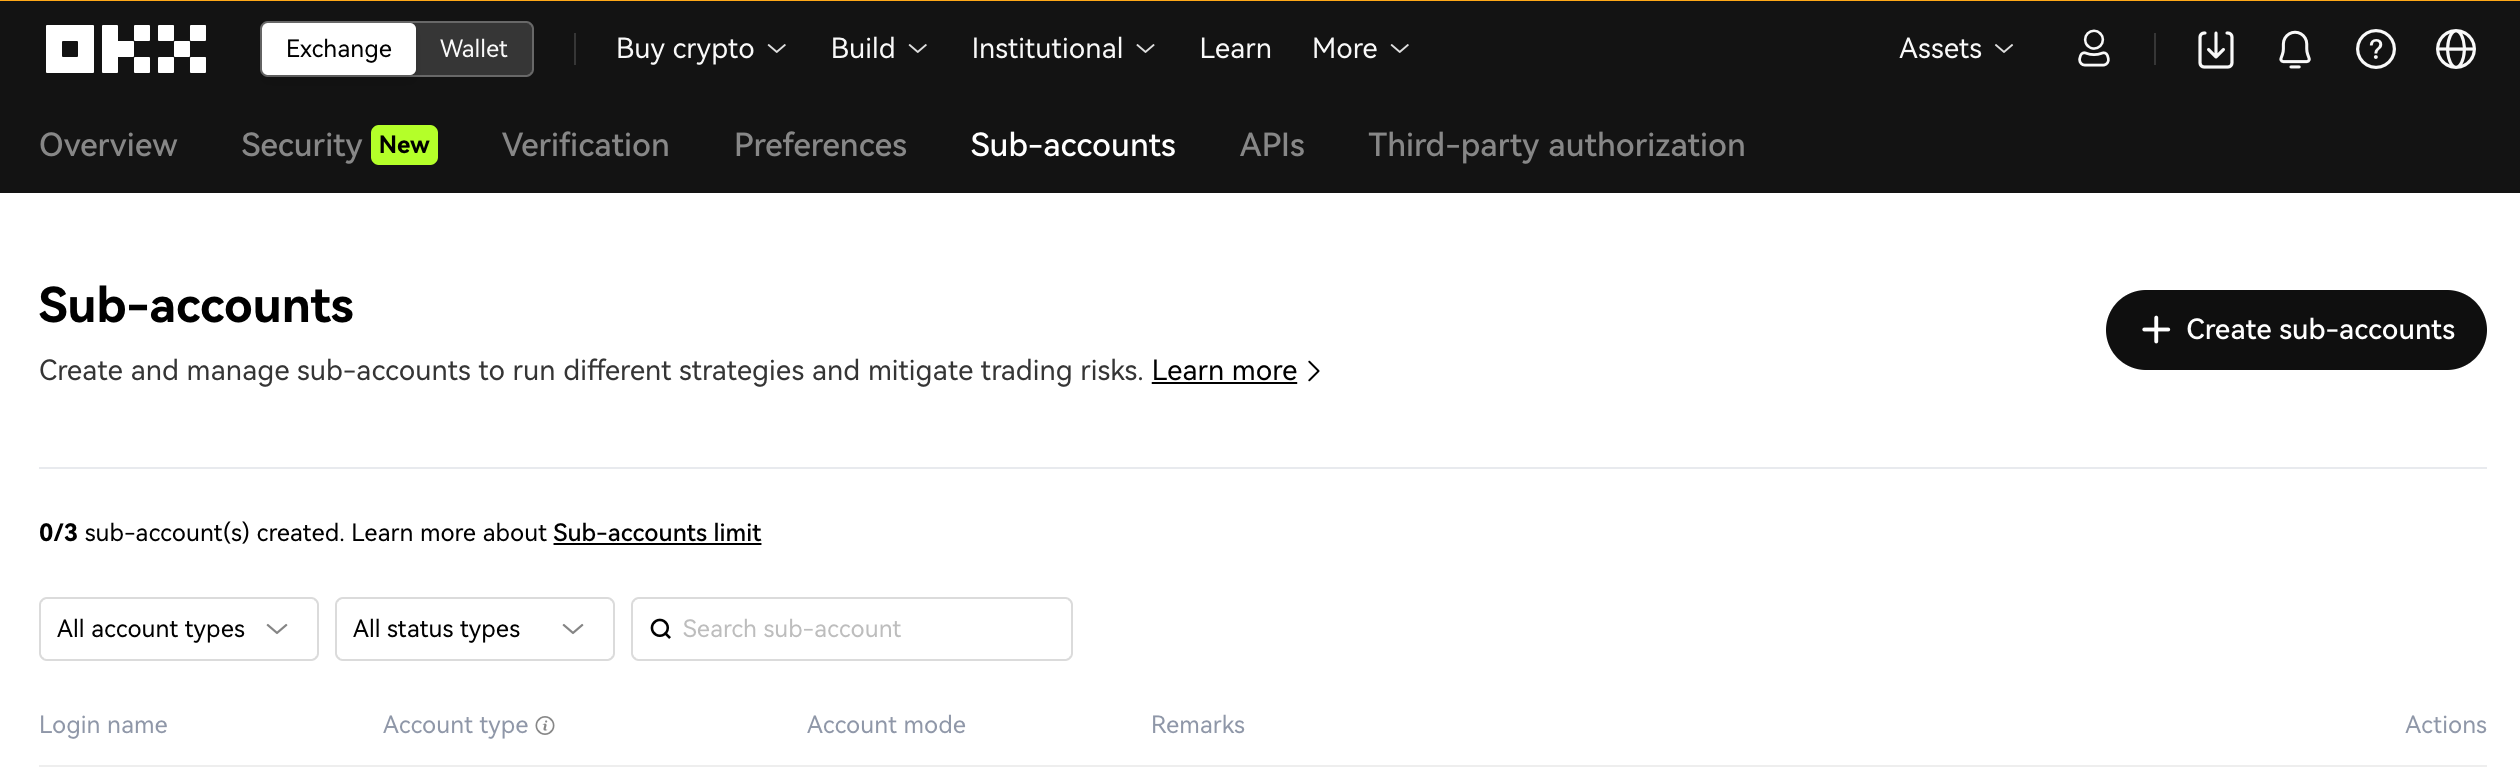
### Create a sub-account from the Sub-accounts page.

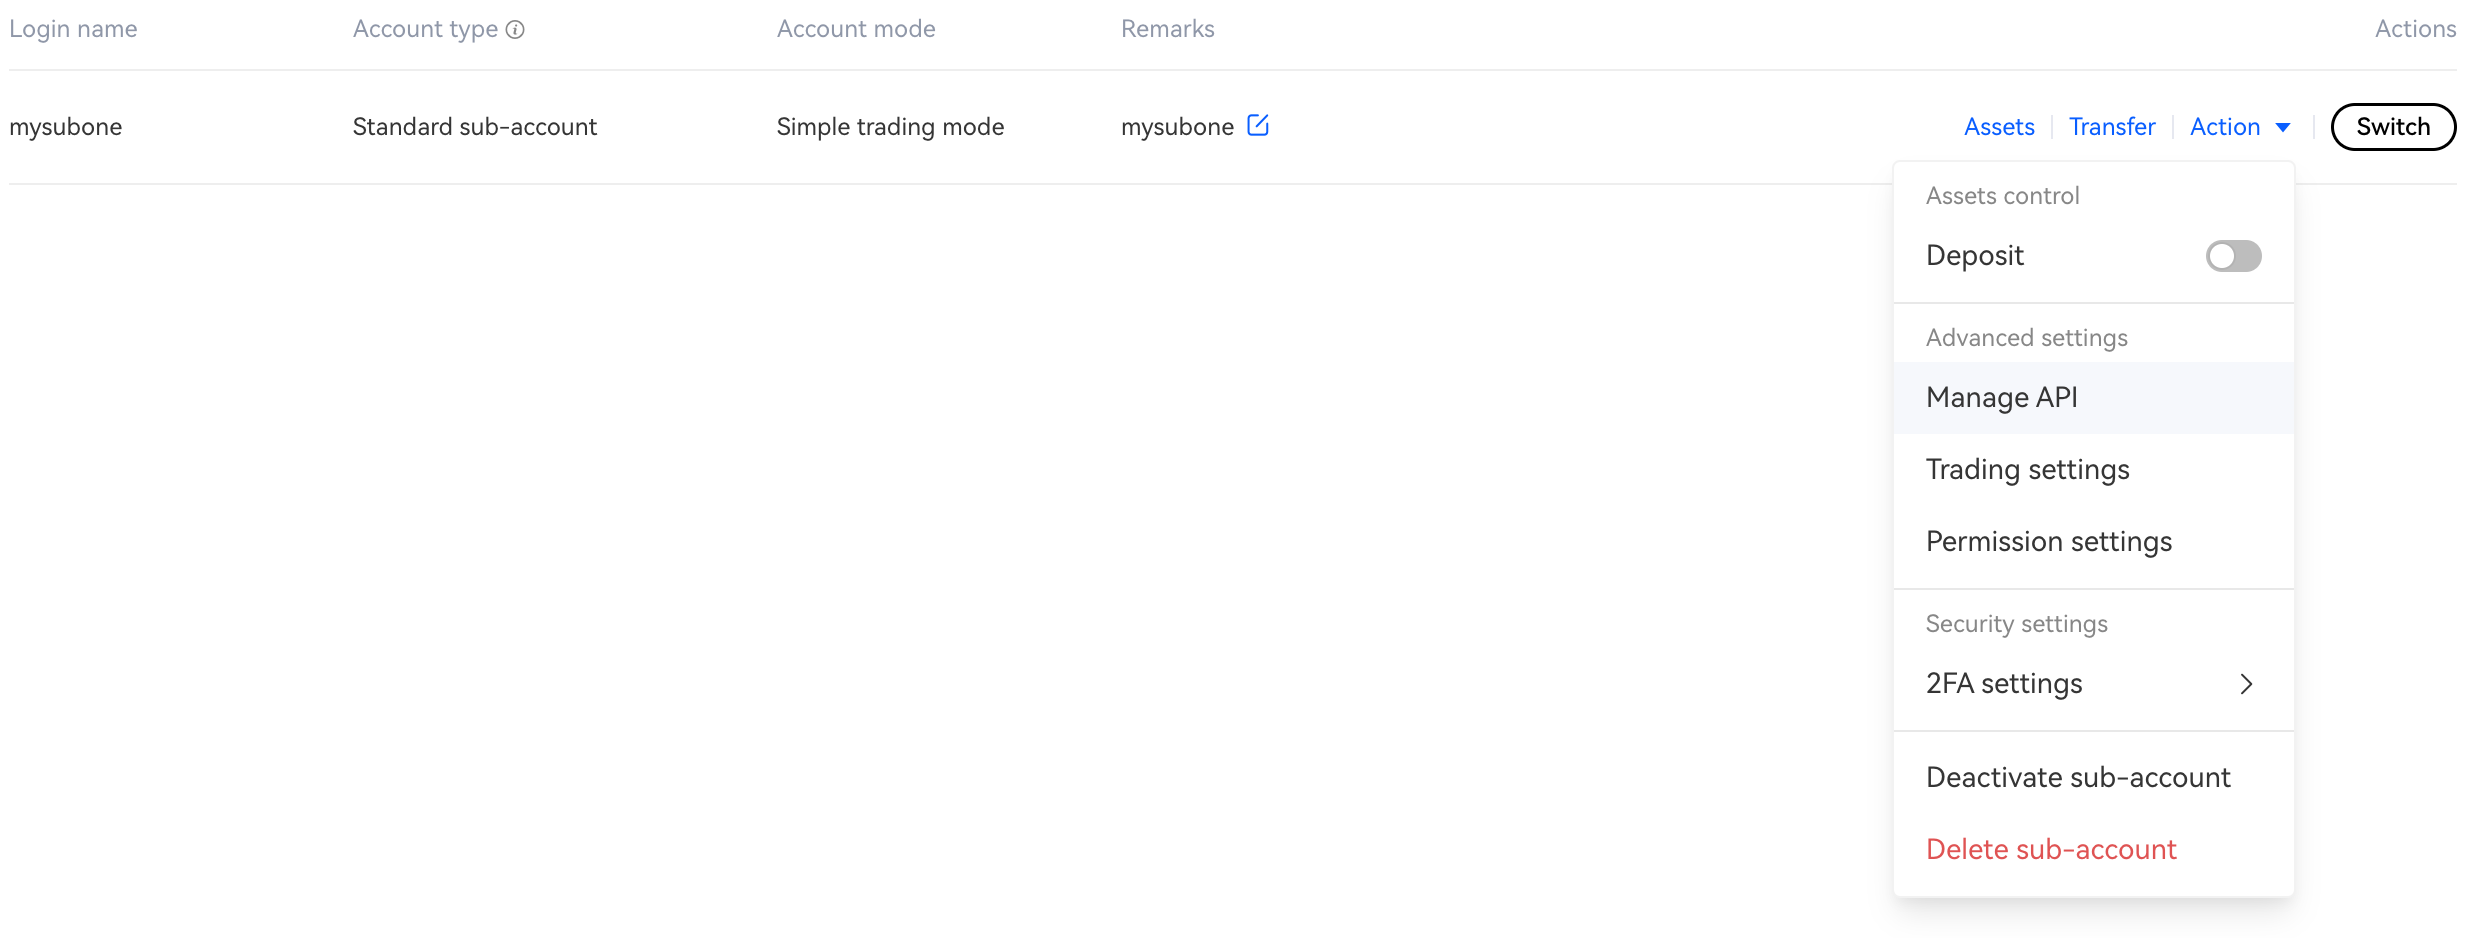
<figure><img src="/files/qU2LF3vdGfjBlTxyt8x3" alt=""><figcaption><p>Click the "Create sub-accounts" button</p></figcaption></figure>

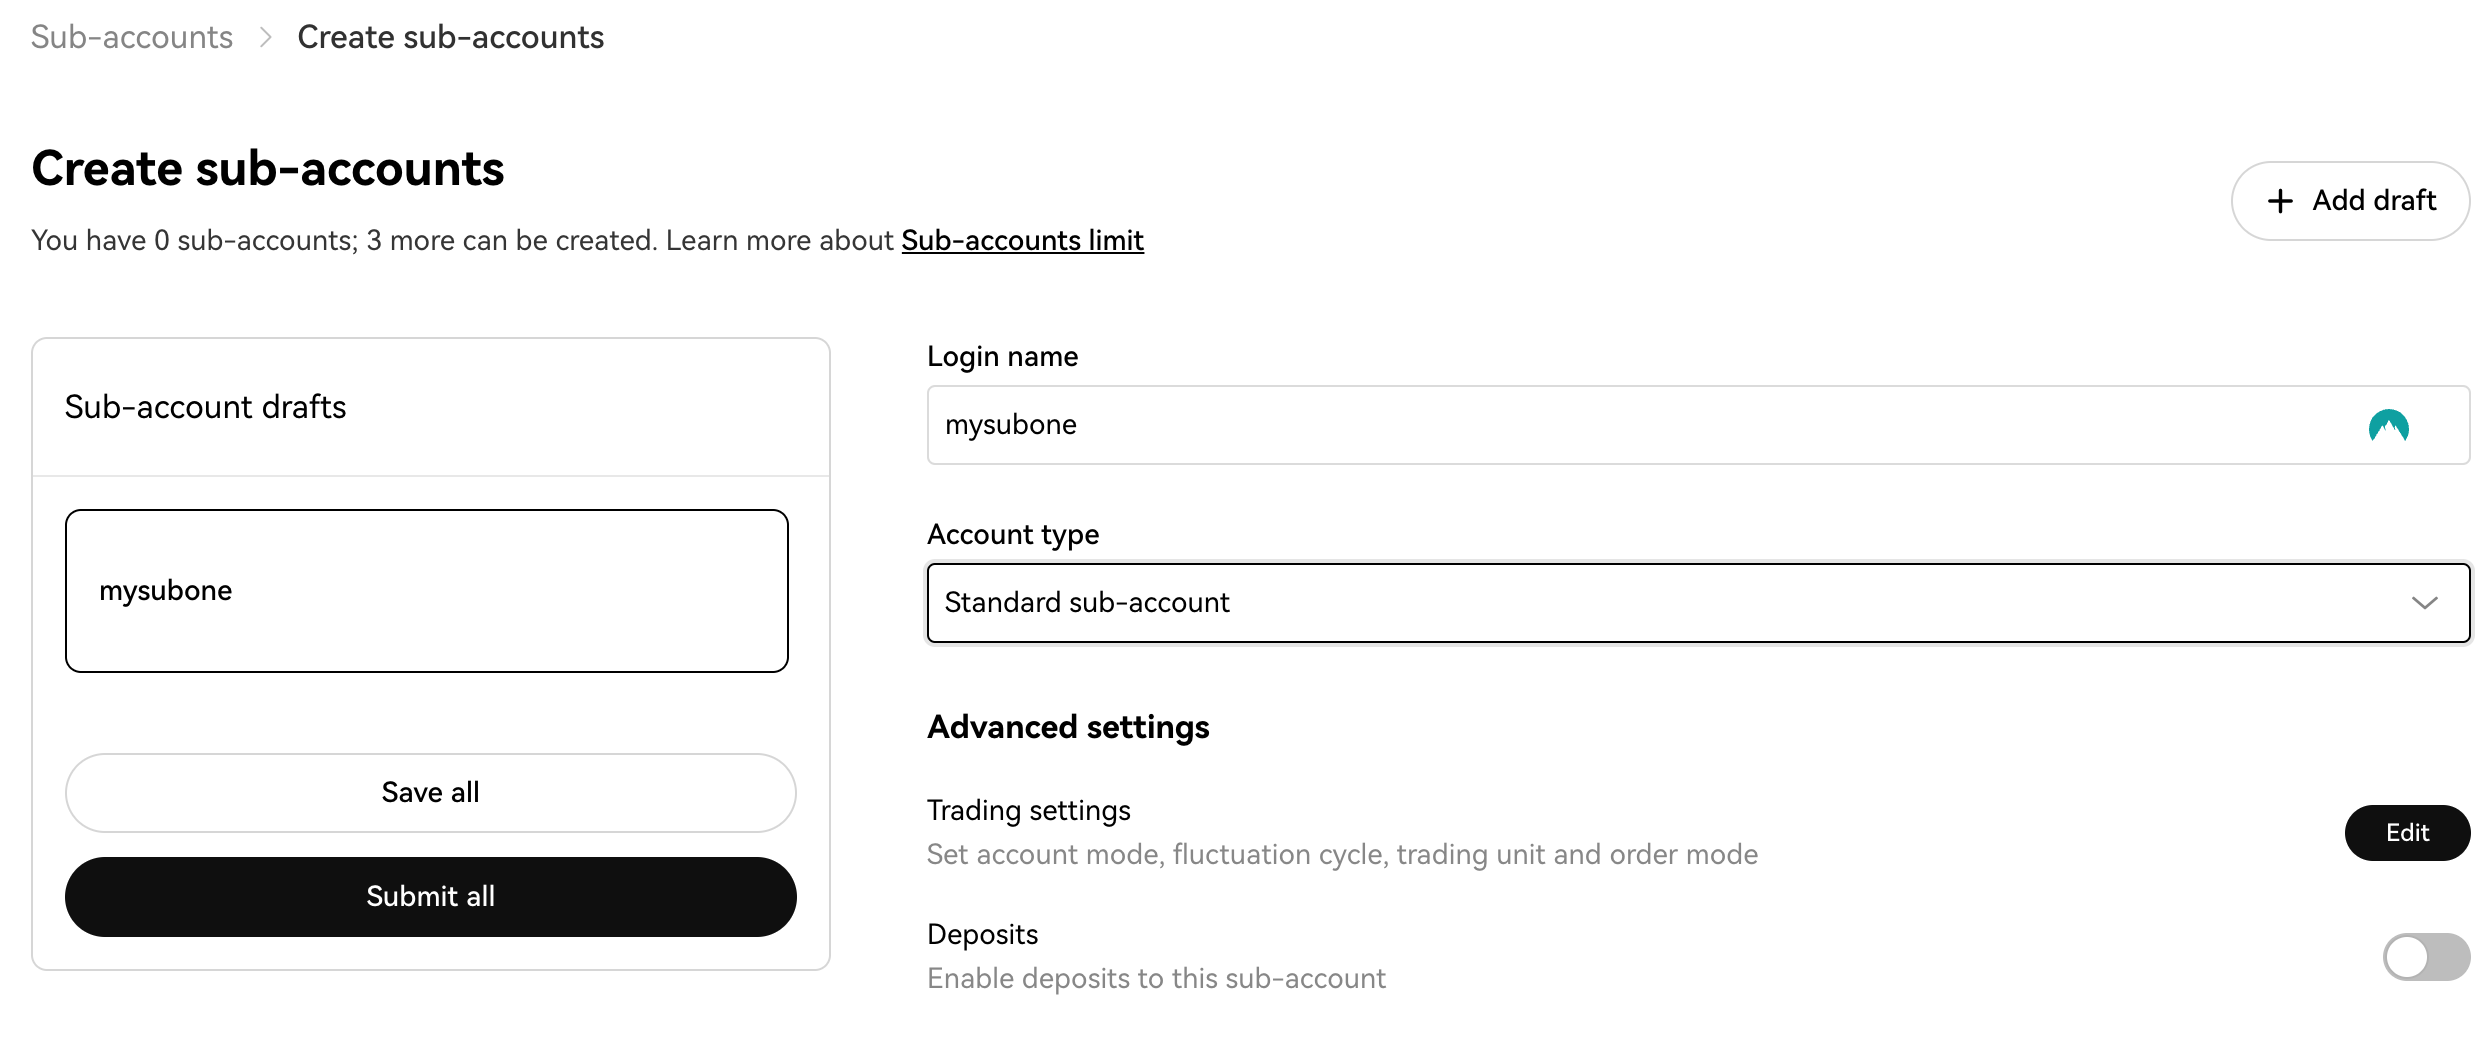
&#x20;Name and configure the sub-account

<figure><img src="/files/REtt5uLRJljvKI6pgBDx" alt=""><figcaption></figcaption></figure>

Create an API Key for this sub-account

<figure><img src="/files/5K7KDPEddf9qoArxOgVq" alt=""><figcaption><p>From the sub-accounts page, choose "Manage API" from the "Action" menu</p></figcaption></figure>

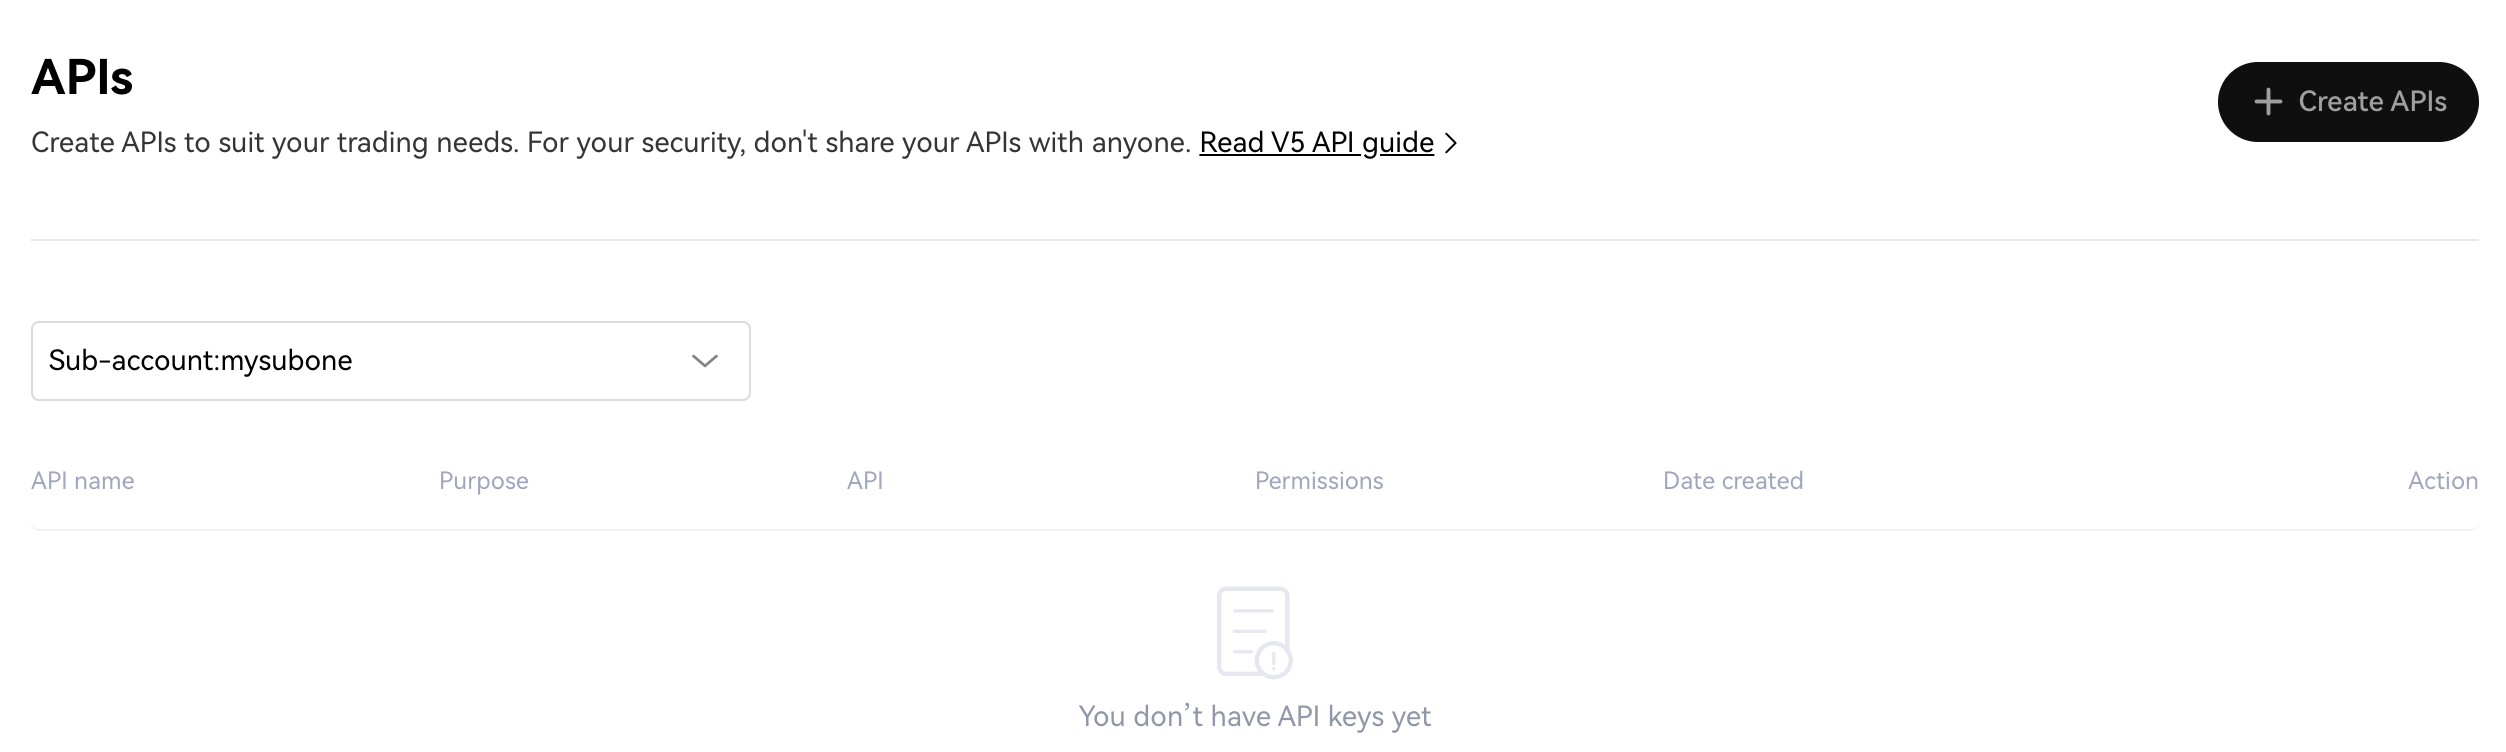
<figure><img src="/files/V8q26xwUpNFkML3NAFHP" alt=""><figcaption><p>Click the "Create API" button</p></figcaption></figure>

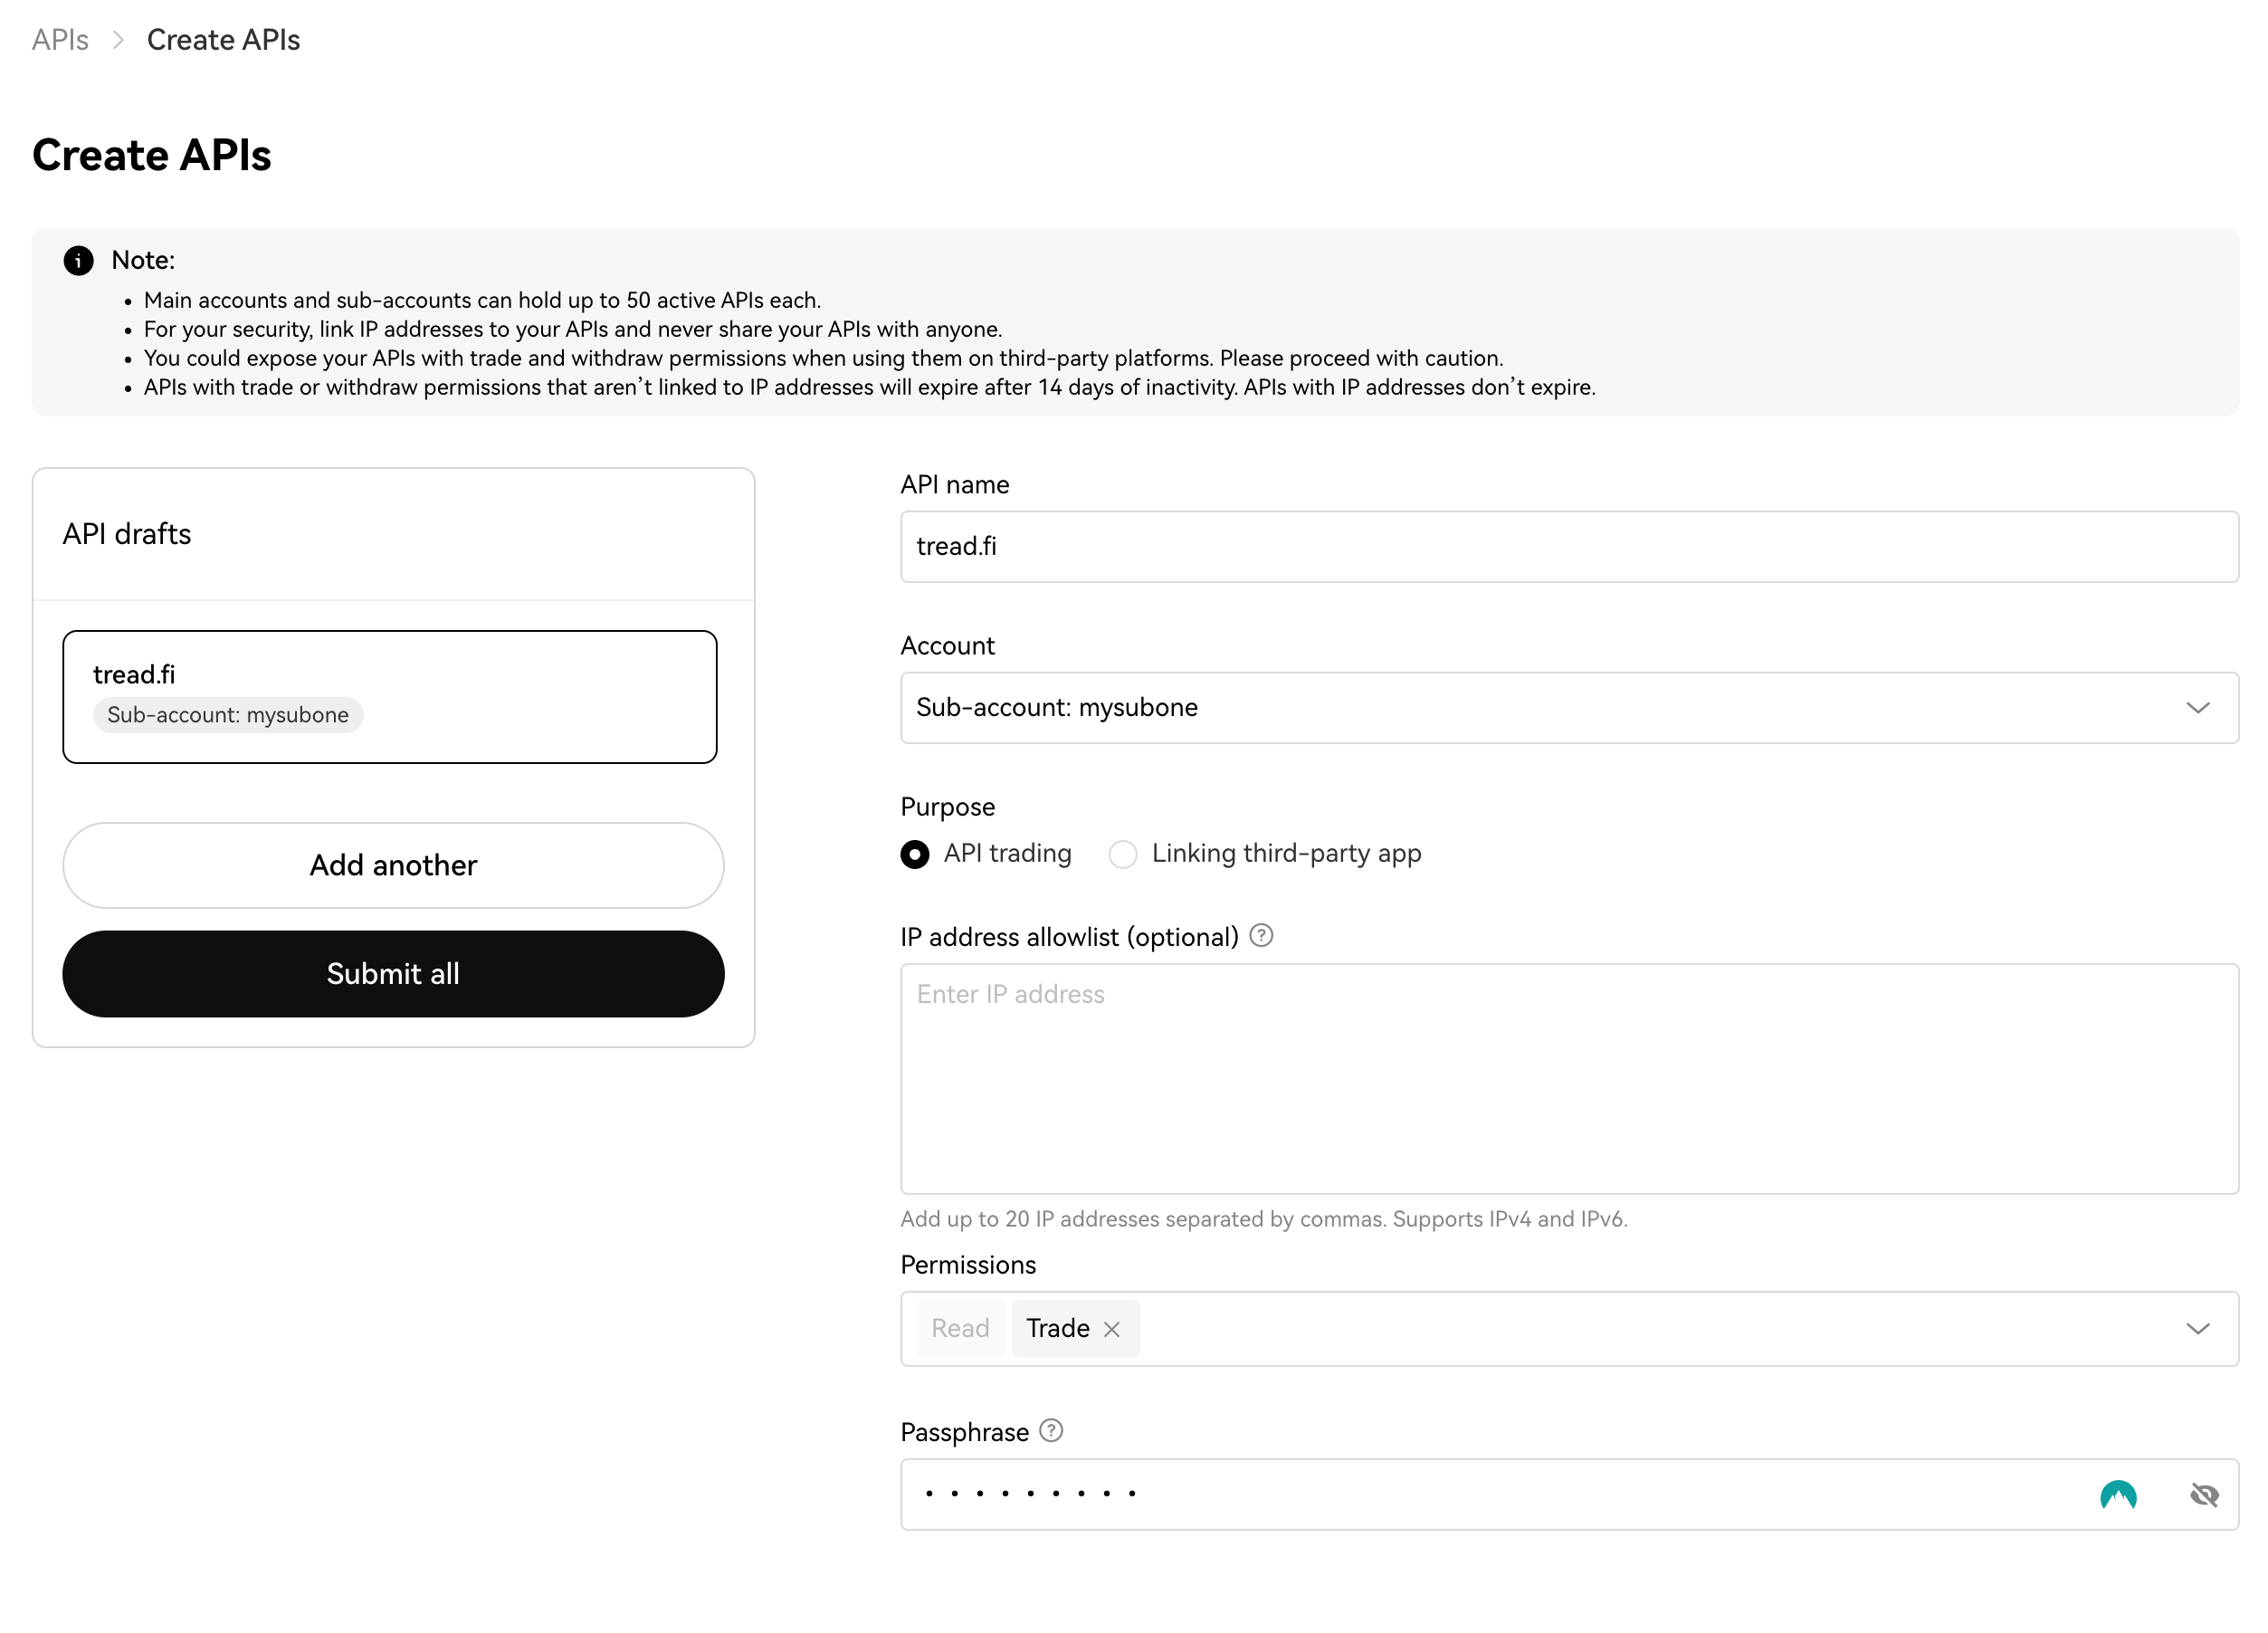
In the Create APIs page, choose the sub-account you just created, making sure the Purpose is set to "API trading" and it has `Read` and `Trade` permissions.  Add your TaaS server's IP address to the allowlist.

<figure><img src="/files/uUx8am2UCK922BFTtmlr" alt=""><figcaption></figcaption></figure>

Use this API key in TaaS to [connect](/account-creation-and-api-key-connection/connecting-to-exchanges) to OKX.

### Linking Your API Key to tread.fi&#x20;

<figure><img src="/files/Xt7UvXB3PDW5Pkk5168i" alt=""><figcaption></figcaption></figure>

* Open up tread's Key Management menu. From the app.tread.fi home page, it can be accessed by clicking on the wallet icon on the top right.
* Click Connect CEX Account

<figure><img src="/files/TkMJ1FC06qaUWpywkIXr" alt=""><figcaption></figcaption></figure>

* Select OKX from the Exchange dropdown
* Set a name for this key for your own reference.
* Copy and Paste the API Key and Secret from OKX into the respective boxes.
* Click submit.

<figure><img src="https://lh7-rt.googleusercontent.com/docsz/AD_4nXcxPKL5LuLWoy8DhaDHamKZHxvlg_XxfPWItdQAsszl7-i0PaGiYD1VCKxBeewjJBQUxbITppwpIrG5JuE6TM_I9P4BPOEM7eijX6gi6DPdUrhHYBW1QDER5NuRZEBfkap2GxjrOICcVywn-NCJS7Oe01XN?key=0Y_t4MkkxDXunkOK3-fvXw" alt=""><figcaption></figcaption></figure>

<br>


# Gate

#### Create New API Key

<figure><img src="/files/8yf3BaiF0GKbzMyYJnNu" alt=""><figcaption></figcaption></figure>

* To create an API Key on Gate, navigate to your profile and select [API Key Management. ](https://www.gate.com/myaccount/profile/api-key/manage)
* From the API Key Management page, click **Create API Key** .

#### Configure API Key Settings

<figure><img src="/files/uAhIyfOE9q40P6qYpzOY" alt=""><figcaption></figcaption></figure>

* Specify the key's name for your own reference
* Whitelist the following IP: `54.238.80.239`
* Set API Key Type as API v4 Key (Default)
* Set Account Type as Trading Account (Default)
* Toggle on  `Spot` and `Account` and set their permissions as `Read and Write`&#x20;
  * <sub>Note:  None of the other permissions listed (like Perpetual Futures, Wallet, Withdraw, etc.) are necessary, as our integration with Gate.io is exclusively for spot trading and does not involve managing wallets or withdrawals.</sub>
* Once configured, click "Submit" and proceed with your Security Verification

#### Linking your API Key to tread.fi

* Navigate to tread.fi's [Key Management ](https://app.tread.fi/key_management)menu by clicking the wallet icon on the top right.
* Click **Connect CEX ACcount**

<figure><img src="/files/Z5TIpmsPzkqTkyjCD93M" alt=""><figcaption></figcaption></figure>

* Select Gate from the dropdown
* Copy your newly created Gate Key and paste into API Key
* Copy and paste in your API Secret
* Click Submit


# Hyperliquid

### Prerequisites

* Have a wallet linked to already linked to Hyperliquid.
* **Only EVM wallets are supported. These include but are not limited to:**
  * Metamask
  * Ctrl Wallet
  * WalletConnect
  * OKX Wallet
  * Coinbase Wallet
* At least **5 USDC deposited** in your **Hyperliquid trading Account.**

### Linking Your Hyperliquid Account

<figure><img src="/files/EiWdhSnYZYWYrdo13RfL" alt=""><figcaption></figcaption></figure>

**Open Up the** [**Key Management**](https://app.tread.fi/key_management) **menu on tread.fi**

* This can be accessed by clicking on the wallet icon on the top right corner on app.tread.fi after you have logged in.

**Link Exchange API Key**

<figure><img src="/files/46evEDYyrv2KQkwibC0f" alt=""><figcaption></figcaption></figure>

* Click  **Connect Hyperliquid**
* Set your desired name for this exchange account.
* Connect the same wallet you used for your Hyperliquid account in the previous steps.
* **Sub-account/Vault Toggle (Optional):** Toggling this allows you to connect and trade with specific sub-accounts or vaults. Simply toggle and input the Ethereum address of your sub-account/vault.
* Click Submit and proceed with wallet signing and confirmation.

###


# Nado

### Linking Your Nado Account

**Open Up the** [**Key Management**](https://app.tread.fi/key_management) **menu on tread.fi**

* This can be accessed by clicking on the wallet icon on the top right corner on app.tread.fi after you have logged in.

<figure><img src="/files/I3maeWHiJraVNnuJS23V" alt=""><figcaption></figcaption></figure>

**Link Exchange API Key**

<figure><img src="/files/uMKSRqaKlKzHNzhMCCt5" alt=""><figcaption></figcaption></figure>

1. **Important:** Please deposit funds on Nado before connecting to tread. If you don't have a Nado account, feel free to use our referral [link](https://app.nado.xyz/?join=316sCkm)&#x20;
2. Click **Connect Nado and connect the same wallet you've got connected.**&#x20;
3. (Optional) Set a reference name for this exchange account.
4. Click Fetch Nado Accounts


# Ondo

#### Prerequisites

* Have an account on **Ondo Perps** ([app.ondoperps.xyz](https://app.ondoperps.xyz)) created with the wallet you intend to use.
* **An EVM-compatible wallet** supported by Tread's wallet connector (e.g. MetaMask, Rabby, WalletConnect-compatible wallets).
* Ensure your Ondo account is funded before connecting so you can begin trading.

#### Linking Your Ondo Account

**Open Up the** [**Key Management**](https://app.tread.fi/key_management) **menu on tread.fi**

* This can be accessed by clicking on the wallet icon on the top right corner on app.tread.fi after you have logged in.

**Link Exchange API Key**

* Click **Connect Ondo**
* Set your desired name for this exchange account.
* Connect the same wallet you used to create your Ondo account.
* You will be prompted to **sign an Ondo login challenge**. This is a standard wallet signature (Sign-In with Ethereum) — it does **not** authorize any transaction or transfer of funds.
* After you sign, Tread automatically creates a **trade-only API key** on Ondo and links it to your account.
* Click Submit and proceed with wallet signing and confirmation.
* You can revoke this key at any time from your account on [app.ondoperps.xyz](https://app.ondoperps.xyz).

####


# Pacifica

### Prerequisites

* **Only Solana wallets are supported.**

### Linking Your Pacifica Account

**Open Up the** [**Key Management**](https://app.tread.fi/key_management) **menu on tread.fi**

* This can be accessed by clicking on the wallet icon on the top right corner on app.tread.fi after you have logged in.

<figure><img src="/files/JsulPhYSkXVKWu5Q2Omy" alt=""><figcaption></figcaption></figure>

**Link Exchange API Key**

<figure><img src="/files/kQ48EXEBYeUWYt4j1zsr" alt=""><figcaption></figcaption></figure>

* Click  **Connect Pacifica**
* Set your desired name for this exchange account.
* Connect the same wallet you used to create your Pacifica account.
* Click Submit and proceed with wallet signing and confirmation.

#### Pacifica cap

Pacifica has a maximum fee of **2.00 bps**. If your tier rate would otherwise be higher (i.e. Tier 0 at 2.50 bps), trades on Pacifica are charged at 2.00 bps instead. All other tiers are unaffected. In practice this means Tier 0 and Tier 1 users pay the same 2.00 bps rate on Pacifica.


# Paradex

<figure><img src="/files/S2xFPrrxxBjjdmV1B0Ej" alt=""><figcaption></figcaption></figure>

### Linking Your Pacifica Account

**Open Up the** [**Key Management**](https://app.tread.fi/key_management) **menu on tread.fi**

* This can be accessed by clicking on the wallet icon on the top right corner on app.tread.fi after you have logged in.

<figure><img src="/files/K2O2xM2XyDnjKHRCSEiM" alt=""><figcaption></figcaption></figure>

**Link Exchange API Key**

<figure><img src="/files/wzRbt7zyRPPjoLORsjKd" alt=""><figcaption></figcaption></figure>

1. Click **Connect Paradex**.
2. (Optional) Set a reference name for this exchange account.
3. Click **Connect** and use the same wallet as your Paradex account.
4. If you don't have a Paradex account, sign up through our signup link.


# RISEx

### **Prerequisites**

* **An EVM-compatible wallet** supported by Tread's wallet connector (e.g. MetaMask, Rabby, WalletConnect-compatible wallets).
* **A RISEx account.** Register at [rise.trade](https://www.rise.trade) using your access code and the EVM wallet you intend to use with Tread before linking. The wallet used during registration must match the wallet you connect in Tread.

### **Linking Your RISEx Account**

**Open Up the** [**Key Management**](https://app.tread.fi/key_management) **menu on tread.fi**

* This can be accessed by clicking on the wallet icon on the top right corner on app.tread.fi after you have logged in.
* Click **Connect RISEx**
* Set your desired name for this exchange account.
* Connect the same wallet you used to register your RISEx account.
* Click Submit and proceed with wallet signing and confirmation.


# Perpl

#### Prerequisites

* Have an account on **Perpl** ([app.perpl.xyz](https://app.perpl.xyz/)) created with the wallet you intend to use.
* **An EVM-compatible wallet** supported by Tread’s wallet connector (e.g. MetaMask, Rabby, WalletConnect-compatible wallets).
* **Deposit funds** into your Perpl account before connecting. The connection will not work on an unfunded account.
* **Enable One-Click Trading** in the Perpl app before connecting. This is required for Tread to trade on your account.

#### Linking Your Perpl Account

**Open Up the** [**Key Management**](https://app.tread.fi/key_management) **menu on** [**tread.fi**](http://tread.fi/)

* This can be accessed by clicking on the wallet icon on the top right corner on [app.tread.fi](http://app.tread.fi/) after you have logged in.

**Link Exchange Account**

* Click **Connect Perpl**
* Set your desired name for this exchange account.
* Connect the same wallet you used to create your Perpl account.
* Your wallet will be prompted to switch to the **Monad** network (it will be added automatically if your wallet doesn’t have it yet).
* You will be prompted to **sign a Perpl API key enrollment message**. This is a standard wallet signature (EIP-712) — it does **not** authorize any transaction or transfer of funds. API keys can never withdraw funds.
* After you sign, Tread automatically creates a **trade-only API key** on Perpl and links it to your account.
* Click Submit and proceed with wallet signing and confirmation.
* You can revoke this key at any time at [app.perpl.xyz/apikeys](https://app.perpl.xyz/apikeys).

<br>


# Fees Schedule

The builder code fee applies currently **only** to trades on these perpetual DEXs:

* Extended
* Hyperliquid
* Nado
* Ondo
* Pacifica

Trades on any other exchange not currently mentioned here are **not** charged this fee.

No volume-based fees are applied to trades on Centralized Exchanges (such as Binance, Bybit, among others).&#x20;

### Fee schedule

Your fee rate is determined by your **rolling 14-day trading volume** across the eligible venues listed above. Volume from all five venues is combined into a single total. The fee is volume-based: the more you trade, the lower your rate.

| Tier | 14-day volume | Fee rate |
| ---- | ------------- | -------- |
| 0    | $0+           | 2.50 bps |
| 1    | $250,000+     | 2.00 bps |
| 2    | $1,000,000+   | 1.75 bps |
| 3    | $5,000,000+   | 1.50 bps |
| 4    | $25,000,000+  | 1.25 bps |
| 5    | $50,000,000+  | 1.00 bps |

New accounts and accounts with no eligible volume start at Tier 0.

### Where to see your current tier

<figure><img src="/files/nkoWRypfK9vfLImBfhG4" alt=""><figcaption></figcaption></figure>

Your current tier, fee rate, and rolling 14-day volume are shown on the [Points](https://app.tread.fi/points) page.&#x20;

###


# Submitting Your First Order

#### Quick Start Tutorial

{% embed url="<https://www.youtube.com/watch?v=3cDhYShh23E>" %}

<figure><img src="/files/G6Vy2m0fUdhfqn03J5LX" alt="" width="375"><figcaption></figcaption></figure>

#### Comprehensive Tutorial

{% embed url="<https://youtu.be/hYJQZhrQROo?si=2CtgclYmYKk1Hstc>" %}

## **Order Entry**

Note: These explanations are mainly relevant for the dashboard UI, for API usage, refer to [API documentation](/interacting-with-the-api/metabuilder-framework) for precise details on constraints and expected format of inputs.

| Field                                                  | Description                                                                                                                                                                                                                                                                                                                                                                                                                                                                                                                                                                                                                                          |
| ------------------------------------------------------ | ---------------------------------------------------------------------------------------------------------------------------------------------------------------------------------------------------------------------------------------------------------------------------------------------------------------------------------------------------------------------------------------------------------------------------------------------------------------------------------------------------------------------------------------------------------------------------------------------------------------------------------------------------- |
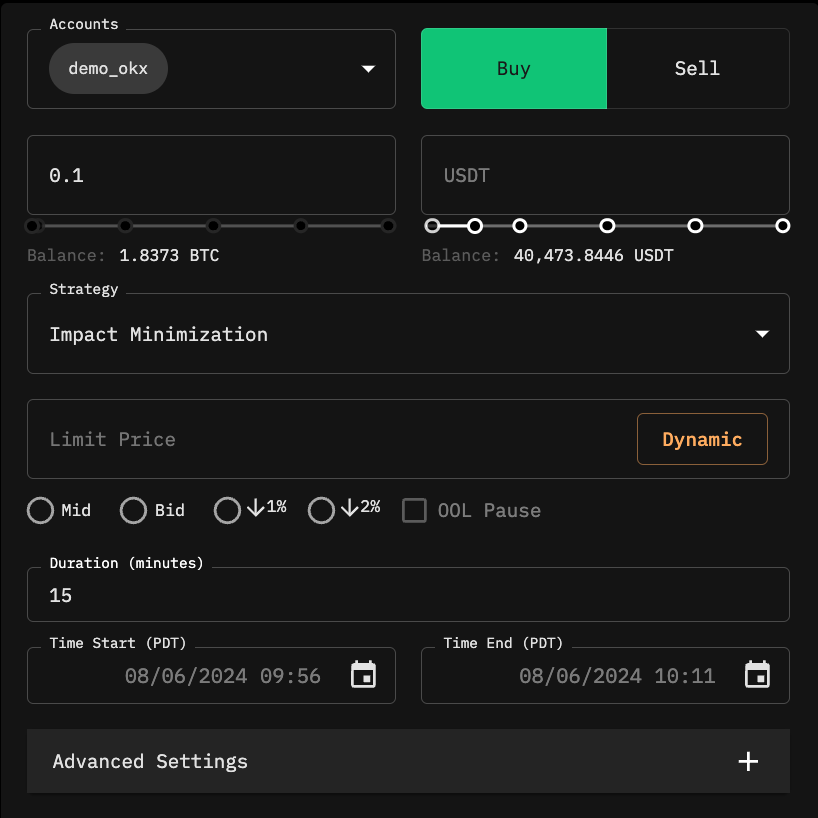
| Account                                                | Select one or more accounts to execute the trade.                                                                                                                                                                                                                                                                                                                                                                                                                                                                                                                                                                                                    |
| Base Asset Quantity                                    | Allows you to speicfy the number of tokens (Base Asset) you would like to trade (e.g. I want to trade 5 BTC, for BTC-USDT).                                                                                                                                                                                                                                                                                                                                                                                                                                                                                                                          |
| Quote Asset Quantity                                   | Allows you to input the dollar amount (quote asset) you would like to trade. (e.g. I want to trade $2000 worth of BTC-USDT)                                                                                                                                                                                                                                                                                                                                                                                                                                                                                                                          |
| [Strategy](/creating-and-submitting-orders/strategies) | A preset execution configuration that combines a selected trajectory with advanced settings to optimize order execution. Refer to the [Strategies](/creating-and-submitting-orders/strategies) section for further details.                                                                                                                                                                                                                                                                                                                                                                                                                          |
| Limit Price (Optional)                                 | <p>Sets a price cap for the order. The order will not execute at a price worse than the specified limit.<br><br>After you set a limit price, you will notice that the <a href="/pages/Gpqkf9DD0wSI21rEd0jr">OOL Pause </a>check mark is ticked. When this is ticked, it means that if market prices are outside the limit price you set, the algorithm pauses execution; the order duration does not get counted get counted. <br><br>Example: I run an algo order to buy 1 BTC over duration of 60 minutes at a set limit price of $100,000. The algo will only operate when the price is $100,000 or lower. If it is higher, the algo pauses. </p> |
| Duration                                               | Defines the total execution time for the order in minutes. For multi-day orders, the order is automatically split up into multi-day algo orders each lasting a day.                                                                                                                                                                                                                                                                                                                                                                                                                                                                                  |
| Time Start (Optional)                                  | Specifies when the order should begin execution.                                                                                                                                                                                                                                                                                                                                                                                                                                                                                                                                                                                                     |
| Time End (Optional)                                    | Specifies when the order should stop execution. If both Time Start and Time End are set, the system calculates the duration automatically.                                                                                                                                                                                                                                                                                                                                                                                                                                                                                                           |

### **Advanced Settings**

| [Trajectory](/creating-and-submitting-orders/advanced-settings/trajectories)                             | Determines the execution schedule, defining how orders are distributed over time to achieve optimal execution outcomes.                                      |
| -------------------------------------------------------------------------------------------------------- | ------------------------------------------------------------------------------------------------------------------------------------------------------------ |
| [Participation Rate Target](/creating-and-submitting-orders/advanced-settings/participation-rate-target) | Defines the target share of market volume the engine aims to execute at, dynamically adjusting execution to match this rate.                                 |
| [Participation Rate Limit](/creating-and-submitting-orders/advanced-settings/participation-rate-limit)   | Sets the maximum percentage of market volume the order can interact with at any given time, preventing excessive exposure.                                   |
| [Passiveness](/creating-and-submitting-orders/advanced-settings/passiveness)                             | Controls the placement depth of limit orders. Higher passiveness results in deeper order book placement, prioritizing price efficiency over execution speed. |
| [Discretion](/creating-and-submitting-orders/advanced-settings/discretion)                               | Allows for controlled variation in execution, enabling more passive fills at the expense of increased tracking variance relative to the benchmark price.     |
| [Alpha Tilt](/creating-and-submitting-orders/advanced-settings/alpha-tilt)                               | Adjusts the execution curve by front-loading or back-loading the order distribution.                                                                         |
| [Max OTC Percentage](/creating-and-submitting-orders/advanced-settings/max-otc-percentage)               | Defines the maximum percentage of the order that can be executed through over-the-counter (OTC) Request for Quotes (RFQs), reducing on-exchange footprint.   |
| [Passive Only](/creating-and-submitting-orders/advanced-settings/passive-only)                           | Ensures the order is executed exclusively using passive limit orders, market orders will not be used throughout execution.                                   |
| [Active Limit](/creating-and-submitting-orders/advanced-settings/active-limit)                           | Enables dynamic limit order placement, adjusting prices in real time based on market conditions.                                                             |
| [Reduce Only](/creating-and-submitting-orders/advanced-settings/reduce-only)                             | Restricts the order to only reducing existing positions, preventing accidental position increases. *Not available on OKX.*                                   |
| [Spot Leverage](/creating-and-submitting-orders/advanced-settings/spot-leverage)                         | Enables margin trading for spot orders. *(Only applicable for Bybit.)*                                                                                       |


# Algo Swap Mode

<figure><img src="/files/46SD9xIAo2l1CRyIBkBz" alt=""><figcaption></figcaption></figure>

### What is Algo Swap Mode?

Algo Swap is one of two primary trading modes on the platform. It provides a streamlined interface for sophisticated order execution, managing all the technical details behind the scenes.

You can toggle between **Algo Swap** and **Terminal** trading modes using the buttons at the top of the interface.

### Key Features

* **Swap-Like Interface:** Trade using a familiar and simplified UI that removes the need to manually fine-tune complex execution settings.
* **Institutional-Grade Execution:** Access intelligent algorithms (like TWAP and VWAP) that work to achieve cost-efficient and precise execution.
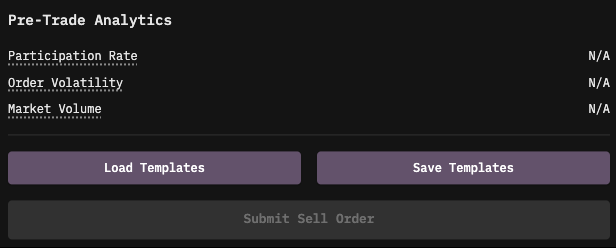
* **Real-Time Pre-Trade Analytics:** Get live insights on your potential order's impact, including its Participation Rate, Volatility, and Market Volume.
* **Intelligent Automation:** The order form automatically suggests optimal execution algorithm and adjusts to market liquidity and volatility.
* **Estimated Execution Time:** See the expected duration of an order based on the selected urgency level.
* **Dual Trading Support:** Trade on both Centralized Exchanges (CEX) and Decentralized Exchanges (DEX) from a single interface. This guide focuses on CEX trading. For DEXs, see our guide on [**Submitting DEX Orders**](/dex-swaps-trading/submitting-dex-orders).

### How to Trade with Algo Swap

1. **Select Algo Swap Mode** Navigate to the top of the trading panel and select the **Algo Swap** toggle.
2. **Select CEX Account(s)** Use the **Account** dropdown menu to select one or more CEX accounts to trade with. Your available balance will update based on your selection.
3. **Select a Trading Pair** Use the dual-token input to select the asset you wish to sell and the asset you wish to buy.
4. **Enter Order Quantity** Enter the amount you want to trade in either the base or quote asset field. The other field will update automatically based on the current market price.
5. **Configure Execution Strategy** Select the **Urgency** level for your trade. This automatically configures the underlying execution parameters for your order. The five levels are:

   * Very Low
   * Low
   * Medium
   * High
   * Very High

   Our system will automatically select the optimal execution strategy (e.g., [TWAP](/creating-and-submitting-orders/advanced-settings/trajectories/twap), [VWAP](/creating-and-submitting-orders/advanced-settings/trajectories/vwap) or [Market](/creating-and-submitting-orders/strategies/market)) based on your selected urgency, order size, and real-time market conditions. *(Execution switches to* [*Market*](/creating-and-submitting-orders/strategies/market) *if the estimated duration is under 2 minutes.)*
6. **Review Pre-Trade Analytics** Before submitting, review the **Pre-Trade Analytics** panel. This provides estimates on how your order might impact the market.
   * **Participation Rate:** The estimated percentage of the total market volume your order will represent. High participation can impact the price.
   * **Order Volatility:** The expected price fluctuation during the execution of your order.
   * **Market Volume:** An indicator of current liquidity.
7. **Submit the Order** Click the **Buy** or **Sell** button. You may be prompted to review a final confirmation before the order is sent to the exchange.


# Strategies

Strategies are **pre-configured execution methods** designed to help traders achieve specific trading objectives. Each strategy is built on a core execution trajectory—such as [**VWAP**](/creating-and-submitting-orders/advanced-settings/trajectories/vwap)**,** [**TWAP**](/creating-and-submitting-orders/advanced-settings/trajectories/twap)**,** [**Target Time**](/creating-and-submitting-orders/advanced-settings/trajectories/target-time)**, or** [**Implementation Shortfall**](/creating-and-submitting-orders/advanced-settings/trajectories/is) **-** with additional pre-configured advanced settings that control how trades interact with the market. These strategies streamline execution decisions, allowing traders to optimize for **speed, cost efficiency, and market impact**.

**Available Strategies**

<figure><img src="/files/B1IQL5za2SycfSmNc5Rn" alt="" width="467"><figcaption></figcaption></figure>

* [**Impact Minimization**](/creating-and-submitting-orders/strategies/impact-minimization) – Spreads orders over time to reduce market impact using a **VWAP trajectory**. Ideal for large trades requiring discreet execution.
* [**Time Constant**](/creating-and-submitting-orders/strategies/time-constant) – Executes trades at a **consistent rate** over a fixed duration. Suitable for traders who need steady, predictable execution.
* [**Target Participation Rate**](/creating-and-submitting-orders/strategies/target-participation-rate) – Adjusts execution dynamically to maintain a **fixed percentage of market volume**. Ensures proportional participation based on real-time trading activity.
* [**Market Maker**](/creating-and-submitting-orders/strategies/market-maker) – Places **passive-only limit orders** to maintain market presence while minimizing taker fees. Best suited for cost-sensitive strategies.
* [**Aggressive Taker**](/creating-and-submitting-orders/strategies/aggressive-taker) – Prioritizes **speed** with front-loaded execution, ensuring quick fills. Ideal for urgent trades requiring immediate liquidity.
* [**Aggressive Maker**](/creating-and-submitting-orders/strategies/aggressive-maker) – Uses **passive-only limit orders** with a 25% participation target, balancing execution speed and cost efficiency.
* [**Target Time**](/creating-and-submitting-orders/strategies/target-time) – Concentrates execution around a **specific future event**, making it ideal for event-driven trading strategies.

Each strategy is designed to align execution with **market conditions and specific trading goals**. For detailed configurations and use cases, refer to individual strategy sections.


# Impact Minimization

<figure><img src="/files/AgMYhztpSzvnjgrSA4Ut" alt=""><figcaption><p>Execution with Impact Minimization</p></figcaption></figure>

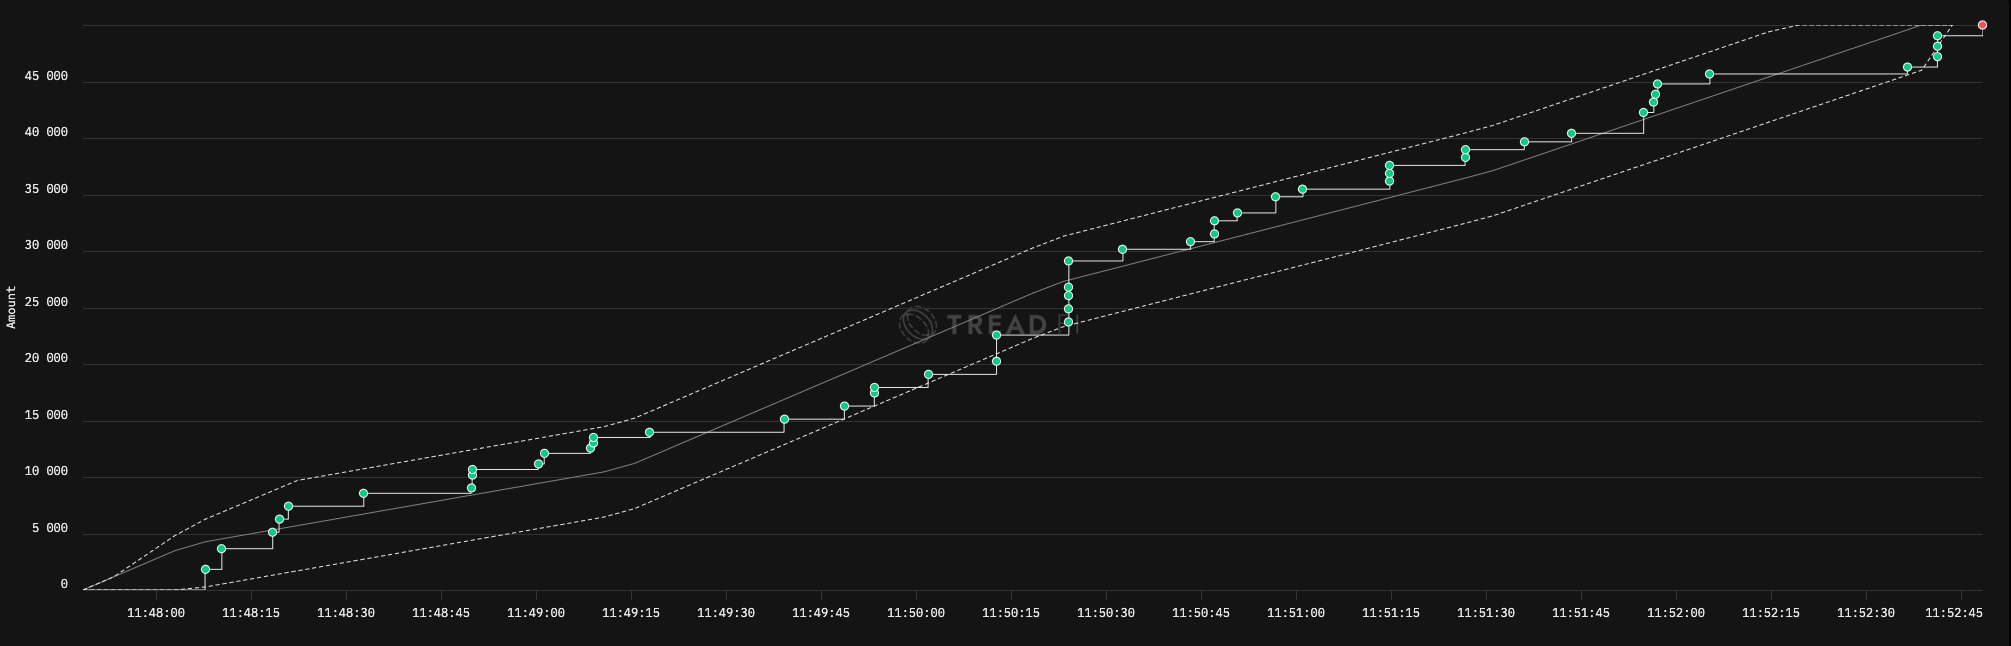
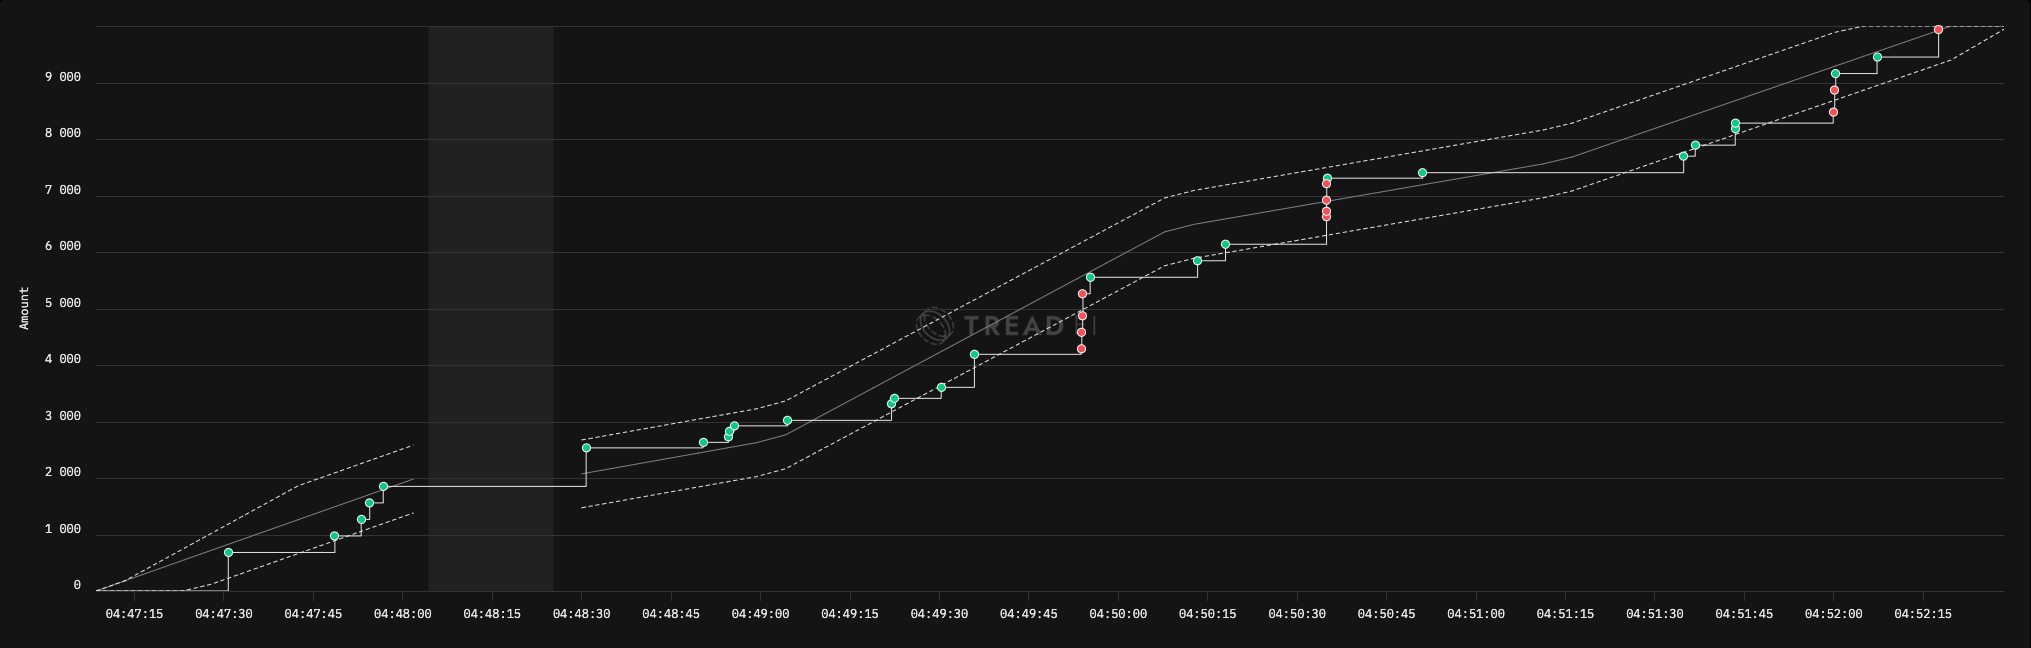
The **Impact Minimization** strategy is designed for traders who prioritize reducing market impact while maintaining execution efficiency. It follows a [**VWAP (Volume Weighted Average Price) trajectory**](/creating-and-submitting-orders/advanced-settings/trajectories/vwap), ensuring trades are distributed over time to minimize price disruption.

**How It Works**

* Users specify a **duration**, defining the execution time frame.
* The engine prioritizes **maker execution** to optimize cost efficiency but will use **taker execution** when necessary to stay within the set duration.
* Orders are executed **incrementally** along a VWAP trajectory, ensuring small portions of the trade are spread out over time.
* Market impact relative to **arrival price** is minimized through passive execution.
* Execution dynamically adjusts based on **real-time market conditions**.

**When to Use This Strategy**

* **Fixed Duration Execution** – Suitable for traders who need execution over a **specific time frame**.
* **High Sensitivity to Market Impact** – Helps reduce market disruption when executing **large orders**.
* **Manageable Taker Fees** – Works best when taker fees are reasonable, ensuring cost-effective execution.
* **Market-Aware Execution** – The engine continuously adapts to market conditions to optimize order placement.

**Potential Drawbacks**

* **Higher Variance in Execution Outcomes** – Market conditions can impact final trade results.
* **Fixed Duration Constraints** – If liquidity shifts unexpectedly, taker execution may increase to meet the deadline.
* **Limited Flexibility for Short Durations** – Shorter execution windows may reduce the ability to optimize order placement.

This strategy is ideal for **large trades requiring minimal market impact** while leveraging **market-aware execution** for cost efficiency.

#### **Impact Minimization Configurations**

| [Trajectory](/creating-and-submitting-orders/advanced-settings/trajectories)               | [VWAP](/creating-and-submitting-orders/advanced-settings/trajectories/vwap) |
| ------------------------------------------------------------------------------------------ | --------------------------------------------------------------------------- |
| [Passiveness](/creating-and-submitting-orders/advanced-settings/passiveness)               | 0.02                                                                        |
| [Discretion](/creating-and-submitting-orders/advanced-settings/discretion)                 | 0.06                                                                        |
| [Alpha Tilt](/creating-and-submitting-orders/advanced-settings/alpha-tilt)                 | 0                                                                           |
| [Max OTC Percentage](/creating-and-submitting-orders/advanced-settings/max-otc-percentage) | 0%                                                                          |
| [Passive Only](/creating-and-submitting-orders/advanced-settings/passive-only)             | Disabled                                                                    |
| [Active Limit](/creating-and-submitting-orders/advanced-settings/active-limit)             | Disabled                                                                    |
| [Reduce Only](/creating-and-submitting-orders/advanced-settings/reduce-only)               | Disabled                                                                    |
| [Strict Duration](/creating-and-submitting-orders/advanced-settings/strict-duration)       | Disabled                                                                    |


# Time Constant

<figure><img src="/files/suutRJdLObol7SG943Fs" alt=""><figcaption><p>Execution with Time Constant</p></figcaption></figure>

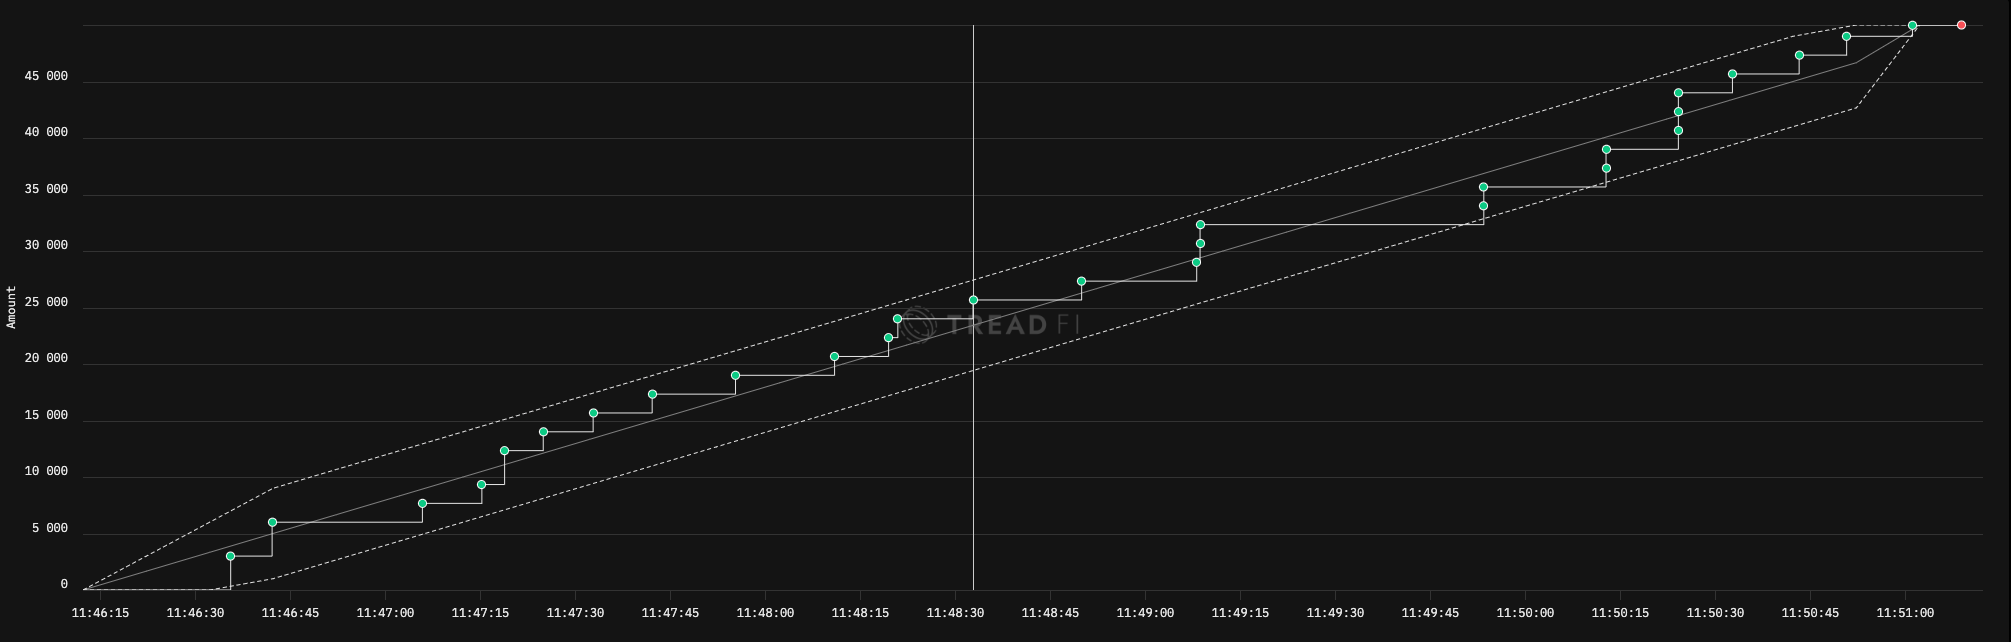
The **Time Constant** strategy is designed for traders who need execution at a steady, predictable pace over a fixed duration. It follows a [**TWAP (Time Weighted Average Price) trajectory**](/creating-and-submitting-orders/advanced-settings/trajectories/twap), ensuring trades occur evenly across the order’s timeframe.

**How It Works**

* Users specify a **duration**, setting the total execution period.
* The engine prioritizes **maker execution** when possible but will switch to **taker execution** if necessary to maintain the schedule.
* Trades execute at a **consistent rate**, independent of market conditions.
* Execution is evenly distributed over time, maintaining a steady flow.

**When to Use This Strategy**

* **Shorter-Duration Orders** – Best for trades requiring execution within a **limited timeframe**.
* **TWAP Benchmarking** – Useful when the goal is to **match the TWAP price** over a set period.
* **Fixed Duration Execution** – Ensures a **steady execution pace** without adapting to market fluctuations.

**Potential Drawbacks**

* **Easily Detectable** – Other market participants may recognize and react to the strategy.
* **Lacks Market Awareness** – Trades at a **fixed rate** without adjusting to liquidity or volatility changes.
* **Less Efficient During Off-Hours** – Executes the same volume at **low-liquidity times (e.g., 3 AM) and high-liquidity times (e.g., 3 PM)**, potentially missing optimal trading windows.

This strategy is ideal for traders who require **consistent execution** and **TWAP benchmarking**, but it may not be optimal for those looking to adapt to real-time market conditions.

#### **Time Constant Configurations**

| [Trajectory](/creating-and-submitting-orders/advanced-settings/trajectories)               | [TWAP](/creating-and-submitting-orders/advanced-settings/trajectories/twap) |
| ------------------------------------------------------------------------------------------ | --------------------------------------------------------------------------- |
| [Passiveness](/creating-and-submitting-orders/advanced-settings/passiveness)               | 0.02                                                                        |
| [Discretion](/creating-and-submitting-orders/advanced-settings/discretion)                 | 0.08                                                                        |
| [Alpha Tilt](/creating-and-submitting-orders/advanced-settings/alpha-tilt)                 | 0                                                                           |
| [Max OTC Percentage](/creating-and-submitting-orders/advanced-settings/max-otc-percentage) | 0%                                                                          |
| [Passive Only](/creating-and-submitting-orders/advanced-settings/passive-only)             | Disabled                                                                    |
| [Active Limit](/creating-and-submitting-orders/advanced-settings/active-limit)             | Disabled                                                                    |
| [Reduce Only](/creating-and-submitting-orders/advanced-settings/reduce-only)               | Disabled                                                                    |
| [Strict Duration](/creating-and-submitting-orders/advanced-settings/strict-duration)       | Disabled                                                                    |

<br>


# Target Participation Rate

<figure><img src="/files/CwLaFABpaEOQCX6TjNUL" alt=""><figcaption><p>Execution with Target Participation Rate</p></figcaption></figure>

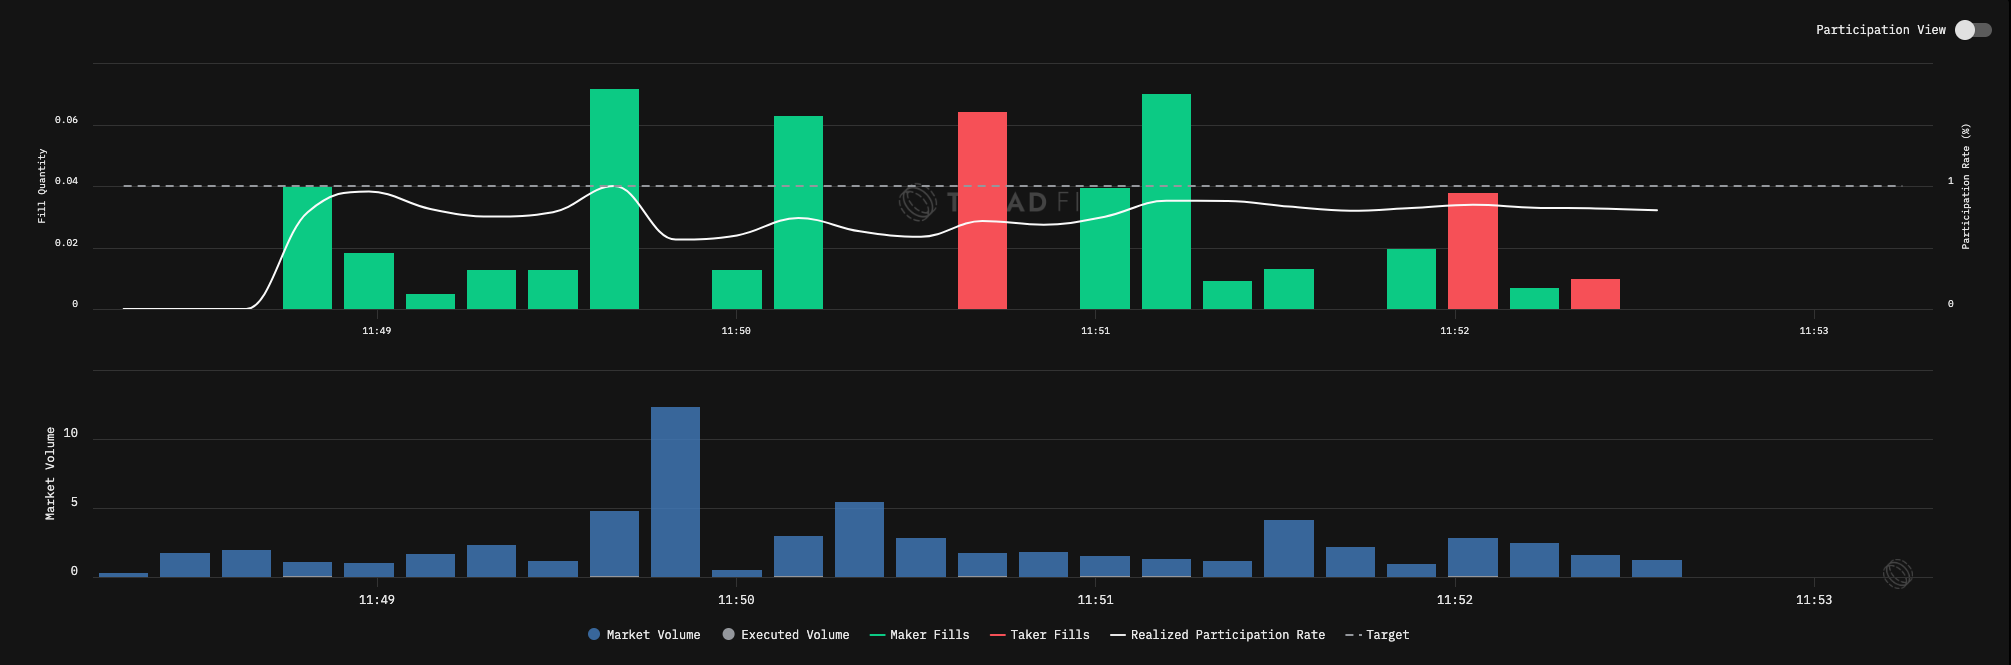
The **Target Participation Rate** strategy is designed for traders who want to maintain a consistent market presence by executing a defined proportion of total market volume. Functionally-speaking, it is identical to the Impact Minimization (VWAP) strategy, but with a different user-facing input method.&#x20;

**How It Works**

**Set Participation Rate Target:**

Instead of setting a fixed duration (like "1 hour"), you set a Participation Rate Target. This tells the algorithm what percentage of the total market volume your order should represent.&#x20;

For example, setting a 10% participation rate means the algorithm will spread your order out over a period in which the market is expected to trade 9x your order size, ensuring your order is only 1/10th of the total trading volume.

**Duration Calculation:**&#x20;

The algorithm takes your order size and their desired participation rate to calculate the necessary duration required to complete the order.

The simplified formula is:

```
Target Market Volume = Your Order Size / Participation Rate Target

```

Upon calculating the above it then analyzes predictive volume data to determine the duration required to complete the order based on its forecasts. This dynamically calculated time becomes the order's execution duration.&#x20;

A lower participation rate will result in a longer duration, while a higher rate will lead to a shorter, more aggressive execution.

If you want to ensure your clip size does not get excessively large, you can set a [maximum clip size.](/creating-and-submitting-orders/advanced-settings/max-clip-size) &#x20;

**Order Execution:**

Once the duration is calculated, the order follows the [VWAP](/creating-and-submitting-orders/advanced-settings/trajectories/vwap) execution algorithm.&#x20;

**When to Use This Strategy**

* **Flexible Duration** – Ideal when execution time isn’t fixed, allowing the strategy to adjust based on market volume.
* **Intuitive Participation Goals** – Best for traders with a specific market participation rate in mind, ensuring a clear and predictable execution footprint.
* **Non-Alpha-Driven Trades** – Suitable for execution-focused trades without a strong directional market view.

**Potential Drawbacks**

* **Uncertain End Time** – Since execution is volume-dependent, the order may take longer in low-volume markets or finish faster if volume spikes.
* **Market Dependency** – Performance varies based on real-time trading conditions, leading to fluctuating execution outcomes.

This strategy is best for traders looking to **stay in line with market activity** while maintaining execution efficiency and minimizing market impact.

#### **Target Participation Rate Configurations**

| [Trajectory](/creating-and-submitting-orders/advanced-settings/trajectories)                             | [VWAP](/creating-and-submitting-orders/advanced-settings/trajectories/vwap) |
| -------------------------------------------------------------------------------------------------------- | --------------------------------------------------------------------------- |
| [Passiveness](/creating-and-submitting-orders/advanced-settings/passiveness)                             | 0.02                                                                        |
| [Discretion](/creating-and-submitting-orders/advanced-settings/discretion)                               | 0.08                                                                        |
| [Alpha Tilt](/creating-and-submitting-orders/advanced-settings/alpha-tilt)                               | 0                                                                           |
| [Participation Rate Target](/creating-and-submitting-orders/advanced-settings/participation-rate-target) | 1% *(required)*                                                             |
| [Max OTC Percentage](/creating-and-submitting-orders/advanced-settings/max-otc-percentage)               | 0%                                                                          |
| [Passive Only](/creating-and-submitting-orders/advanced-settings/passive-only)                           | Disabled                                                                    |
| [Active Limit](/creating-and-submitting-orders/advanced-settings/active-limit)                           | Disabled                                                                    |
| [Reduce Only](/creating-and-submitting-orders/advanced-settings/reduce-only)                             | Disabled                                                                    |
| [Strict Duration](/creating-and-submitting-orders/advanced-settings/strict-duration)                     | Disabled                                                                    |


# Market Maker

<figure><img src="/files/01NsSWTSEGY42FC1wDh7" alt=""><figcaption><p>Execution with Market Maker</p></figcaption></figure>

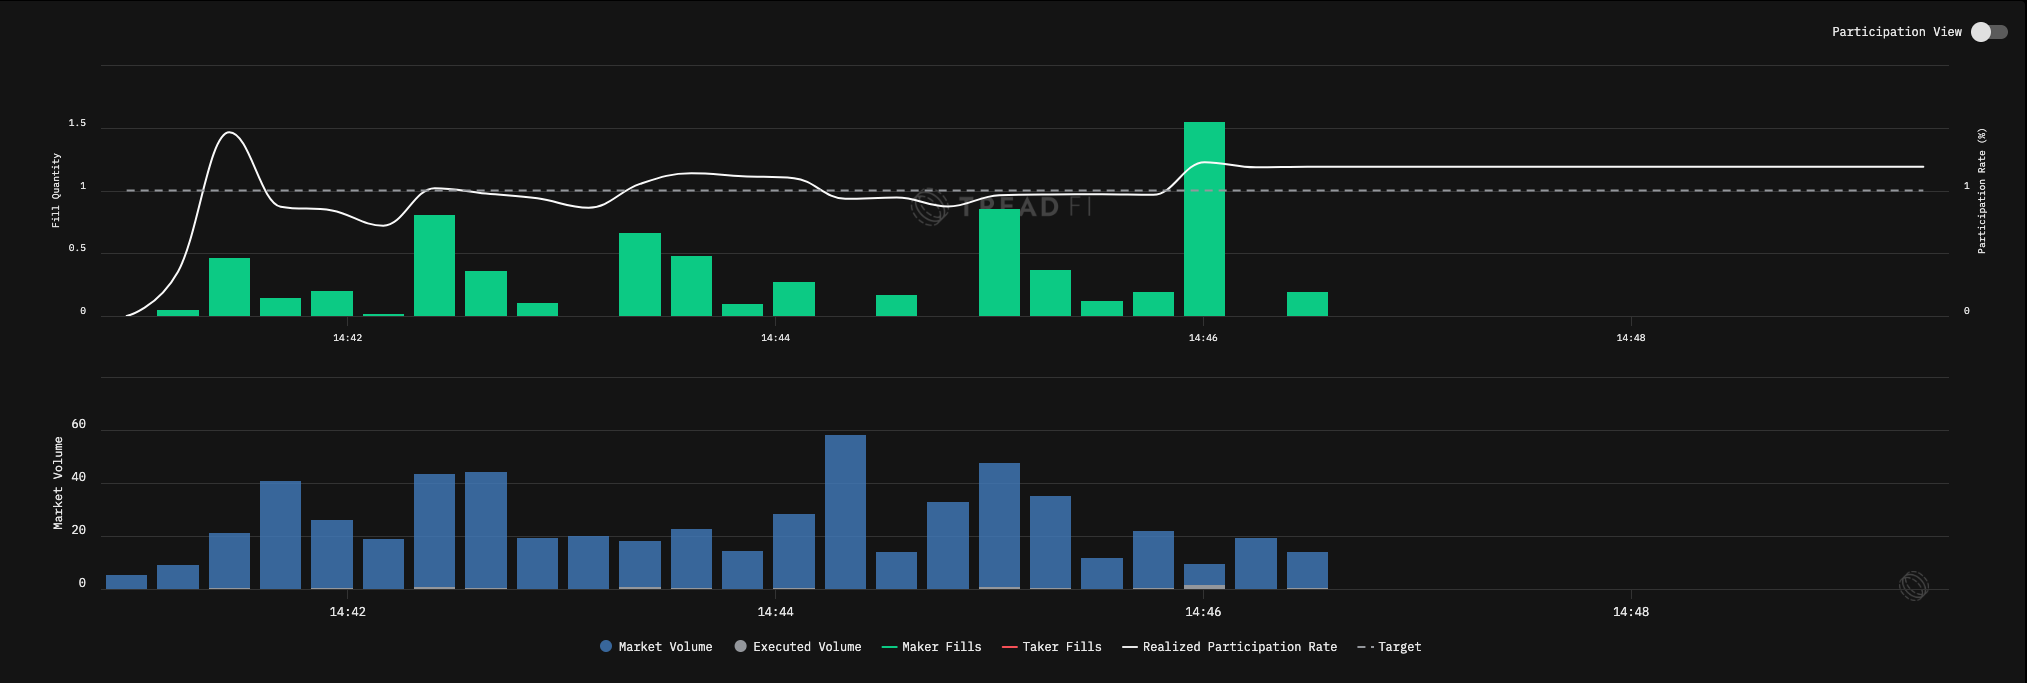
The Market Maker algorithm is designed for users who want to execute a large order while acting as a liquidity provider. The primary goal is to get filled passively by placing limit orders, which can lead to better execution prices and lower trading fees.\
\ <br>

**How It Works**

* It essentially follows the [**VWAP (Volume Weighted Average Price) trajectory**](/creating-and-submitting-orders/advanced-settings/trajectories/vwap), but primarily relying on **passive limit orders** to avoid taker fees and minimize market impact.&#x20;
* It only resorts to urgent 'taker' fills if the execution falls seignificantly behind schedule, or in other words, breaches the lower discretionary bound.\
  In short, the goal of this strategy is: be passive first, only become aggressive when necessary to stay on track.

**When to Use This Strategy**

* **High Taker Fee Markets** – Ideal for trading in environments where **taker fees significantly impact profitability**.
* **Non-Alpha-Driven Trades** – Best for execution-focused trades where **price prediction is not a priority**.
* **High Sensitivity to Market Impact** – Suitable for traders aiming to **reduce order visibility and market influence**.

**Potential Drawbacks**

* **Extended Execution Time** – If market conditions limit passive fills, orders may take **longer than expected** to complete.
* **Uncertain Completion** – Relying solely on passive orders means the strategy may face **execution delays or incomplete fills** in low-liquidity conditions.

This strategy is best for traders seeking **cost-efficient execution** with minimal market impact, particularly in **high-fee environments** where avoiding taker orders improves profitability.

#### **Market Maker Configurations**

| [Trajectory](/creating-and-submitting-orders/advanced-settings/trajectories)                             | [VWAP](/creating-and-submitting-orders/advanced-settings/trajectories/vwap) |
| -------------------------------------------------------------------------------------------------------- | --------------------------------------------------------------------------- |
| [Passiveness](/creating-and-submitting-orders/advanced-settings/passiveness)                             | 0.02                                                                        |
| [Discretion](/creating-and-submitting-orders/advanced-settings/discretion)                               | 0.08                                                                        |
| [Participation Rate Target](/creating-and-submitting-orders/advanced-settings/participation-rate-target) | 1% *(required)*                                                             |
| [Alpha Tilt](/creating-and-submitting-orders/advanced-settings/alpha-tilt)                               | 0                                                                           |
| [Max OTC Percentage](/creating-and-submitting-orders/advanced-settings/max-otc-percentage)               | 0%                                                                          |
| [Passive Only](/creating-and-submitting-orders/advanced-settings/passive-only)                           | Enabled                                                                     |
| [Active Limit](/creating-and-submitting-orders/advanced-settings/active-limit)                           | Disabled                                                                    |
| [Reduce Only](/creating-and-submitting-orders/advanced-settings/reduce-only)                             | Disabled                                                                    |
| [Strict Duration](/creating-and-submitting-orders/advanced-settings/strict-duration)                     | Disabled                                                                    |


# Aggressive Maker

<figure><img src="/files/ubREyap2C6YODCZvoGzy" alt=""><figcaption><p>Execution with Aggressive Maker</p></figcaption></figure>

The **Aggressive Maker** strategy is designed for traders who want to **maintain a strong order book presence** while ensuring a **high execution rate**. This strategy follows a [**VWAP (Volume Weighted Average Price) trajectory**](/creating-and-submitting-orders/advanced-settings/trajectories/vwap) and targets a **25% volume participation rate**, placing **only passive limit orders** to optimize execution costs.

**How It Works**

* The engine places [**passive-only**](/creating-and-submitting-orders/advanced-settings/passive-only) **limit orders dynamically**, ensuring **25% market volume participation**.
* The [**passiveness**](/creating-and-submitting-orders/advanced-settings/passiveness) **configuration** controls how far orders are placed from the market price, while [**active limit**](/creating-and-submitting-orders/advanced-settings/active-limit) **mode** allows for more flexible limit order placement.
* Execution follows a **VWAP trajectory**, balancing **participation and cost efficiency**.

**When to Use This Strategy**

* **Markets with High Taker Fees** – Best for traders looking to **avoid costly taker fees** while ensuring steady execution.
* **Active Market Participation** – Suitable for those who want **consistent market presence** without incurring high costs.
* **Moderate Execution Urgency** – A good balance between **execution speed and cost-efficiency**, leveraging strategic passive order placement.

**Potential Drawbacks**

* **Potential Execution Delays** – Passive orders may take **longer to fill**, depending on market conditions.
* **Market Impact Risks** – A **high participation rate** may signal trading intentions, potentially influencing price behavior.

This strategy is ideal for traders seeking **cost-effective execution** with **steady market participation**, while avoiding **taker fees** and maintaining a **controlled execution footprint**.

#### **Aggressive Maker Configurations**

| [Trajectory](/creating-and-submitting-orders/advanced-settings/trajectories)                             | [VWAP](/creating-and-submitting-orders/advanced-settings/trajectories/vwap) |
| -------------------------------------------------------------------------------------------------------- | --------------------------------------------------------------------------- |
| [Passiveness](/creating-and-submitting-orders/advanced-settings/passiveness)                             | 0.02                                                                        |
| [Discretion](/creating-and-submitting-orders/advanced-settings/discretion)                               | 0.08                                                                        |
| [Alpha Tilt](/creating-and-submitting-orders/advanced-settings/alpha-tilt)                               | 0                                                                           |
| [Participation Rate Target](/creating-and-submitting-orders/advanced-settings/participation-rate-target) | 25% *(required)*                                                            |
| [Max OTC Percentage](/creating-and-submitting-orders/advanced-settings/max-otc-percentage)               | 0%                                                                          |
| [Passive Only](/creating-and-submitting-orders/advanced-settings/passive-only)                           | Enabled                                                                     |
| [Active Limit](/creating-and-submitting-orders/advanced-settings/active-limit)                           | Enabled                                                                     |
| [Reduce Only](/creating-and-submitting-orders/advanced-settings/reduce-only)                             | Disabled                                                                    |
| [Strict Duration](/creating-and-submitting-orders/advanced-settings/strict-duration)                     | Disabled                                                                    |


# Aggressive Taker

<figure><img src="/files/BvW79Qz6b3YC6tcuEeah" alt=""><figcaption><p>Execution with Aggressive Taker</p></figcaption></figure>

The **Aggressive Taker** strategy is designed for traders who **prioritize speed and execution urgency** over cost efficiency. It follows a [**VWAP (Volume Weighted Average Price) trajectory**](/creating-and-submitting-orders/advanced-settings/trajectories/vwap) but with an **aggressive, front-loaded execution profile**, driven by an [**alpha tilt**](/creating-and-submitting-orders/advanced-settings/alpha-tilt) **setting of 1**. This results in **faster fills**, with a higher proportion of taker orders to ensure rapid execution.

**How It Works**

* The engine sets **alpha tilt to 1**, creating a **front-loaded execution profile** that prioritizes early fills.
* While following a **VWAP trajectory**, the strategy **aggressively executes trades**, focusing on more **taker orders**.
* This approach sacrifices **cost efficiency** in favor of **minimized opportunity cost** and **quick execution**.

**When to Use This Strategy**

* **High Trading Urgency** – Ideal when **immediate execution** is more important than cost efficiency.
* **Aversion to Opportunity Cost** – Best for traders looking to **avoid missing price movements** due to slow execution.
* **Markets with Low Taker Fees** – Suitable when **taker fees are negligible** relative to execution speed benefits.

**Potential Drawbacks**

* **Higher Market Impact** – Aggressive taker behavior can **move the market**, leading to **less favorable fills**.
* **Higher Fees** – A **higher proportion of taker orders** results in **increased trading costs**.

This strategy is best for traders who need **fast execution and market certainty**, even if it means **paying higher fees and accepting potential market impact**.

#### **Aggressive Taker Configurations**

| [Trajectory](/creating-and-submitting-orders/advanced-settings/trajectories)               | [VWAP](/creating-and-submitting-orders/advanced-settings/trajectories/vwap) |
| ------------------------------------------------------------------------------------------ | --------------------------------------------------------------------------- |
| [Passiveness](/creating-and-submitting-orders/advanced-settings/passiveness)               | 0.02                                                                        |
| [Discretion](/creating-and-submitting-orders/advanced-settings/discretion)                 | 0.08                                                                        |
| [Alpha Tilt](/creating-and-submitting-orders/advanced-settings/alpha-tilt)                 | 1                                                                           |
| [Max OTC Percentage](/creating-and-submitting-orders/advanced-settings/max-otc-percentage) | 0%                                                                          |
| [Passive Only](/creating-and-submitting-orders/advanced-settings/passive-only)             | Disabled                                                                    |
| [Active Limit](/creating-and-submitting-orders/advanced-settings/active-limit)             | Disabled                                                                    |
| [Reduce Only](/creating-and-submitting-orders/advanced-settings/reduce-only)               | Disabled                                                                    |
| [Strict Duration](/creating-and-submitting-orders/advanced-settings/strict-duration)       | Disabled                                                                    |

<br>


# Target Time

<figure><img src="/files/iMA8JlC9heYugY0IvwAP" alt=""><figcaption><p>Execution with Target Time</p></figcaption></figure>

The **Target Time** strategy is designed for traders who need to **execute trades around a specific future event**. It provides **precise timing control**, using a [**Target Time trajectory**](/creating-and-submitting-orders/advanced-settings/trajectories/target-time) to optimize execution around a designated point in time.

**How It Works**

* Traders configure two key parameters:
  * **Target Time (UTC)** – The point at which execution is most concentrated.
  * **Interval (in minutes)** – The total execution window, defining how far trades are spread before and after the target time.
* The engine follows a **normal distribution** for order execution:
  * The **mean** is the target time.
  * The **standard deviation** is **10% of the total order duration**.
  * **68% of executions** occur within the **middle 20% of the total duration**, ensuring most trades happen near the target time.

**When to Use This Strategy**

* **Event-Driven Trading** – Ideal for executing trades around **scheduled market events, announcements, or economic releases**.
* **Precise Timing Requirements** – Best when **trades must be concentrated around a specific time**.
* **Controlled Execution** – Helps **manage market exposure** within a defined execution window.

**Potential Drawbacks**

* **Market Volatility Risks** – If the market **moves unpredictably** near the target time, execution may be impacted.
* **Timing Sensitivity** – Misjudging the event’s impact or timing could lead to **suboptimal execution**.
* **Symmetric Execution** – The strategy **does not adapt to real-time market shifts**, potentially missing favorable conditions outside the set window.

This strategy is best for traders looking to **align execution with key events** while maintaining **controlled exposure and precise timing**.

#### **Target Time Configurations**

| [Trajectory](/creating-and-submitting-orders/advanced-settings/trajectories)               | [Target Time](/creating-and-submitting-orders/advanced-settings/trajectories/target-time) |
| ------------------------------------------------------------------------------------------ | ----------------------------------------------------------------------------------------- |
| [Passiveness](/creating-and-submitting-orders/advanced-settings/passiveness)               | 0.02                                                                                      |
| [Discretion](/creating-and-submitting-orders/advanced-settings/discretion)                 | 0.08                                                                                      |
| [Alpha Tilt](/creating-and-submitting-orders/advanced-settings/alpha-tilt)                 | 0                                                                                         |
| [Max OTC Percentage](/creating-and-submitting-orders/advanced-settings/max-otc-percentage) | 0%                                                                                        |
| [Passive Only](/creating-and-submitting-orders/advanced-settings/passive-only)             | Disabled                                                                                  |
| [Active Limit](/creating-and-submitting-orders/advanced-settings/active-limit)             | Disabled                                                                                  |
| [Reduce Only](/creating-and-submitting-orders/advanced-settings/reduce-only)               | Disabled                                                                                  |
| [Strict Duration](/creating-and-submitting-orders/advanced-settings/strict-duration)       | Disabled                                                                                  |


# Market

<figure><img src="/files/GpRn6ayfqgEnsUp4PMIv" alt=""><figcaption></figcaption></figure>

A **Market Order** is executed **immediately** at the **best available price**. Unlike limit orders, market orders prioritize **execution speed** over price control, ensuring that trades are filled as quickly as possible.

**How It Works**

* A **buy market order** purchases the asset at the **lowest available ask price**.
* A **sell market order** sells the asset at the **highest available bid price**.
* Orders are submitted immediately when clicked
* The system will show a loading state while the order is being processed
* Orders are placed at the current market price for instant execution

### Quick Buy/Sell

The Market Strategy panel in the Order Form provides quick buy and sell buttons with pre-configured sizing options to enable rapid trading execution. These buttons allow you to place market orders instantly without manually entering quantities.

#### Percentage-Based Buttons (Top Row)

The first row uses percentage-based sizing relative to your available balance:

* 10% - Uses 10% of your notional balance
* 25% - Uses 25% of your notional balance
* 50% - Uses 50% of your notional balance
* 75% - Uses 75% of your notional balance
* 100% - Uses 100% of your notional balance

**Buy Logic:** If you have a negative base asset balance (short position), these buttons will buy the base asset to cover your position. Otherwise, they use your notional balance to buy.

**Sell Logic:** If you have a negative base asset balance (short position), these buttons will sell notional balance to cover your position. Otherwise, they sell your base asset balance.

#### Dollar Amount Buttons (Bottom Row)

The second row provides fixed dollar amount options:

* $250 - Places a $250 order
* $1K - Places a $1,000 order
* $2.5K - Places a $2,500 order
* $10K - Places a $10,000 order
* **L1 (Bottom Right Corner Dynamic Number) -**  Uses the exact amount available at the best price (Level 1 order book). <sub>The L1 (Level 1) button is always dynamic and cannot be changed.</sub>

  **Buy:** L1 button buys the quantity at the best ask price\
  **Sell:** L1 button sells the quantity at the best bid price

#### Customizing Button Values

1. Click the Edit icon (pencil) next to "Quick Buy" or "Quick Sell"
2. The dollar amount buttons will become editable text fields
3. Enter your desired values (the first 4 buttons can be customized)
4. Click the Save icon (checkmark) to confirm changes
5. Click the Cancel icon (X) to discard changes

#### Customization Notes

* Only the first 4 dollar amount buttons can be customized
* Your custom values are saved locally and will persist between sessions
* Values should be entered as numbers (e.g., "500" for $500)

### **When to Use a Market Order**

* **Immediate Execution** – Ensures the order is filled **instantly**.
* **High Liquidity Markets** – Works best when **there is sufficient order book depth**.
* **Urgent Trades** – Ideal for traders prioritizing **execution speed over price control**.

**Considerations**

* **No Price Guarantee** – The final execution price may **differ from the last traded price**.
* **Potential Slippage** – In **highly volatile markets**, slippage may occur, leading to **less favorable fills**.
* **Higher Fees** – Market orders typically **incur taker fees**, which can be **higher than maker fees** associated with limit orders.

This order type is best for traders who **need certainty of execution**, even if it means accepting potential price fluctuations and higher fees.

<br>


# Limit

<figure><img src="/files/Do5g9oHRoCr3o8qwJIHG" alt=""><figcaption><p>Execution with Limit</p></figcaption></figure>

A **Limit Order** allows traders to set a **maximum purchase price (for buys)** or **minimum selling price (for sells)**. Unlike market orders, limit orders provide **price control** but do **not guarantee execution**.

**How It Works**

* A **buy limit order** executes **only at the limit price or lower**.
* A **sell limit order** executes **only at the limit price or higher**.
* If the market price does not reach the limit price, the order remains **open until filled, modified, or canceled**.

**When to Use a Limit Order**

* **Price Control** – Ensures execution at a **desired price or better**.
* **Avoiding Slippage** – Protects against **unfavorable price movements**, especially in volatile markets.
* **Passive Execution** – Helps **reduce trading fees** by avoiding taker fees.
* **Retail-Sized Orders** – Works well for **smaller trades** that do not significantly impact market liquidity.

**Considerations**

* **No Execution Guarantee** – If the market **never reaches the limit price**, the order may remain unfilled.
* **Partial Fills Possible** – Orders may be **partially executed** if there is **insufficient liquidity** at the limit price.
* **Not Ideal for Large Trades** – Large limit orders may become **visible in the order book**, potentially influencing market behavior.

This order type is best for traders who **prioritize price control over immediate execution** and are willing to wait for optimal conditions.

<br>


# IOC

<figure><img src="/files/LjcnQdQza8kn9hdeQhGw" alt=""><figcaption><p>Execution with IOC</p></figcaption></figure>

The **Immediate-Or-Cancel (IOC)** strategy is designed for traders who need **fast execution with minimal market exposure**. The engine attempts to fill **all or part of an order immediately**, and any **unfilled portion is automatically canceled**. This strategy helps traders **capture available liquidity** without leaving orders open in the market.

**How It Works**

* The engine submits the order for **immediate execution**.
* Any **unfilled portion is instantly canceled**.
* Orders can be placed as **market or limit orders**.
* If multiple accounts are selected, the **Smart Order Router (SOR)** directs the order to the venue offering the **best price and liquidity**.

**When to Use This Strategy**

* **Urgent Execution** – Best for trades that need to be **filled quickly**.
* **Managing Large Orders** – Helps capture liquidity **without affecting market prices**.
* **Volatile Markets** – Reduces exposure to **fast-moving market conditions**.

**Potential Drawbacks**

* **Partial Fills** – Only part of the order may execute, leaving the rest unfilled.
* **Missed Opportunities** – Since unfilled portions are **canceled immediately**, traders might miss **favorable price movements**.

This strategy is ideal for traders who prioritize **speed and liquidity capture** while minimizing exposure to **open order risks**.


# Iceberg

<figure><img src="/files/H8HiXvjifuv6hwko7FJB" alt=""><figcaption><p>Execution with Iceberg</p></figcaption></figure>

The **Iceberg** strategy minimizes market impact by **splitting large orders into smaller, discrete slices**. Each slice is placed **sequentially** as the previous one fills, preventing the full order size from being exposed to the market.

**How It Works**

* The **Slices parameter** determines how many smaller orders the parent order is split into.
* Each slice size is **randomized within a ±5% range** to reduce the risk of market participants detecting the order pattern.
* If multiple accounts are selected, the engine **selects the venue with the best price for the first slice** and continues **routing all subsequent slices to that venue**.
* The platform displays only one order placement for the parent order, while **individual fills** appear in the **Fills section**.

<figure><img src="/files/QFMYVxKOuuO4tLX7Yp4V" alt=""><figcaption><p>Order Filled with Iceberg</p></figcaption></figure>

**When to Use This Strategy**

* **Large Orders** – Ideal for executing **sizable trades** without revealing the full order size.
* **Reducing Market Impact** – Helps **prevent price movement** by keeping order sizes small.
* **Maintaining Anonymity** – Useful when traders want to **conceal the full extent** of their positions.

**Potential Drawbacks**

* **Slower Execution** – Large orders may take **longer to complete**, depending on market conditions.
* **Venue Lock-In** – Once the **first slice is executed at a venue**, all subsequent slices are **sent to the same venue**, even if better prices emerge elsewhere.

This strategy is best for traders looking to **execute large trades discreetly**, reducing **market impact and visibility** while maintaining **controlled execution**.


# Exit Conditions

<figure><img src="/files/4dDHIhJJneOKNoGypVAn" alt=""><figcaption></figcaption></figure>

### Overview

Exit Conditions allow you to automatically create **Take Profit** and **Stop Loss** orders that will execute when your main order is filled. These are separate orders that are created alongside your primary order and will only activate once your main order has been completed.

### Basic Mechanics

1. **Parent Order Completion:** Exit condition orders only become active after your main (parent) order has been fully filled
2. **Child Order Creation:** When you place an order with exit conditions, the system creates separate Take Profit and/or Stop Loss orders
3. **Mutual Exclusion:** If one exit condition order executes, the other is automatically cancelled
4. **Batch Grouping:** All related orders (main order + exit conditions) are grouped together for easy management

### Order Types

**Take Profit Orders**

* **Purpose:** Automatically sell your position when the price moves favorably
* **For Buy Orders:** Triggers a sell order when price reaches or exceeds your target price
* **For Sell Orders:** Triggers a buy order when price drops to or below your target price

**Stop Loss Orders**

* **Purpose:** Automatically limit your losses when the price moves against you
* **For Buy Orders:** Triggers a sell order when price drops to or below your stop price
* **For Sell Orders:** Triggers a buy order when price rises to or exceeds your stop price

### Exit Strategy Types

You can choose from three different execution strategies for your exit conditions:

#### 1. Maker

* **Best for:** When you want to limit your exposure to taker fees
* **Execution:** Places limit orders at or near the current market price
* **Duration:** Uses the same duration as your parent order
* **Risk:** May not fill if price moves away quickly

#### 2. VWAP (Volume Weighted Average Price)

* **Best for:** Large orders where you want to minimize market impact
* **Execution:** Executes over time to achieve the volume-weighted average price
* **Duration:** Uses the same duration as your parent order
* **Risk:** Moderate execution risk, good balance of price and timing

#### 3. Taker

* **Best for:** When you need fast or immediate execution
* **Execution:** Uses market orders for instant fills
* **Risk:** Higher execution cost but guaranteed fills

### Price Validation Rules

#### Take Profit Prices

* For Buy Orders: Must be greater than or equal to current market price
* For Sell Orders: Must be between 0 and current market price

#### Stop Loss Prices

* For Buy Orders: Must be between 0 and current market price
* For Sell Orders: Must be greater than or equal to current market price

### Important Considerations

#### Order Dependencies

* Exit condition orders will not execute until your main order is fully filled
* If your main order is cancelled, all exit condition orders are automatically cancelled
* Only one exit condition can execute - if Take Profit triggers, Stop Loss is cancelled and vice versa

#### Risk Management

* No Guarantees: Market conditions can change rapidly, and exit orders may not execute at your exact target price
* Slippage: In volatile markets, actual execution prices may differ from your target prices
* Gap Risk: In extreme market conditions, prices may gap beyond your stop loss levels


# Scale Orders

<figure><img src="/files/8FptM6PKl3N76h4WCYgY" alt=""><figcaption></figcaption></figure>

### Scale Orders Feature Overview

Scale Orders is an advanced trading feature that allows you to create multiple limit orders distributed across a price range, rather than placing a single order at one price point.

### Key Benefits

* Reduced Market Impact: Large orders are broken into smaller pieces to minimize price disruption
* Improved Fill Rates: Multiple price levels increase the probability of execution
* Automated DCA: Systematic accumulation or distribution across price ranges
* Liquidity Provision: Create order grids for market making strategies
* Risk Distribution: Spread execution risk across multiple price points

### Core Concept

Instead of placing one large order at a single price, Scale Orders automatically creates multiple smaller orders spread across a price range. For example:

* Instead of: 1 order for 10 BTC at $110,000
* You get: 10 orders of 10 BTC each, spread from $100,500 to $115,000

### Key Parameters

<figure><img src="/files/H1cEkj981DZs00GXCwJ1" alt=""><figcaption></figcaption></figure>

#### **Price Range**

* **From Price:** Starting price for the order ladder (can be percentage or absolute)
* **To Price:** Ending price for the order ladder
* **Price Input Modes:**
  * Percentage mode: -1% to +1% (relative to current market price)
  * Absolute mode: $49,500 to $50,500 (fixed dollar amounts)

#### **Distribution Controls**

* **Price Skew** (-1 to +1): Controls where orders are placed (density across limit price range)
  * `0`: Even distribution
  * `+1`: More orders concentrated near the "To Price" (higher price end)
  * `-1` More orders concentrated near the "From Price" (lower price end)
* **Size Skew (-1 to +1):** Controls how much is allocated to each order (quantity distribution)

  * `0`: Equal size for all orders
  * `+1`: Larger orders at the edges (both from and to price), smaller in the middle
  * `-1`: Larger orders in the center, smaller at the edges

### Visual Representation of Price and Size Skew

**Price Skew**

```
Price Skew = -1 (crowded at start):
$99.00 ●●●●●●●●●●
$99.25 ●●●●●●●
$99.50 ●●●●
$99.75 ●●
$101.00 ●

Price Skew = 0 (linear):
$99.00 ●●●●●●●●●●
$99.50 ●●●●●●●●●●
$100.00 ●●●●●●●●●●
$100.50 ●●●●●●●●●●
$101.00 ●●●●●●●●●●

Price Skew = +1 (crowded at end):
$99.00 ●
$99.25 ●●
$99.50 ●●●●
$99.75 ●●●●●●●
$101.00 ●●●●●●●●●●
```

**Important Context:**

* **Buy orders**: `p_from > p_to` (descending prices: $99.00 → $99.90)
* **Sell orders**: `p_from < p_to` (ascending prices: $100.10 → $101.00)

### Size Skew

{% code overflow="wrap" %}

```
Size Skew = 100% (larger sizes at the prices near the 'from' price when you're buying):
Order 1: $99.00 ████████████ (20% of total)
Order 2: $99.25 ████████ (15% of total)
Order 3: $99.50 ██████ (12% of total)
Order 4: $99.75 ████ (8% of total)
Order 5: $101.00 ██ (5% of total)

Size Skew = 0 (uniform distribution):
Order 1: $99.00 ████████████ (20% of total)
Order 2: $99.25 ████████████ (20% of total)
Order 3: $99.50 ████████████ (20% of total)
Order 4: $99.75 ████████████ (20% of total)
Order 5: $101.00 ████████████ (20% of total)

Size Skew = -100 (larger sizes towards the 'to' price when you're buying):
Order 1: $99.00 ██ (5% of total)
Order 2: $99.25 ████ (8% of total)
Order 3: $99.50 ██████ (12% of total)
Order 4: $99.75 ████████ (15% of total)
Order 5: $101.00 ████████████ (20% of total)

Do the opposite when you are selling (so 100% Skew if you want most of the qty sold to be at the limit prices near your market prices, -100% if you most of the quantity sold near the higest limit prices)
```

{% endcode %}

The visualizations shows that Size Skew affects the **thickness/quantity** of each order, while Price Skew affects the **spacing/density** of orders across the limit price range.

**Order Count**

* Number of individual orders to create (1-40 orders)
* Each order gets a portion of your total quantity

#### Order Properties

<figure><img src="/files/qn5FkCREfBCdI6b28W2i" alt="" width="563"><figcaption></figcaption></figure>

Each generated order inherits:

* Strategy and execution parameters from the base order
* Duration and scheduling settings
* Account and pair specifications
* Risk management settings (passiveness, discretion, etc.)

### Limitations and Considerations

* **Minimum Order Sizes:** Each individual order must meet exchange minimum size requirements
* **Maximum Order Count:** Limited to a maximum of 40 orders per batch
* **Price Precision:** All prices rounded to exchange tick size requirements
* **Capital Requirements:** Total quantity must be available in selected accounts

### Troubleshooting

#### Common Issues

* **Insufficient Liquidity:** Reduce order count or narrow price range
* **Minimum Size Violations:** Increase total quantity or reduce order count
* **Price Range Too Narrow:** Widen range to accommodate minimum tick sizes

#### Error Messages

* **"Need one of the qty fields":** Specify either base or quote quantity
* `"order_count must be > 0":` Set order count to at least 1
* `"total_qty must be > 0":` Specify a positive total quantity
* `"Unable to get price for pair":` Verify pair is available on selected exchange

#### <br>

<br>


# Use Cases and Best Practices

### Use Cases

#### Dollar Cost Averaging (DCA)

**Buy Strategy:** Distribute buy orders below current market price

* **Range:** -2% to -0.5%
* **Benefit:** Systematic accumulation during price declines

**Sell Strategy:** Distribute sell orders above current market price

* **Range:** +0.5% to +2%
* **Benefit:** Gradual profit-taking during price rallies

#### Liquidity Provision

**Market Making:** Create symmetric order grids around current price

* **Buy range:** -1% to -0.1%
* **Sell range:** +0.1% to +1%
* **Benefit:** Capture bid-ask spreads and provide market liquidity

#### Volatility Capture

**Wide Range Strategy:** Place orders across a broader price range

* **Range:** -5% to +5%
* **Benefit:** Capture significant price movements in either direction\\
* Liquidity Consideration: Ensure sufficient liquidity exists at your target price levels
* Exchange Selection: Consider exchange-specific order book depth and fees
* Timing: Avoid placing during high volatility periods unless intentional

### Best Practices

#### Parameter Selection

* Order Count: 5-20 orders typically provide good granularity without over-complication
* Price Range: Consider market volatility and your risk tolerance
* Skew Settings: Use positive price skew for trending markets, negative for mean reversion

#### Risk Management

* Position Sizing: Ensure total quantity aligns with your risk management rules
* Range Width: Wider ranges capture more movement but require larger capital allocation
* Monitoring: Regularly review and adjust parameters based on market conditions

#### Performance Optimization

* Liquidity Consideration: Ensure sufficient liquidity exists at your target price levels
* Exchange Selection: Consider exchange-specific order book depth and fees
* Timing: Avoid placing during high volatility periods unless intentional

<br>


# Advanced Settings

<div align="center"><figure><img src="/files/gsB2kb5KWq4S3oZ0gUK4" alt="" width="375"><figcaption></figcaption></figure></div>

The **Advanced Settings** allow traders to **fine-tune execution parameters**, providing greater control over order behavior. While **preset strategies** offer convenient deployment, **advanced settings** enable traders to customize execution according to their **specific trading objectives**. Each strategy in the platform is built on **execution trajectory and additional configurable parameters**, allowing for a tailored approach to market execution.

#### **Key Configurations**

* [**Trajectory**](/creating-and-submitting-orders/advanced-settings/trajectories) – Defines the **execution schedule** of an order, determining **how trades are distributed over time**.
* [**Participation Rate Target**](/creating-and-submitting-orders/advanced-settings/participation-rate-target) – Sets the **desired market participation rate**, dynamically adjusting execution to stay on target.
* [**Participation Rate Limit**](/creating-and-submitting-orders/advanced-settings/participation-rate-limit) – Restricts the **maximum percentage of market volume** an order can engage with at any given time.
* [**Spot Leverage**](/creating-and-submitting-orders/advanced-settings/spot-leverage) – Enables **margin trading for spot orders** (applicable for Bybit; other exchanges manage leverage separately).
* [**Passiveness**](/creating-and-submitting-orders/advanced-settings/passiveness) – Adjusts **how far limit orders are placed from the market price**, impacting execution speed and price efficiency.
* [**Discretion**](/creating-and-submitting-orders/advanced-settings/discretion) – Introduces **controlled randomness** to execution, reducing predictability and minimizing market impact.
* [**Alpha Tilt**](/creating-and-submitting-orders/advanced-settings/alpha-tilt) – Skews **execution timing** by **front-loading or back-loading the order** based on market expectations.
* [**Max OTC Percentage**](/creating-and-submitting-orders/advanced-settings/max-otc-percentage) – Defines the **portion of an order that can be executed via OTC (over-the-counter) channels** instead of public markets, reducing market impact and exchange fees.
* [**Max Clip Size**](/creating-and-submitting-orders/advanced-settings/max-clip-size) – Sets the **maximum size of passive orders**, managing visibility and execution speed.
* [**Passive Only**](/creating-and-submitting-orders/advanced-settings/passive-only) – Ensures that **all orders are maker orders**, preventing the engine from taking liquidity.
* [**Active Limit**](/creating-and-submitting-orders/advanced-settings/active-limit) – Allows **limit orders to be dynamically placed** at more aggressive prices, continuously adjusting with market movements.
* [**Reduce Only**](/creating-and-submitting-orders/advanced-settings/reduce-only) – Ensures orders **only decrease an existing position**, preventing unintended increases.
* [**Strict Duration**](/creating-and-submitting-orders/advanced-settings/strict-duration) – Stops execution **at the specified time**, regardless of whether the full target quantity has been executed.


# Trajectories

In **tread.fi**, **trajectories** define **how orders are executed over time**, shaping how trades interact with **market conditions**. Each trajectory provides a **foundational execution approach**, and [**strategies**](/creating-and-submitting-orders/strategies) are built on top of these trajectories, applying specific configurations to achieve different **trading objectives**.

#### **The Four Primary Execution Trajectories**

1. **VWAP (Volume Weighted Average Price)**
   * Adjusts execution **based on market volume**, ensuring orders **scale with liquidity**.
   * Suitable for traders aiming to **minimize market impact** while maintaining a presence in the order flow.
2. **TWAP (Time Weighted Average Price)**
   * Executes orders at a **fixed, consistent rate** over time, **ignoring market volume fluctuations**.
   * Useful for traders seeking **steady execution** with a predictable trading footprint.
3. **Target Time**
   * Concentrates execution **around a specific future event**, ensuring the bulk of the trade occurs **near the designated time**.
   * Ideal for **event-driven trading strategies** that require **precise timing**.

#### **Choosing the Right Trajectory**

Each trajectory serves a different purpose, and selecting the right one depends on **trading objectives, market conditions, and risk tolerance**. Strategies in **tread.fi** leverage these trajectories, applying **advanced configurations** to fine-tune execution behavior.


# VWAP

<figure><img src="https://lh7-rt.googleusercontent.com/docsz/AD_4nXewzBll5bzWDPpWvY2JGGzfWsmcztUG-6Q5MrHgfc6x70c8iy4VGuwdqTdcaW4ct6Y17aF3QVwnldCr_WhQlwdAD5CfQBxElzFwbTqSK2CXmemX0NVnvbp7R6GvZ58AcEUrlBMCzw?key=2WiiUTnIpT80_43pMWB-IUW2" alt=""><figcaption><p>Example of VWAP Trajectory</p></figcaption></figure>

The **VWAP trajectory** aims to **match the market’s volume-weighted average price** over the order duration. It dynamically **adjusts execution based on market volume**, ensuring **steady participation while minimizing market impact**.

#### **How It Works**

* The engine **monitors real-time market volume** and adjusts order execution accordingly.
* Trades are executed **more aggressively during high-volume periods** and **more passively during low-volume periods**.
* This **dynamic adjustment** helps maintain **steady market participation** while reducing **price disruption**.

#### **When to Use VWAP**

* **For gradual execution** of orders over an extended period.
* **To minimize market impact** by distributing execution across **liquid trading periods**.
* **Best suited for liquid, predictable markets** with stable trading activity.
* **For volume-based execution** that dynamically adjusts to market conditions.

#### **VWAP Limitations**

* **Delayed execution in low-volume periods** may lead to **alpha decay**.
* **Limited response to sudden liquidity events**, as VWAP **relies on historical volume patterns** rather than real-time market shifts.

This trajectory is ideal for traders who **want to execute large orders discreetly** while maintaining **a strong correlation with overall market activity**.


# TWAP

<figure><img src="https://lh7-rt.googleusercontent.com/docsz/AD_4nXckHYJQt--_s0T0wtqRjjf933JWCmcpgIrAm_u-olOyJULKw8wwVurGZpxrWwQlqW38943ENO4b7NC-z07SVcGJVTIRnYLhxvhTJU74ZUD2cabh398QyEl1wMsRh-uYv6l47U3nww?key=2WiiUTnIpT80_43pMWB-IUW2" alt=""><figcaption><p>Example of TWAP Trajectory</p></figcaption></figure>

The **TWAP trajectory** executes an order **at a fixed rate** over its duration, following a **linear execution schedule**. Unlike **VWAP**, TWAP does **not adjust based on market volume**, making it a **simple and predictable execution method**.

#### **How It Works**

* The engine **divides the total order into equal parts** and executes them at **regular intervals** over the specified duration.
* Execution proceeds **at a constant rate**, **ignoring market volume and liquidity fluctuations**.

#### **When to Use TWAP**

* For **straightforward execution strategies** that don’t require volume-based adjustments.
* When trading **illiquid pairs** to ensure **balanced execution** and prevent drastic price fluctuations.
* When **consistent and predictable order flow** is required.
* In markets with **stable or low volume**, where volume-based strategies may not be effective.

#### **TWAP Limitations**

* **Does not factor in market conditions**—executing at a constant rate regardless of liquidity, which can lead to **suboptimal fills**.
* **Constant execution rate may miss short-term alpha opportunities** and does not respond to price trends.

This trajectory is ideal for traders looking for **simple, predictable execution**, particularly in **low-volume or stable markets**.


# Target Time

<figure><img src="/files/lLjP3bqxYEq7wdDfPauc" alt=""><figcaption><p>Example of Target Time Trajectory</p></figcaption></figure>

The **Target Time trajectory** is designed for traders who want to **execute orders around a specific future event**. It follows a **time-based execution approach**, concentrating trading activity **at a designated moment**, providing **precise control over execution timing**.

#### **How It Works**

* Traders configure two parameters:
  * **Target Time (UTC)** – The point when the **highest concentration of trading will occur**.
  * **Interval (minutes)** – Defines the **total duration** of the trade, distributing execution evenly around the target time.
* The engine follows a **normal distribution** for execution:
  * The **mean** is the **target time**.
  * The **standard deviation** equals **10% of the total duration**.
  * **68% of the order** is executed **within the central 20% of the interval**.

#### **When to Use Target Time**

* **Event-Driven Trading** – Ideal for executing trades around **scheduled events**, such as economic reports or earnings releases.
* **Precise Execution Timing** – Best when the majority of trading **must occur at a specific time**.
* **Controlled Risk Exposure** – Helps **manage market exposure** by concentrating execution **within a defined window**.

#### **Target Time Limitations**

* **Sensitivity to Market Volatility** – Unexpected price movements **around the target time** may impact execution quality.
* **Requires Accurate Timing** – Misjudging **the event’s impact or timing** could lead to **suboptimal results**.
* **Limited Flexibility** – The strategy **does not adapt in real-time** to market changes **outside the set execution window**.

This trajectory is ideal for **traders needing precise execution control** around **time-sensitive market events** while managing **risk exposure** efficiently.


# IS

<figure><img src="/files/rF1A3BULCZSo7OKTA6mI" alt=""><figcaption><p>Example of Implementation Shortfall</p></figcaption></figure>

The **IS (Implementation Shortfall) trajectory** is designed to **minimize the difference between the arrival price** (the price at order submission) **and the average execution price**. It dynamically **adjusts the execution schedule** to balance **market impact and timing risk**, making it particularly useful in **volatile or illiquid markets** where slippage is a concern.

#### **How Implementation Shortfall Works**

* Traders set an **aggressive execution profile**, **front-loading** a larger portion of the order to reduce **timing risk**.
* The engine **opportunistically places limit orders** to optimize costs but will **use market orders when necessary** to maintain execution speed.
* The trajectory follows a **VWAP (Volume Weighted Average Price) approach** with [**Alpha Tilt**](/creating-and-submitting-orders/advanced-settings/alpha-tilt) **set to 1**, ensuring **faster initial execution** while balancing cost efficiency.

#### **When to Use Implementation Shortfall**

* **Volatile Market Conditions** – Ideal for **reducing slippage** when price movements are unpredictable.
* **Urgent Trades** – Best for scenarios where **immediate execution** is prioritized over cost.
* **Illiquid Markets** – Helps traders **navigate limited liquidity** while minimizing timing risk.

#### **Implementation Shortfall Limitations**

* **Higher Market Impact** – The **aggressive front-loading** increases the likelihood of influencing market prices.
* **Potentially Higher Costs** – Frequent use of **market orders** may result in **higher taker fees**.
* **Less Suitable for Passive Strategies** – Not ideal if the goal is to **minimize visibility** and maintain a **low-profile market presence**.

This trajectory is best suited for traders who **need fast execution** in **volatile or illiquid markets**, ensuring **reduced slippage while managing execution costs**.


# Participation Rate Target

The **Participation Rate Target** defines the **desired rate at which an order participates in market volume**. The engine dynamically **adjusts execution** to match this target, ensuring steady participation based on **real-time market conditions**.

#### **How It Works**

* **Set as a percentage of total market volume**—e.g., a 10% participation rate means the order aims to execute 10% of all market volume over time.
* The engine uses a mix of **passive and aggressive child orders** to stay on target.
* **Pre-Trade Analytics** estimates the expected time to completion, but actual execution varies **based on market conditions**.

#### **Considerations**

* **Market-Dependent Execution** – Time to fill may **extend or shorten** depending on liquidity and market activity.
* **Flexible Strategy** – The engine **adjusts execution aggressiveness** dynamically if it starts falling behind the target participation rate.

This setting is ideal for traders who want **consistent market presence** while maintaining **control over execution speed and market impact**.


# Participation Rate Limit

The **Participation Rate Limit** sets a **maximum cap** on the rate at which an order participates in the market, ensuring that execution **does not exceed a predefined percentage of total market volume**. This helps **control market impact** and maintain **order pacing**.

#### How It Works

* Defined as a maximum percentage of total market volume (e.g., a 15% limit means the order will never account for more than 15% of the market's traded volume at any time).
* The engine monitors actual participation rate during execution and reduces trading quantities per interval if the limit is exceeded.
* If market volume decreases, the order automatically slows its pace by reducing quantities traded at each schedule point to maintain the limit.
* Duration is not affected — the order will complete within the originally specified time window.

#### Considerations

* **Constrained Execution:** If market volume is insufficient, orders may be underfilled or take longer to execute within the original duration.
* **Quantity Reduction Only:** In low-liquidity conditions, the engine reduces quantities per interval to stay within the limit. The order duration remains unchanged, which may result in partial fills if the original duration is insufficient.
* **No Duration Extension:** This setting only amends quantities downward; it does not affect duration. The order will complete (or partially complete) within the originally specified time window.

This setting is ideal for traders looking to limit market impact, ensuring that execution remains controlled and does not excessively influence market dynamics, even if it means potentially incomplete fills in low-liquidity conditions.


# Passiveness

**Passiveness** determines how far **limit orders** are placed from the market price, balancing **execution speed** and **price efficiency**. A higher Passiveness value means the orders are placed deeper in the book, increasing the likelihood they will be filled passively (as a "maker") but decreasing the certainty of execution.

#### **How It Works**

* **Higher Passiveness (closer to 1)** – Orders are placed **deeper in the order book**, reducing urgency but **improving price efficiency**.
* **Lower Passiveness (closer to 0)** – Orders are placed **closer to the best bid/ask**, increasing **execution probability** but with a **higher risk of adverse selection**.

#### **Considerations**

<figure><img src="https://lh7-rt.googleusercontent.com/docsz/AD_4nXcCnzfjVIw0hHUJx9Nxi0R2jm_rX020wLv1EuDZY2qB0GzVbjWganKNa43oI6TtRg3r5GqaP2qlLPUP6PS8yU_gPhQa71RoCtlLrqCbxYspl7iNz5EW6AAi3NY96zsNMustywuFRA?key=2WiiUTnIpT80_43pMWB-IUW2" alt=""><figcaption><p>Order Placements with High Passiveness</p></figcaption></figure>

**High Passiveness (e.g., 0.8) – Better Pricing, Slower Fills**

* Orders are placed **deeper in the book**, reducing **market impact**.
* Suitable for **large orders**, minimizing execution costs in **stable markets**.

<figure><img src="https://lh7-rt.googleusercontent.com/docsz/AD_4nXdMwL_L66cd9iGDmQpA9QIeX16z7yIiWKBsKsabs8e6e9DbTxOfJqWPI0nFgI0I-gxTJBAsaM-onVATJ44vTmBu-OAbg9nZJpey86egszX0wfBY3x0Pxw2D6D7a-bHBzMwhlQzRjQ?key=2WiiUTnIpT80_43pMWB-IUW2" alt=""><figcaption><p>Order Placements with Low Passiveness</p></figcaption></figure>

**Low Passiveness (e.g., 0.2) – Faster Execution, Higher Fill Probability**

* Orders are placed **closer to the top of the book**, increasing **fill probability**.
* Suitable for **urgent trades**, **volatile markets**, and **short execution windows**.

This setting allows traders to **fine-tune execution behavior**, balancing **cost efficiency and execution speed** based on market conditions.


# Discretion

**Discretion** introduces **controlled randomness** into order execution, making **trading patterns less predictable** and reducing the risk of detection by other market participants. This setting adjusts the balance between **passive execution for better pricing** and **aggressive execution for closer benchmark tracking**.

#### **How It Works**

* **Higher discretion** – Orders rely more on **passive fills**, leading to **better pricing** but greater **variance from the benchmark**.
* **Lower discretion** – Orders track the **benchmark price more closely** but **increase reliance on market orders**, potentially raising execution costs.

#### **Considerations**

<figure><img src="https://lh7-rt.googleusercontent.com/docsz/AD_4nXdf0VvfxXwJI_mj5l__VAlfry2Uum2xgFgHRo6C_S2vYEv6ED42ybJnMQPIH87cvag0JTpUvKQ43IjFUQIaokGWFnHXSKnf44VWsA-FeRq1arL4i1N6apeVosi7OyfaXhfIN9pTTA?key=2WiiUTnIpT80_43pMWB-IUW2" alt=""><figcaption><p>Discretionary Band with High Discretion</p></figcaption></figure>

**High Discretion (e.g., 0.2) – More Passive Fills, Higher Benchmark Variance**

* Optimizes for **better pricing** by favoring **limit orders**.
* Works well with **Post-Only mode**, helping reduce **taker fees**.

<figure><img src="https://lh7-rt.googleusercontent.com/docsz/AD_4nXc04ljqYF5980i6Mj0CIHYIvUwUopMW31iPpsVAkK9ZaeqM7DMgNyo9geO-QGaBbj-rv167PAtAj9fSctoTke3MW_C8qG6uwQEHCEH-I2hPcWAiW0BKjjucMV4UNe6zVSVhHY73Ow?key=2WiiUTnIpT80_43pMWB-IUW2" alt=""><figcaption><p>Discretionary Band with Low Discretion</p></figcaption></figure>

**Low Discretion (e.g., 0.04) – Closer Benchmark Tracking, More Aggressive Execution**

* Prioritizes **staying close to the benchmark** with **faster execution**.
* Relies more on **taker orders**, increasing **execution costs**.

This setting allows traders to **fine-tune execution behavior**, balancing **cost efficiency, order visibility, and benchmark tracking**.


# Active Limit

**Active Limit** enables limit orders to **dynamically follow the market’s midpoint**, ensuring they adjust in real-time as prices fluctuate. This setting helps traders stay **competitive** by continuously updating order placement to reflect market movements.

#### **How It Works**

* **Limit orders are pegged to dynamic price levels**, adjusting as the market moves.
* **Orders are re-pegged every second**, maintaining alignment with current market conditions.

#### **Considerations**

* **Enhances responsiveness**, ensuring limit orders remain near the market price.
* **May increase visibility in the order book**, potentially signaling trading intent.

This setting is useful for traders looking to **stay competitive in fast-moving markets** while maintaining control over order execution.


# Order Templates

<figure><img src="/files/ziVBF4YywJnW9MUcfSKF" alt=""><figcaption></figcaption></figure>

The Save Templates and Load Templates features allow traders to store and reuse pre-configured order settings, reducing the need for repetitive manual input.

### Saving a Template

<figure><img src="/files/VvCUq0fcR6EsRJXHHFwd" alt=""><figcaption></figcaption></figure>

* Click Save Templates at the bottom of the order form to name and store the current configuration.
* The template will save all relevant details, including:
  * Selected Account(s)
  * Trading Pair
  * Quantity
  * Strategy/Advanced Settings
* Once saved, the template can be quickly applied to future trades, ensuring consistency and efficiency.

### Loading a Template

<figure><img src="/files/9GqwGqDPWb6iULDb0IWq" alt=""><figcaption></figcaption></figure>

* Click Load Templates to access previously saved configurations.
* Select a saved template to instantly populate the order form with its settings.
* You can also delete templates that are no longer needed.

For example, if you frequently execute "Buy 100 ETH on Binance at 1% participation rate," you can save this setup and reload it instantly when placing similar trades in the future.


# Pair Naming

Our pair naming is structured to clearly show its characteristics.  Knowing the naming structure is crucial for interacting with the API.

$$
\begin{array}{c}
\text{BASE} \\
\downarrow \\
\text{BTC}
\end{array}
\quad : \quad
\begin{array}{c}
\text{VARIANT} \\
\downarrow \\
\text{PERP}
\end{array}
\quad - \quad
\begin{array}{c}
\text{QUOTE} \\
\downarrow \\
\text{USDT}
\end{array}
$$

### Examples

#### Spot

```
BTC-USDT
```

The **Variant** is omitted.

#### Perpetual Future

```
ETH:PERP-USDT
```

{% hint style="info" %}
Inverse perps generally have USD as quote value
{% endhint %}

#### Dated Future

```
SOL:FUTURE_2025.03.28-USDC
```

The **Variant** always starts with **FUTURE\_** and ends with date: **YYYY.MM.DD**

#### Option

$$
\begin{array}{c}
\text{BASE} \\
\downarrow \\
\text{BTC}
\end{array}
\quad : \quad
\begin{array}{c}
\text{TYPE} \\
\downarrow \\
\text{CALL}
\end{array}
\quad @ \quad
\begin{array}{c}
\text{STRIKE} \\
\downarrow \\
\text{98000}
\end{array}
\quad \_ \quad
\begin{array}{c}
\text{EXPIRY} \\
\downarrow \\
\text{2024.11.22}
\end{array}
\quad - \quad
\begin{array}{c}
\text{QUOTE} \\
\downarrow \\
\text{USDT}
\end{array}
$$

The **Variant** has a more complex structure: <mark style="color:green;">`TYPE`</mark>`@`<mark style="color:blue;">`STRIKE`</mark>`_`<mark style="color:red;">`EXPIRY`</mark>


# Max Clip Size

**Max Clip Size** defines the **largest allowable passive (MAKE) order per placement**, controlling **order visibility and execution speed** in the order book.

#### **How It Works**

* **Higher Max Clip Size** – Places **larger individual orders**, leading to **faster execution** but **greater order book visibility**.
* **Lower Max Clip Size** – Places **smaller orders**, reducing **market impact** but potentially **slowing execution**.

#### **Configuration**

* **High Max Clip Size (e.g., $10,000) – Faster Execution**
  * Suitable for **liquid markets** where **large trades can be absorbed without excessive price movement**.
* **Low Max Clip Size (e.g., $1,000 - $5,000) – Lower Market Impact**
  * Suitable for **illiquid assets**, minimizing **order book visibility** to reduce **potential market signaling**.

This setting allows traders to **control order exposure**, balancing **execution speed and market impact** based on liquidity conditions.


# OOL Pause

<figure><img src="/files/g8mpuM6ljXNVZYega8zV" alt=""><figcaption><p>Limit Price with OOL Pause Enabled</p></figcaption></figure>

Out-of-Limit (OOL) Pause is a configuration that controls how the engine handles periods when the market price moves outside the specified limit price.

### **How It Works**

* When OOL Pause is **enabled**, the engine will pause execution when the market price is outside the limit price. These periods are not included in the execution schedule.

<figure><img src="/files/hKrDTN9GT5Qlx4jquUmr" alt=""><figcaption><p>Execution with OOL Pause Enabled</p></figcaption></figure>

* When OOL Pause is **disabled**, the engine will attempt to "catch up" after a period when the market was outside the limit price, resuming execution to meet the original schedule.

<figure><img src="/files/jYDxnqTE6pwdjPYMJppv" alt=""><figcaption><p>Execution with OOL Pause Disabled</p></figcaption></figure>

### **Considerations**

* Compatibility: OOL Pause cannot be used with strategies that target a participation rate, such as Target Participation Rate, Market Maker, and Aggressive Maker.
* Default Setting: This configuration is disabled by default.


# Dynamic Limit Price

<figure><img src="/files/sn4L25RjuTGhyDEZ9KTe" alt=""><figcaption></figcaption></figure>

Dynamic Limit Price allows you to set limit orders that automatically adjust based on real-time market conditions. Instead of using a static limit price, this feature recalculates the limit price approximately every five seconds, ensuring that orders remain aligned with market movements.

### How It Works

Traders can configure a Dynamic Limit Price using two modes: Pair Offset and Custom.

{% tabs %}
{% tab title="Pair Offset" %}

<figure><img src="/files/maX2SENS0pZTAmybuRRN" alt="" width="563"><figcaption><p>Pair Offset</p></figcaption></figure>

* This mode sets the limit price relative to another trading pair on any venue.
* It is particularly useful for some arbitrage strategies, ensuring orders are placed only when a favorable price discrepancy exists.
* The Offset field allows traders to set a positive or negative price adjustment.
* The calculated dynamic limit price is displayed in the preview box and updates automatically every five seconds.
  {% endtab %}

{% tab title="Custom Offset" %}

<figure><img src="/files/5xVeiZSb2DIFAWQh3FxW" alt="" width="563"><figcaption><p>Custom Offset</p></figcaption></figure>

* This mode allows traders to define a **custom pricing logic** that adjusts dynamically based on their specific criteria.
* Syntax and capabilities are aligned with [conditional orders](/creating-and-submitting-orders/advanced-settings/order-conditions) (without variable tracking).
* This provides additional flexibility, allowing traders to fine-tune execution conditions beyond standard pair-based offsets.
  {% endtab %}
  {% endtabs %}

This feature is particularly valuable for traders engaging in algorithmic execution and spread trades where precise limit order placement is critical. By leveraging Dynamic Limit Price, traders can improve execution quality while maintaining greater control over price-sensitive trades.


# Spot Leverage

The **Spot Leverage** parameter enables **margin trading for spot markets**, allowing traders to use **leverage on supported exchanges**.

#### **Considerations**

* **Bybit-Specific Feature** – This setting is only relevant for **Bybit**, where it must be enabled to activate margin trading for spot orders.
* **Exchange-Specific Handling** – Some exchanges, such as **OKX**, manage spot leverage through **account configurations outside of tread.fi**, meaning this parameter does not apply.

This setting is useful for traders looking to **enhance capital efficiency** by using **leveraged spot trading** where supported.


# Alpha Tilt

**Alpha Tilt** skews the execution schedule, **front-loading or back-loading trades** based on market expectations. This setting modifies **order distribution over time** without changing the underlying execution trajectory.

#### **How It Works**

* **Positive Alpha Tilt (1)** – **Front-loads execution**, executing **more aggressively early** and slowing down later.
* **Negative Alpha Tilt (-1)** – **Back-loads execution**, starting **slowly** and accelerating towards the end.
* **Neutral Alpha Tilt (0)** – Maintains **even execution** throughout the order duration.

#### **Considerations**

<figure><img src="https://lh7-rt.googleusercontent.com/docsz/AD_4nXcsmeTdRdZAlNdxfdSsqLi6ix37accsQ6OlT40aFGBsx2QaRHT0ocPq7LEq95MYbXItZYjO0QdIBnHaKTRqyJHt3t9BhlkCRHj4nHz4bVHMhHuGhgFL-g5k5V9DABJH681uQufV6A?key=2WiiUTnIpT80_43pMWB-IUW2" alt=""><figcaption><p>Trajectory with Positive Alpha Tilt</p></figcaption></figure>

**Positive Alpha Tilt (1) – Front-Loaded Execution**

* Best for **news-driven trading** or **price reversion strategies** where early execution is critical.

<figure><img src="https://lh7-rt.googleusercontent.com/docsz/AD_4nXfeDtfF8Im4fnoFyO2rYy4SZdANjm61NcbWhuEKzGbfk6xdERkKT7z2i3Ilz665nxXEN8SfshaRUlCbFnkseSOaddNy0Bu_A1Lk5bPzfuMsCdV-XrMhyqbO76Hf6d6DyzuOGKMXUw?key=2WiiUTnIpT80_43pMWB-IUW2" alt=""><figcaption><p>Trajectory with Neutral Alpha Tilt</p></figcaption></figure>

**Negative Alpha Tilt (-1) – Back-Loaded Execution**

* Ideal for **trading into liquidity events** or **momentum-driven strategies** where later execution is preferred.

<figure><img src="https://lh7-rt.googleusercontent.com/docsz/AD_4nXetCnaNf1Jj8ClVvQm2Qeik7aphlFuXUSIxaI1wHFrJbK5MiKrEhfrdBv8kAwNvJqKZHeL51diQNdQXZv5NUBokF-il2FLjWnNzzSn997XY-8TUshzLDB20QSo_s_mr4CWXQms_UQ?key=2WiiUTnIpT80_43pMWB-IUW2" alt=""><figcaption><p>Trajectory with Negative Alpha Tilt</p></figcaption></figure>

**Neutral Alpha Tilt (0) – Even Execution**

* Suitable for **balanced execution**, ensuring steady participation over time.

This setting allows traders to **fine-tune execution timing**, optimizing for early or late fills based on **market conditions and strategy objectives**.


# Max OTC Percentage

**Max OTC Percentage** defines how much of an order can be executed via **RFQs (Request for Quotes)** instead of public exchanges. This setting helps balance **cost efficiency** and **execution speed** by determining the share of an order that can be filled **off-exchange** through OTC channels.

#### **How It Works**

* **Higher Max OTC Percentage** – More execution via **RFQs**, reducing **taker fees** and minimizing **market impact**.
* **Lower Max OTC Percentage** – More execution on **exchanges**, prioritizing **speed and liquidity access**.

#### **Considerations**

* **High Max OTC Percentage (e.g., 80%) – More RFQ Execution**
  * Best for **large trades**, minimizing **slippage and exchange fees**.
* **Low Max OTC Percentage (e.g., 20%) – More Exchange Execution**
  * Ideal for **fast execution** in **highly liquid markets**.

This setting allows traders to **optimize execution costs** while maintaining **control over order placement** between **OTC and exchange execution**.


# Passive Only

**Passive Only** ensures that the engine **does not cross the spread or take liquidity**, meaning all fills will be **maker-type (limit) orders**. This setting helps traders **add liquidity to the market** while reducing execution costs, as **maker fees are typically lower than taker fees**.

#### **How It Works**

* The engine **only places passive limit orders**, preventing orders from executing immediately as taker orders.
* Helps traders **optimize execution costs** by avoiding **higher taker fees**.

#### **Considerations**

* **Fill quantities may occasionally fall below the trajectory's lower bound**, as the engine **cannot guarantee fills without taking liquidity**.
* **Orders may not reach the full target quantity** if the **duration expires** before all fills are completed.

This setting is useful for traders prioritizing **cost efficiency over execution speed**, ensuring all orders contribute to market liquidity.


# Reduce Only

**Reduce Only** ensures that orders **strictly decrease an existing position**, preventing accidental increases. When enabled, this safeguard helps traders **close or trim positions** without inadvertently expanding them.

#### **How It Works**

* The **Reduce Only instruction** is passed to the exchange on **every order slice**, ensuring that only position-reducing trades are executed.
* Prevents new position openings, limiting execution to **position reductions only**.

#### **Considerations**

* **Not available on OKX**, as the exchange does not support this functionality.
* Helps maintain **risk control** by preventing **accidental exposure increases**.

This setting is useful for traders who need to **exit or scale down positions** without risking unintended position growth.


# Strict Duration

Strict Duration strictly applies to **participation rate** and/or **passive-only** orders and instructs the engine to stop exactly at the specified duration or end time, regardless of whether the full target quantity has been filled.

**How It Works**

* For participation rate and passive-only strategies, duration is normally a guideline for sizing - the order continues running until the target quantity is fully executed. Strict Duration\
  overrides this behavior, forcing the order to close at the duration end.
* For other strategies **(e.g. Impact Minimisation)**, duration is already a hard stop by default - **Strict Duration has no additional effect.**

**Volume Target/Limit with End Time**

* When you set an end time shorter than the computed duration (based on your volume target and market capacity), the engine uses your end time and adjusts the order quantity downward to what's achievable within that window at the target participation rate.
* The order may complete the adjusted quantity before your end time rather than running the full duration with a partial fill.
* **Example:** You set up a participation rate target order. The engine predicts that based on your target participation rate and overall order size, it will take at least 24 hours to complete. You decide to set a 12-hour strict duration to override this.
  * The engine compares these two values:
    * 24 hours - how long the order would take to complete based on market volume
    * 12 hours - your desired execution window
  * Since the full quantity can't be completed within 12 hours at your target participation rate, the engine adjusts the order quantity downward at submission to roughly what's achievable in that window (with a 1.25x buffer). At 12 hours, the order strictly stops with the adjusted target quantity.

**Considerations**

* The order may remain partially filled if market conditions do not support full execution within the set timeframe.
* Ideal for traders requiring time-bound execution on participation rate or passive-only strategies.


# Order Conditions

Using logic considering price/time conditions, TaaS can delay an order until those conditions are met. Once the order is released, this condition is not re-evaluated or considered in order execution.

<figure><img src="/files/DUYPc6qDMRbfIWdqFBS7" alt="" width="375"><figcaption><p>A Green Tick indicate that Condition is Valid</p></figcaption></figure>

<figure><img src="/files/XTNovlHJHaO6bKbkG65m" alt=""><figcaption><p>Viewing conditional orders</p></figcaption></figure>

## Symbols

### Valid Dynamic Terms

#### Pair Price

```
{Pair}@{Exchange} // ex. ETH:PERP-USDT@Bybit
```

#### Order Fields

```
:qty // order qty in target token
```

orders are submitted with either base\_asset\_qty or quote\_asset\_qty, which is targeting the base or quote token.  Ex. :qty will evaluate to 150 if your order is BUY 150 ETH or 100,000 if BUY 100,000 USDT of ETH

```
:current_target // current scheduled target qty
```

the engine tries to place up to a certain amount at all times and this value changes over time

```
:filled // executed qty in target token
```

always converted to target token same as :qty

#### Current Time

```
TIME // current time in UTC
```

### Valid Operators

* max ( ) , min ( )
* +, -, \*, /, \*\* (exponentiate) , % (modulo)&#x20;
* \>= , <= , > , < , == , !=
* AND , OR

Note the differences between the initialization (?=), assignment (:=), and comparison (==) operators.&#x20;

## Sample Use Cases

### Time Conditions

Using **TIME** as a placeholder for the current time, you can set a time in the future to trigger an order. For example, this order will run on midnight (UTC) on 2023-09-24:

```
TIME > dt2023-09-24T00:00
```

### Price Conditions

By using the common placeholder \<Token Pair>@\<Exchange>, you can assign a price condition. For example, this order will only run when BTC-USDT on Binance hits 30,000 or more:

```
BTC-USDT@Binance > 300000
```

*Note: If you would like the algo order to only trade above this price as well, be sure to place a limit price as well.*

Using basic math operators, you can also specify ratios to trigger orders. For example, this order will run when the BTC/ETH ratio reaches 20 on Binance:

```
( BTC-USDT@Binance / ETH-USDT@Binance ) > 20
```

Taking advantage of other operators, another example can be an order that only triggers when the spread between ETH and ETH:PERP reaches a certain threshold:

```
( ETH-USDT@Binance - ETH:PERP-USDT@Binance ) > 1
```

## Variable Tracking

In certain scenarios, a previous state may be needed to facilitate the right condition. In this case, you can set variables to track through each consecutive evaluation. There are three operators that faciliate variable tracking:&#x20;

* To assign a value to keep track\
  \<Variable name> := \<Dynamic value>
* To assign a value only if null (for initialization)\
  \<Variable name> ?= <(Dynamic) Value>
* To end line and go to the next clause\
  ;

A perfect example is a trailing stop:

<pre><code>TRAILING_STOP ?= BTC-USDT@Binance * 0.7 ;
<strong>TRAILING_STOP := MAX ( BTC-USDT@Binance * 0.7 , TRAILING_STOP ) ;
</strong>TRAILING_STOP > BTC-USDT@Binance
</code></pre>

Breaking down this complex example line-by-line:

* ```
  TRAILING_STOP ?= BTC-USDT@Binance * 0.7 ;
  ```
* Set the initial value of the TRAILING\_STOP variable to 30% away from the current price. This line will not be run unless the TRAILING\_STOP variable is null, which is only true on the first evaluation.
* ```
  TRAILING_STOP := MAX ( BTC-USDT@Binance * 0.7 , TRAILING_STOP ) ;
  ```
* On the evaluation, set the value of TRAILING\_STOP to the higher of either the current 30% away on BTC-USDT or the previous TRAILING\_STOP
* ```
  TRAILING_STOP < BTC-USDT@Binance
  ```
* Run the order if the ultimate condition of BTC-USDT price is less than the TRAILING\_STOP price

##


# Pre-Trade Analytics

<figure><img src="/files/sqfULSIOZfu2zfGSRpke" alt="" width="464"><figcaption><p>Pre-trade Analytics</p></figcaption></figure>

After entering your order details (pair, size, and exchange), the **Pre-Trade Analytics** section provides estimated metrics to help assess market conditions before execution.

> Important Note: All pre-trade analytics depend on sufficient historical data to generate reliable estimates. For newly listed tokens, low-liquidity pairs, or trading pairs with limited trading history, these metrics may be inaccurate or unavailable. The Participation Rate calculation requires expected volume data (or falls back to historical volume), Market Volatility requires at least 12 hours of price data, and Market Volume requires sufficient history to establish expected patterns. When data is insufficient, metrics may display as "N/A" or return unreliable values.

**Participation Rate**

This metric estimates the percentage of expected market volume your order is expected to represent over its duration, based on predicted volume patterns (Expected Scheduled Volume) adjusted for recent market activity via the Expected Volume Ratio. A higher participation rate may indicate greater potential market impact.&#x20;

**Market Volatility**

This represents the historical realized volatility of the selected pair on your chosen exchange, calculated from hourly price movements over the past 24 hours and projected over the order duration. The value represents the expected price movement within one standard deviation (1σ). Longer-duration orders are generally exposed to more volatility.

**Market Volume**

This metric compares realized market volume over the past 24 hours against expected volume patterns (e.g., time of day, day of week). A value above 1.0 indicates current activity is above typical levels, while below 1.0 suggests below-average activity. This helps determine whether current market conditions are more or less active than usual.


# Glossary

This glossary provides definitions specific to how terms are used within the platform. Some definitions may differ from traditional trading terminology to align with the platform's unique functionalities and strategies.

**Algo Execution:** Automated trading strategies that execute orders based on pre-defined algorithms within tread.fi, optimizing for speed, cost, or market impact.

**Alpha Tilt:** A parameter that skews the execution schedule, front-loading or back-loading trades based on market expectations.

**Active Limit:** A parameter that enables dynamic limit order placement, adjusting prices in real-time according to market conditions.

**Arbitrage:** A strategy that exploits price differences between markets or exchanges, facilitated through tread.fi multi-leg execution features.

**Assets Under Management (AUM)/Total Equity:** The current net worth of a portfolio, reflecting all assets and trading results. On the platform, "Assets Under Management (AUM)" visually tracks this historical value. Calculated as cash, stablecoins, current market value of spot holdings, and net unrealized PnL from open derivative positions.

**Basis Trading:** A strategy involving simultaneous buying of a spot asset and selling of a futures contract to profit from price discrepancies.

**Cross-Exchange Arbitrage:** Buying an asset on one exchange and selling it on another to exploit price differences, automated through tread.fi's smart order routing.

**Directional Bias:** Indicates a portfolio's overall tendency to profit from either upward (long bias) or downward (short bias) market movements, derived from the net notional value of open contracts. A positive bias signifies a net bullish stance, while a negative bias indicates a net bearish stance.

**Discretion:** A parameter that introduces controlled randomness into order execution, reducing predictability and minimizing detection by the market.

**Dynamic Limit Spread:** A setting that defines the minimum price difference required for executing spread trades, ensuring profitability thresholds are met.

**Exposure Tolerance:** Adjusts execution speed between legs in multi-leg trades to maintain balance and reduce market exposure when one leg fills faster than the other.

**Funding Rate Arbitrage:** A strategy that exploits differences in funding rates between perpetual swaps and spot markets.

**Good 'Til Canceled (GTC):** An order that remains active on the tread.fi platform until executed or manually canceled.

**Gross Market Value (GMV):** The notional value of all open positions, representing the aggregate size of assets controlled through leverage. Calculated as the sum of spot, cash, and absolute notional values of all open derivative contracts.

**Iceberg Order:** A large order split into smaller "slices" to reduce visibility and market impact, managed automatically by the tread.fi engine.

**Immediate-Or-Cancel (IOC):** An order that executes all or part immediately, with any unfilled portion canceled. The tread.fi Smart Order Router selects the best venue for execution.

**Implementation Shortfall (IS):** An execution trajectory designed to minimize the difference between the arrival price and the final execution price.

**Limit Order:** An order to buy or sell at a specified price or better.

**Maker:** A trader or order that adds liquidity to the market by placing limit orders that are not immediately filled, earning maker fees when executed.

**Market Impact:** The influence that large trades have on the price of an asset. tread.fi strategies aim to minimize this through intelligent execution.

**Market Maker (Strategy):** A strategy within tread.fi that places passive limit orders to reduce taker fees and minimize market impact. Unlike traditional market making, this strategy does not provide continuous bid-ask spreads.

**Market Order:** An order to buy or sell immediately at the best available price.

**Max Clip Size:** Defines the maximum size of individual passive orders in a larger trade to control visibility and execution speed.

**Max OTC Percentage:** The maximum portion of an order that can be executed through over-the-counter (OTC) channels.

**Out-of-Limit (OOL) Pause:** Pauses execution when the market price moves outside the set limit, preventing trades from executing at unfavorable prices.

**Passive Only:** A setting that ensures the engine only places maker orders, avoiding taking liquidity from the market.

**Participation Rate:** The percentage of total market volume a trader aims to participate in over a specified period.

**Participation Rate Limit:** Sets the maximum percentage of market volume an order can engage with at any time to prevent overexposure.

**Pre-Trade Analytics:** Insights provided before execution, including expected costs, participation rates, and market conditions, tailored to tread.fi's algorithms.

**Reduce Only:** Ensures that trades can only decrease an existing position, preventing accidental increases.

**Smart Order Router (SOR):** Directs orders to the exchange or liquidity venue offering the best price and execution conditions, a core feature of tread.fi.

**Slices:** Smaller portions of a parent order, automatically managed by the engine to minimize market impact and maintain order anonymity.

**Spread Trade:** A strategy involving the simultaneous buying and selling of related assets to profit from price differences, easily configured through tread.fi.

**Statistical Arbitrage:** Uses quantitative models to exploit pricing inefficiencies between correlated assets.

**Strict Duration:** Ensures execution stops at the set end time, regardless of whether the full target quantity has been completed.

**Taker:** A trader or order that removes liquidity from the market by executing against existing orders in the order book, typically incurring taker fees.

**Target Participation Rate:** A strategy that aims to maintain a consistent participation rate in the market without a fixed duration.

**Target Time:** A strategy that concentrates execution around a specific future event, optimizing for timing.

**Time Weighted Average Price (TWAP):** Executes orders at a steady rate over a specified period, regardless of market conditions.

**Triangular Arbitrage:** Exploits price discrepancies between three different assets within the same exchange.

**Unrealized PnL (Profit & Loss):** The theoretical profit or loss on open trading positions, based on current market prices versus entry prices. It is "on paper" and not yet realized by closing the position.

**Volume Weighted Average Price (VWAP):** Adjusts execution based on market volume to match or improve upon the market’s volume-weighted average price.


# Order History

Clicking "Orders" on the top navigation bar opens a table displaying all historical orders for the selected user account. Traders can filter this list using various parameters to locate specific trades efficiently.

Click the magnifying class to view your execution history and performance

<figure><img src="/files/kJH4yz7ciUgwLslPpPMW" alt=""><figcaption></figcaption></figure>

### Available Filters

<figure><img src="/files/Sx0gXH44I2ZlzmxcYPrp" alt=""><figcaption><p>Filter Menu in Order Management</p></figcaption></figure>

* Date Range – Narrow down the timeframe of displayed orders.
* [Trading Pair](/creating-and-submitting-orders/advanced-settings/order-templates/pair-naming) – View orders for a specific asset pair.
* Side – Filter by buy or sell orders.
* [Strategy](/creating-and-submitting-orders/strategies) – Display orders based on the selected execution strategy.
* Market Type – Choose between different market types (e.g., spot, perps, futures and options).
* Order Status – Select from Active, Canceled, Finished, Scheduled, Paused, Conditional.
* Order Type – Refine by Single, [Multi](/other-trading-modes/multi-spread-basis-portfolio-trading), or Chained orders.

### Order History Table

There is no limit to the number of historical orders displayed, but pagination helps navigate through large datasets efficiently.

<figure><img src="/files/WUXhjBgYZX2sQ56lnyXy" alt=""><figcaption><p>Order History Table in Order Management</p></figcaption></figure>

Each row in the order history table includes key details such as:

* Accounts – The account associated with the order.
* [Pair](/creating-and-submitting-orders/advanced-settings/order-templates/pair-naming) – The trading pair for the order (e.g., BTC:PERP-USDT).
* Side – Whether the order is a Buy or Sell or [Multi](/other-trading-modes/multi-spread-basis-portfolio-trading).
* Executed Notional – The total value of the executed portion of the order.
* Target Quantity – The originally intended trade size.
* Average Executed Price – The price at which the order was filled on average.
* Filled Percentage – The proportion of the order that has been completed.
* Time Start – The timestamp when the order was initiated.
* [Strategy](/creating-and-submitting-orders/strategies) – The trading strategy used for execution.
* Status – The current state of the order (e.g., Active, Finished, Canceled).
* Order Actions – Available actions such as Resubmit, Amend, Pause, Cancel, or View Order Details.


# Manage Order

### Manage Order

<figure><img src="/files/mACwDP5Etsiqgj0k0UVg" alt="" width="375"><figcaption><p>Manage Order in Order Management</p></figcaption></figure>

From the Order History table, traders can also take the following actions on each orders:

* [Pause](/order-tracking-and-portfolio-management/manage-order/pause-order): Temporarily halt execution of an active order. (Only available for active orders)
* [Resubmit Order](/order-tracking-and-portfolio-management/manage-order/resubmit-order): Submit a new order identical to the original order, with the same target quantity.
* [Resubmit Remaining Order](/order-tracking-and-portfolio-management/manage-order/resubmit-order): Submit a new order using the same configuration, but with the quantity set to the unfilled portion of the original order. (Only available for incomplete orders)
* [Cancel](/order-tracking-and-portfolio-management/manage-order/cancel-order): Terminate an active order before completion. (Only available for active orders)

### Viewing Order Details

<figure><img src="/files/qUt1fcEQmcxIaa7lt2Ud" alt="" width="375"><figcaption></figcaption></figure>

Clicking on view order in the manage order section brings up a [detailed order viewer](/order-tracking-and-portfolio-management/real-time-algo-order-tracking), displaying a breakdown of individual executions, price movements, and strategy performance. For multi-leg trades, child orders are displayed in this table, while the parent order structure remains accessible through the Multi-Order Viewer.


# Resubmit Remaining Order

The **Resubmit Remaining Orders** feature allows traders to **execute only the unfilled portion** of a previously **paused or canceled order**, ensuring efficient management of incomplete trades.

#### **How It Works**

* Click **Resubmit Remaining** on a **partially filled order** with **Paused** or **Canceled** status.
* Review the **Remaining Order Execution Summary**, which displays the **unfilled quantity** and order parameters.
* Click **Place Buy/Sell Order** to confirm and submit the order for execution.

#### Limitations

* This feature is **only available for orders that were partially filled** before being **paused or canceled**.
* The **resubmitted order adpats to the market conditions at the time of execution** and does not attempt to match the original schedule.
* **Execution configuration remain the same**, ensuring consistency with the original strategy.

The **Resubmit Remaining Orders** feature provides a **streamlined way to complete partially filled trades**, allowing traders to efficiently manage execution without creating a new order from scratch.


# Resubmit Order

#### **Resubmit Orders**

The **Resubmit Orders** feature allows traders to **create a new order** using the same configuration as a previously **active, paused, or canceled order**. This enables quick re-entry into the market without manually setting up a new order.

#### **How It Works**

1. Click **Resubmit** on any **active, paused, or canceled order**.
2. A new order is created with **the same parameters** as the original order.
3. Execution **starts fresh**, following the market conditions at the time of resubmission rather than the original schedule.

This feature provides **flexibility in managing execution**, allowing traders to efficiently restart or replicate an order in response to market conditions.


# Amend Order

The **Amend Orders** feature allows traders to **modify specific parameters** of an active order, providing flexibility to adjust execution strategies **without canceling and resubmitting**.

#### **How It Works**

<figure><img src="/files/OWBZs6kTb0ZquF09k0pq" alt="" width="375"><figcaption><p>Amend Order Pop-up</p></figcaption></figure>

1. Click **Amend** on an **active order** to adjust its parameters in real time.
2. The engine **applies changes immediately**, allowing the order to continue execution with the updated settings.

#### **Adjustable Parameters & Limitations**

* **Duration** – Can be **extended** but **not shortened** to less than the time already elapsed.
* **Quantity** – Can be **increased** but **not reduced** below the amount already executed.
* **Participation Rate Target** – Adjustable for orders using the **Target Participation Rate strategy**.
* **Target Time and Interval** – For **Target Time strategy orders**, both can be modified, but the new **Target Time must be set in the future**.
* **Limit Price** – Can be adjusted to reflect **changing market conditions**.

The **Amend Orders** feature provides **real-time flexibility**, ensuring that orders remain aligned with **evolving market conditions** while maintaining execution continuity.


# Pause Order

The **Pause Orders** feature allows traders to **temporarily stop an in-progress order** without canceling it, providing flexibility to respond to market conditions in real time.

#### **How It Works**

<figure><img src="/files/TUCN7dQw8g3RbLKwkSAu" alt=""><figcaption><p>Execution with Pause Orders</p></figcaption></figure>

1. Click **Pause** on an **active order** to halt execution.
2. The **execution trajectory chart** will display a **gray area** indicating paused periods (see image).
3. When resumed, the order **continues execution based on current market conditions** without attempting to "catch up" to the original schedule.

#### **Limitations**

* **Unavailable for Target Time Orders** – The **Pause function is not supported** for orders using the **Target Time strategy**.
* **Automatic Cancellation** – Orders **paused for more than 24 hours** will be **automatically canceled**.

The **Pause Orders** feature provides traders with **greater execution control**, allowing them to **adjust their strategy** without committing to a full cancellation.


# Cancel Order

The **Cancel Orders** feature allows traders to **manually terminate an active order** before completion, preventing further execution. This provides flexibility to **lock in profits, limit exposure, or respond to unfavorable market conditions**.

#### **How It Works**

1. Click **Cancel** on an **active order** to immediately stop further execution.
2. The **order status updates to Canceled**, and no further trades will be executed for that order.
3. **Any unfilled portion remains unexecuted**, and no new placements will be made.

#### **Limitations**

* **Irreversible Action** – Once an order is canceled, it **cannot be resumed** and must be resubmitted as a **new order** if execution is needed.

#### **Cancel All Orders**

Traders can **cancel all active orders at once** from the **main execution page** or **order management page**. Clicking **Cancel All** will:

* **Immediately stop execution for all open orders** across selected accounts.
* Provide a **fast way to manage risk** and exit multiple trades simultaneously.

The **Cancel Orders and Cancel All** feature gives traders **full control over execution**, allowing them to quickly **exit positions, manage risk, and adapt to changing market conditions**.


# Real-Time Algo Order Tracking

<figure><img src="/files/Kljw6GHBqtHuUhq4poOk" alt=""><figcaption><p>Algo Order Tracking Dashboard Interface</p></figcaption></figure>

The dashboard provides real-time insights into an order’s execution, allowing users to track performance and market interaction as the trade progresses.&#x20;

You can access this by clicking the magnifying glass from your order table:

<figure><img src="/files/hFqPsIG5EgZ3xs9o9ScW" alt=""><figcaption></figcaption></figure>

### Execution Statistics

<figure><img src="/files/x5XAQ2LP6ch7whPm6kRJ" alt=""><figcaption></figcaption></figure>

<table><thead><tr><th width="178">Benchmark</th><th>Description</th></tr></thead><tbody><tr><td><strong>Slippage</strong></td><td>Side-adjusted natural logarithm of <em>executed price</em> divided by <em>arrival price</em>. The arrival price is the mid quote at the time of order submission. The benchmark price will not change as the order progresses and the realized cost will be a reflection of as-of volume weighted executed prices compared to the arrival price.</td></tr><tr><td><strong>VWAP Slippage</strong></td><td>Side-adjusted natural logarithm of <em>executed price</em> divided by <em>VWAP.</em> As the order trades, VWAP is a dynamic benchmark price that reflects the as-of volume weighted average price of all market trades that print on the selected exchanges from order entry to current time. The VWAP cost will be a reflection of as-of volume weighted executed prices compared to the VWAP benchmark price.</td></tr><tr><td><strong>Exchange Fee</strong></td><td><em>Exchange fee</em> divided by <em>traded notional</em>. </td></tr><tr><td><strong>Participation Rate</strong></td><td>The value column contains the cumulative market volume. The Benchmark column is the current participation rate (executed volume divided by cumulative market volume). </td></tr></tbody></table>

**Execution Trajectory Chart (Fixed-Duration Orders)**

<figure><img src="/files/HVNc3cF8nkLJReEIylqE" alt=""><figcaption></figcaption></figure>

For fixed-duration orders, the execution schedule chart displays the planned execution quantity (grey) along with the upper and lower discretion bounds (dashed lines). The actual cumulative fills are represented by a solid white line, tracking how the order is executed over time. Each fill is marked with:

* **Green** - Passive (maker) fill
* **Red** - Aggressive (taker) fill
* **Orange Square** - OTC fill
* **Orange Triangle** - Active placement pending execution

**Participation Rate Target Orders**

<figure><img src="/files/YNlMciqZfj2UF7tv9yah" alt=""><figcaption></figcaption></figure>

For orders using a participation rate target, the order viewer presents a breakdown of executed volume, cumulative realized participation rate, and market volume for context. Users can toggle between this view and the schedule-based execution chart.

**Price Chart and Execution Context**

For trades executed in version 1.4.3 or later, the price chart illustrates where fills occurred relative to the bid-ask spread during the order’s duration. The chart includes:

* **Dotted Grey Line** - Average executed price
* **Dashed Violet Line** - VWAP benchmark
* **Orange Line** - Dynamic limit price
* **Bid/Ask Traces** - Represented in green (bid) and red (ask); for narrow spreads, they may overlap.

This real-time execution tracking helps traders monitor their order's performance, assess market conditions, and refine execution strategies based on data-driven insights.


# Manage Order

<figure><img src="/files/JLDIweYEQ1M5R2wkDb6b" alt=""><figcaption><p>Manage Order on the Order Execution Dashboard</p></figcaption></figure>

The **Manage Orders** section within the **Order Execution Dashboard** allows traders to actively control their execution in real time without creating new orders from scratch. Available actions include:

* [**Resubmit Orders**](/order-tracking-and-portfolio-management/manage-order/resubmit-order) – Quickly re-enter the market by submitting a new order based on a previously executed one.
* [**Amend Orders**](/order-tracking-and-portfolio-management/manage-order/amend-order) – Modify key parameters of an active order without canceling it, allowing for real-time adjustments.
* [**Pause Orders**](/order-tracking-and-portfolio-management/manage-order/pause-order) – Temporarily halt execution without canceling the order, with the option to resume based on current market conditions.
* [**Cancel Orders**](/order-tracking-and-portfolio-management/manage-order/cancel-order) – Terminate an active order at any time, preventing further execution.

Each action is detailed on its own page, explaining functionality, use cases, and execution behavior.


# Markouts

<figure><img src="/files/KYG5EOfdiXq2Uf0XRx3I" alt=""><figcaption></figcaption></figure>

Markouts are an aggregation of prices (in log return space) 10, 5 and 1 seconds before and after each individual fill.&#x20;

* <mark style="color:red;">Red Line</mark> - Taker markouts with error bars (1 SD in <mark style="color:orange;">orange</mark>)
* <mark style="color:green;">Green Line</mark> - Maker markouts with errors bars (1 SD in <mark style="color:blue;">blue</mark>)
* <mark style="color:orange;">Orange Bars</mark> - Spread in basis points&#x20;

The first thing to remember about markouts are that they are defined by sample bias. Maker fills tend to only get filled if the market moves into your resting orders and the engine may rely on taker fills more often when prices are moving away (and resting orders aren't getting filled). Rest assured, as long as you keep this bias in mind, markouts can be immensely helpful in understanding the behavior of other participants on the limit order book and market microstructure that affect your maker/taker rates.&#x20;

#### Terminology:

* **Drift-away** - Positive sided returns. If buying, increasing prices and if selling, decreasing prices. Generally a bad thing because prices are getting worse.
* **Drift-towards**. Negative sided returns. If buying, decreasing prices and if selling, increasing prices. Generally a good thing because prices are getting better.&#x20;
* **Flat returns**: No changes in prices, 0 returns.

### Taker Fills

#### What you want to see

* **Minimal impact (flat returns) post-fill**. If you see that the price does not move after you get your fill, it is a sign that your aggressive liqudity taking is equaled by resting orders on the other side.
* **No drift-away pre-fill.** If you see the prices moving away before you get your fill, you may be waiting too much on a competitive side to take liquidity. Front-loading your order could coerce the engine to send out more taker orders earlier on the in the order. *Note*, if your taker fills are very close together, they could be interfering with each other. &#x20;

<div data-full-width="true"><figure><img src="/files/lZZwLumjkrKSYEhnhjXN" alt="" width="375"><figcaption></figcaption></figure></div>

#### What you don't want to see

* **Drift-away post-fill.** If prices move away after the fill, especially 5 and 10 seconds post-fill, your taker orders could be signaling to the makers on the other side about your working order. Once again, if taker fills are coming in very frequently, they may be interfering with each other, so more caution should be given to return profiles that are flat pre-fill and moves away post-fill. If the slope is constant pre/post-fill, there may be external factors at play.
* **Drift-towards throughout the entire period**. You should be getting passive resting orders filled in these drift profiles. You are probably placing too deep in the book and reverting to taking liquidity as a result.

<figure><img src="/files/3zwNk2jL4hv4azAHIDcm" alt="" width="375"><figcaption></figcaption></figure>

### Maker Fills

#### What you want to see

* **Drift-towards pre-fill, flat returns post-fill**. This is the ideal scenario for when resting orders should get filled. It will almost always be the case as the market has to move towards you for resting orders to get filled, but with the flat returns post-fill, you can be certain that you couldn't have placed deeper in the book and got the resting order filled (adverse selection).
* **Flat returns throughout**. If trading on an illiquid market, this is the best case scenario as you were able to get your resting order filled at near. Had this kind of return profile not resulted in a fill because you were too passive, the engine may have not got the fill at all (if post-only) or had to rely on aggressive taker fills, both scenarios are objectively worse.

<figure><img src="/files/0Kar8tZCEF1BoIZy3MAP" alt="" width="375"><figcaption></figcaption></figure>

#### What you don't want to see

* **Drift-towards pre/post-fill.** Although the pre-fill returns is normal, seeing drift-towards post-fill indicates that you could have placed deeper in the book and the aggressive parties on the other side would have filled your order (adverse selection).

<figure><img src="/files/kyakGwLo0JjteXqVhzTi" alt="" width="375"><figcaption></figcaption></figure>

### OTC Fills

#### What you want to see

* **Flat**. If your OTC trade is making the price move on exchange, your trade may carry too much  context to market makers who have influence over prices.

#### What you don't want to see

* **Drift-away pre-fill**. If you see prices move away from you pre-fill, you are leaking information at the RFQ stage. This is inevitable, but something that should be scrutinized. In crypto, RFQs are generally two sided, so there may be even more suspicious behavior going on by market makers.


# Portfolio

### Overview

The Portfolio section is your comprehensive trading account management hub, providing detailed insights into your account's financial position, performance, and trading activity. This section is organized into three main tabs, each offering unique perspectives on your trading account data.

<figure><img src="/files/17oZ6IR6t4FRbmwaZH1h" alt=""><figcaption></figcaption></figure>

Your primary account dashboard and asset overview. The Portfolio tab serves as your main command center, providing a complete view of your account's financial health and performance. This tab is available for all account types (CEX and DEXs).

* **Real-time Portfolio Metrics:** Total equity, directional bias, and unrealized PnL
* **Interactive Equity Charts:** Historical performance with Total Equity and Gross Market Value (GMV) tracking
* **Comprehensive Asset Breakdown:** Detailed tables organized by market type (Perpetual Futures, Spot, Cash, etc.)
* **Risk Management Tools:** Liquidation risk assessment for leveraged positions
* **Historical Trends:** Multiple time frames (1d, 7d, 30d, 1y) for performance tracking
* **Data Export:** CSV download functionality for external analysis

For further details specific to this tab please see [here](/order-tracking-and-portfolio-management/portfolio/portfolio-tab).

***

#### [Funding Tab](/order-tracking-and-portfolio-management/portfolio/funding-rate-analytics)

The Funding tab provides in-depth analysis of your funding-related costs and activities, helping you understand the true cost of maintaining leveraged positions. This tab is only available for Non-DEX accounts.

**Key Features:**

* **Funding Cost Analysis:** Daily and cumulative funding payments/receipts
* **Borrowing Activity:** Track borrowing costs and patterns over time
* **Position-specific Funding:** Individual funding rates and costs per trading pair
* **Historical Trends:** Visual charts showing funding patterns across different time periods
* **Performance Impact:** How funding costs affect your overall returns
* **Time Frame Controls:** Analyze funding data across 1d, 7d, 30d, and 1y periods

For further details specific to this tab please see [here](/order-tracking-and-portfolio-management/portfolio/funding-rate-analytics).

***

#### [vCeFi Tab](/order-tracking-and-portfolio-management/portfolio/vcefi-verified-cefi)

The vCeFi tab provides transparency and verification of your trading activity through on-chain proofs. This feature enables you to share verifiable trading performance data while maintaining privacy. This tab is only available for Non-DEX accounts.

**Key Features:**

* **Trading Proofs:** Blockchain-verified records of your trading activity
* **Performance Metrics:** Total equity, unrealized PnL, and notional exposure tracking
* **Volume Analysis:** Cumulative trading volume and activity patterns
* **Shareable Performance:** Generate shareable images of your trading proofs
* **Privacy Controls:** Toggle between private and public proof sharing
* **Historical Data:** Track performance and volume over time

For further details specific to this tab please see [here](/order-tracking-and-portfolio-management/portfolio/vcefi-verified-cefi).

### Account Type Differences

#### Non-DEX Accounts (Centralized Exchanges + Hyperliquid)

* All three tabs available: Portfolio, Funding, and vCeFi
* Full feature set: Complete risk management, funding analysis, and proof generation
* Advanced metrics: Liquidation risk, funding costs, and detailed position analysis

#### DEX Accounts (On-Chain Swaps/Trading via OKXDEX Integration)

* **Portfolio tab only:** Simplified view focused on asset holdings
* **Chain-specific organization**: Assets grouped by blockchain (Ethereum, BSC, Base, Solana)
* **Streamlined interface**: Optimized for multi-chain portfolio management

<br>


# Portfolio (Tab)

### Overview

The Portfolio tab provides a comprehensive view of your account's financial position, including real-time balance information, performance metrics, and detailed asset breakdowns. This tab is the central hub for monitoring your trading account's health and performance.

### Key Features

#### Portfolio Summary Cards

<figure><img src="/files/0k9PlgDAvxb7Yih6o6kq" alt=""><figcaption></figcaption></figure>

The top section displays three key summary cards.

**Total Equity**

* **Displays:** Your current overall portfolio value in USD
* **Calculation:** Sum of cash, spot asset holdings, and net profit/loss from all open perpetual futures positions
* **Time comparisons:** Shows percentage changes over 1 day and 7 days&#x20;

**Directional Bias**

* **Displays:** Your portfolio's overall lean towards long or short positions and an overall net exposure value in USDT with bias classification
* **Classifications:**
  * **Long Bias:** More long positions than short
  * **Short Bias:** More short positions than long
  * **Delta Neutral:** Balanced long/short exposure
  * **Adjusted L/S Ratio:** Shows the percentage breakdown of your long/short exposure

**Unrealized PnL (Not available for DEX accounts)**

* **Displays:** Current profit or loss on your open positions
* **Display:** Value in USDT with ROI percentage

#### Total Equity Chart

<figure><img src="/files/gQR1td0lu83BtYZUrzGX" alt=""><figcaption></figcaption></figure>

A comprehensive chart showing your portfolio's performance over time:

**Chart Features**

* **Total Equity Line:** Your portfolio value over time (white line)
  * **Components included:** Cash/stablecoins + spot holdings + unrealized PnL from perpetual futures positions
* **Gross Market Value (GMV) Line:** Gross Market Value showing total market exposure (orange line) calculated as:
  * **Sum of absolute notional values** from all perpetual futures positions only
  * **Excludes:** Cash, spot holdings, and other non-position assets
  * **Purpose:** Shows your total leveraged exposure to the market, regardless of direction
* **Time Frame Controls:** Buttons to switch between 1d, 7d, 30d, and 1y views
* **CSV Export:** Download button to export historical equity data

**Chart Interactions**

* Hover over data points to see exact values
* Transfer markers show the amount and asset type of deposits/withdrawals
* Multiple transfers near the same time are grouped and offset for clarity

### Additional Charts (Non-DEX accounts only)

**Notional Exposure Chart**

<figure><img src="/files/EXc2JtCk5MW594mByCqD" alt=""><figcaption></figcaption></figure>

* Shows your net market exposure over time
* Helps track how your position sizes change
* Color-coded: Green for positive exposure, red for negative

**Unrealized PnL Chart**

<figure><img src="/files/gdWIW8GbrBa1uQqZkHqN" alt=""><figcaption></figcaption></figure>

* Displays your unrealized profit/loss over time
* Useful for tracking performance trends
* Shows the impact of market movements on your positions

**Liquidation Risk Panel (Perpetual Futures only)**

<figure><img src="/files/rfxa51Z9Y0y5eJlX0H4y" alt=""><figcaption></figcaption></figure>

* **When shown:** Only appears if you have open perpetual futures positions
* **Key metrics:**
  * **Liquidation Buffer:** Available funds above maintenance margin
  * **Maintenance Margin:** Required margin to maintain positions
  * **Margin Ratio:** Maintenance margin as percentage of wallet balance
  * **Average Leverage:** Weighted average leverage across positions
  * **Risk Assessment:** Color-coded risk levels from safe to high risk
  * **Progress Bar:** Visual representation of liquidation risk

#### 4. Asset Breakdown Tables

Your assets are organized into expandable sections by market type:

**Market Type Categories**

<figure><img src="/files/ZaaHBvnLB4GHXRMcin7f" alt=""><figcaption></figcaption></figure>

* **Perpetual Futures:** Leveraged positions with funding fees
* **Spot:** Regular cryptocurrency holdings
* **Spot Margin:** Leveraged spot positions
* **Cash:** Stablecoins and fiat currencies


# Funding Rate Analytics

### Overview

The Funding tab provides comprehensive analysis of your funding costs and borrowing activities, helping you understand the true cost of maintaining leveraged positions. This tab is exclusively available for CEX (Centralized Exchange) and Hyperliquid accounts and offers detailed insights into your funding costs/payments.

### Key Features

#### Summary Metrics Cards

<figure><img src="/files/PRsvHDitSQDaWkwCa9Hj" alt=""><figcaption></figcaption></figure>

The top section displays four key funding metrics:

**Total Equity**

* **Displays:** Your current overall portfolio value in USD
* **Purpose:** Provides context for funding cost analysis relative to your total account value
* **Usage:** Used to calculate funding return percentage

**Cumulative Funding**

* **Displays:** Total accumulated funding payments/receipts over time
* **Calculation:** Sum of all funding payments/costs since account inception

**Cumulative Borrow**

* **Displays:** Total accumulated borrowing costs over time

**Funding Return**

* **Displays:** Funding impact as a percentage of your total equity
* **Calculation:** `(Total Funding in Period / Total Equity) × 100`
* **Color coding:**
  * Green: Positive funding return (net funding received)
  * Red: Negative funding return (net funding paid)
* **Purpose:** Shows how funding costs affect your overall returns

#### Funding Payments Chart

<figure><img src="/files/vMbgZfqGeKiiwL2A2UPT" alt=""><figcaption></figcaption></figure>

A comprehensive stacked bar chart showing funding activity in 4-hour intervals:

**Chart Features**

* **4-Hour Intervals:** Funding rates are paid every 4 hours at 00:00, 04:00, 08:00, 12:00, 16:00, 20:00 UTC
* **Stacked Bars:** Multiple data series combined in each bar
* **Time Frame Controls:** Buttons to switch between 1D, 7D, 30D, and 1Y views

**Data Series**

* **4-Hour Funding (Green/Red bars)**
  * Green: Positive funding (you received payments)
  * Red: Negative funding (you paid costs)
  * **Calculation:** Net funding payments for each 4-hour period
* **Borrow Costs (Orange bars)**
* **Deposits (Blue bars)**
  * Shows deposits made during each 4-hour period
* **Withdrawals (Pink bars)**
  * Shows withdrawals made during each 4-hour period
  * Displayed as negative values (subtracted from the stack)

**Chart Interactions**

* **Hover Tooltips:** Show exact values for each data series
* **Time Period Selection:** Use 1D, 7D, 30D, 1Y buttons to change the analysis window

**Average Funding Rate Chart**

<figure><img src="/files/qJknVlK0zEhpjXS25vDS" alt=""><figcaption></figcaption></figure>

* **Displays:** Column chart showing funding rates by trading pair
* **Y-Axis:** Funding rate as percentage
* **Purpose:** Compare funding rates across different trading pairs
* **Tooltip:** Shows exact funding rate percentage on hover

**Funding Contribution Chart**

<figure><img src="/files/VJskAKwhXezI8MrY0bQ9" alt=""><figcaption></figcaption></figure>

* **Dispalys:** Pie chart showing each position's contribution to total funding
* **Purpose:** Identify which positions contribute most to your funding costs/benefits
* **Legend:** Shows percentage contribution for each position

#### Positions Table

A detailed table showing funding metrics for each trading pair:

**Table Columns**

* **Symbol:** Trading pair (e.g., BTCUSDT, ETHUSDT)
* **Avg Funding Rate**: Average funding rate as percentage (e.g., 0.0123% = 0.000123)
* **Total Funding:** Net funding amount in USD for the selected time period
* **Contribution:** Percentage of total funding attributed to this position.

### Integration with Other Tabs

#### Portfolio Tab Connection

* Funding costs directly impact your unrealized PnL
* Total equity from Portfolio tab is used in funding return calculations
* Monitor both tabs together for complete performance picture

#### vCeFi Tab Connection

* Funding activity is included in your trading proofs
* Verifiable funding data supports your trading performance claims
* Historical funding data contributes to your trading reputation

The Funding tab is essential for understanding the true cost of leveraged trading and optimizing your position management strategy. Regular monitoring of funding costs helps ensure that funding payments don't erode your trading profits over time.


# vCefi (Verified CeFi)

In Beta

### Overview

The vCeFi (Verifiable Centralized Finance) tab offers on-chain verified trading performance data, allowing you to share proof of your centralized exchange activity. It merges decentralized transparency with centralized efficiency, enabling you to build a verifiable trading reputation while keeping your individual positions private.

You have full control over what data to publicly show or keep private.

### Trader Profile Dashboard

The main dashboard displays comprehensive trading performance metrics:
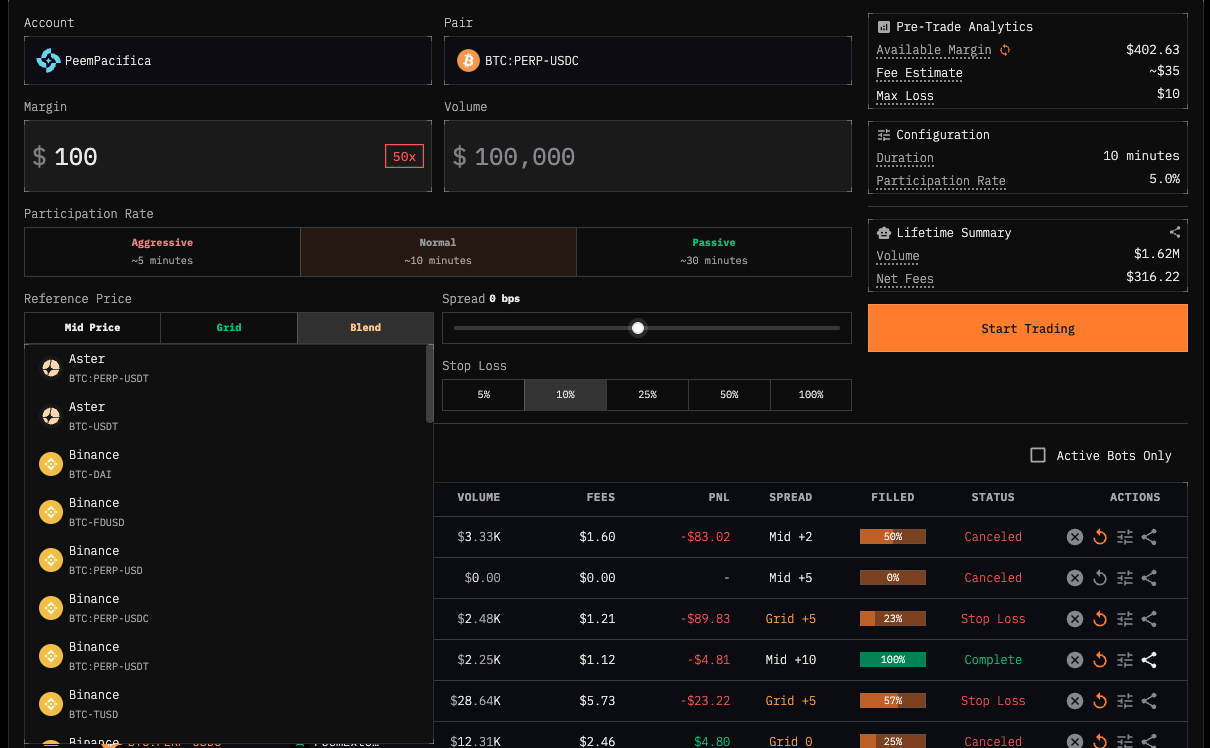
**Performance Charts**

**Unrealized PnL Chart**

* **Displays:** Your profit/loss over time
* **Data Source:** On-chain verified trading data
* **Time Range:** Based on selected date range
* **Color Coding:** Green for profits, red for losses

**Notional Exposure Chart**

* **Displays:** Your total market exposure over time
* **Data Source:** On-chain verified position data
* **Usage:** Track how your position sizes change over time
* **Risk Management:** Helps identify periods of high/low exposure

**Cumulative Volume Chart**

* **Displays**: Your total trading activity over time
* **Chart Type:** Column chart showing daily trading volume
* **Exchange Breakdown:** Volume separated by exchange (if multiple accounts)
* **Total Display:** Shows cumulative volume for the selected period

**Key Terminology**

* **Epoch:** Time period for the proof (blockchain timestamp)
* **Volume:** Trading volume for the epoch
* **Proof:** Link to view detailed proof data
* **Share:** Generate shareable image of the proof

## Proofs Table

<figure><img src="/files/dixynKBwA0zn2lWJmBwq" alt=""><figcaption></figcaption></figure>

Below the charts, you'll find the **Proof Table**. This table displays your trading activity, which has been **cryptographically secured and verified on-chain**. Your trading activity is captured in **10-minute intervals**, as shown under the **Trade Window** column.

For each time interval, one or more metrics can be verified. This is indicated by icons under the **Data** column. You can hover over these icons to see which specific metrics have been verified.

To verify the trade data status for a specific window, click the **Proof button** in that row.

<figure><img src="/files/L28gpCy513x94Avq9JN1" alt=""><figcaption></figcaption></figure>

The image above shows the computed and verified metrics. It also displays the number of validators for each data point.

<figure><img src="/files/dgPnyHVuxfrOh0Jqiwfo" alt=""><figcaption></figcaption></figure>

Expanding a metric reveals further details about its validation status and attestor information. Clicking the "Proof" button takes you directly to the transaction details on MonVision.

The lower table shows the raw trade data, balance data, and pricing data captured during this time interval. This data is used to compute the metrics displayed above.


# Market Maker Bot

<figure><img src="/files/BJfz9Fd04DwkukUk3uVy" alt=""><figcaption></figcaption></figure>

#### Overview

The Market Maker Bot allows you to run an automated market-making strategy in just a few clicks. The bot simultaneously places buy and sell orders around the current market price. This feature helps traders earn spreads while providing market liquidity through a [TWAP](https://docs.tread.fi/trajectories/twap) (Time-Weighted Average Price) strategy with [passive only](https://docs.tread.fi/advanced-settings/passive-only) and [active limit](https://docs.tread.fi/advanced-settings/active-limit) execution.

This page provides an overview and quick-start guide for market making. Once you're familiar with the basics, refer to the resources below to optimize the bot for your use case, whether focusing on points or profits.

{% content-ref url="/pages/GvPcLZ3aOiJc1n2GyhDD" %}
[Reference Price Modes and Risk Controls](/bots/market-maker-bot/reference-price-modes-and-risk-controls)
{% endcontent-ref %}

{% content-ref url="/pages/PX9u2lJnsRD43RMhaNfa" %}
[Strategies & Configurations](/bots/market-maker-bot/strategies-and-configurations)
{% endcontent-ref %}

#### Key Features

**Automated Market Making**

* Simultaneously places buy and sell limit orders around current market price
* Uses TWAP strategy for optimal execution timing
* Automatically manages limit order placements and execution
* Splits the notional amount equally between buy and sell orders

**Execution Strategy**

* **TWAP Execution:** Orders are executed over time using the TWAP algorithm to minimize market impact. Your notional amount is split equally between the buy and sell sides
* **Passive Orders:** The bot exclusively uses limit orders (maker orders) to capture spreads and avoid paying taker fees. This may result in slower execution if market conditions don't align with your order placements
* **Dynamic Pricing:** Orders are placed around the current market price with appropriate spreads to stay competitive

#### **How it Works**

* **Automated Orders:** The bot places **limit/maker orders** on both sides (Buy/Sell) of the order book.&#x20;
* Passive Execution: It exclusively uses limit orders (Maker orders); t**he bot never crosses the spread or uses market/taker orders.**&#x20;
* **Dynamic Adjustment:** Orders are refreshed periodically to stay close to the market price.
* **Safety First:** If prices move too fast, the bot pauses to prevent deeply unbalanced exposure.

### Quick Start Guide

Follow these steps to launch a bot with standard settings.

**1. Select Exchange Account (if you have not connected one please see:**&#x20;

{% content-ref url="/pages/Li5PjziR8PJ11IFBMxPc" %}
[Connecting to Exchanges](/account-creation-and-api-key-connection/connecting-to-exchanges)
{% endcontent-ref %}

**2. Select Pair**&#x20;

Choose your Spot or Perpetual pair.

* If it's your first time, we recommend sticking to highly liquid Perpetual pairs like BTC-PERP.
* **For spot: you must hold inventory for both assets when starting:**
  * The 50/50 Rule: To market-make a Spot pair, **you need 50% of the inputted margin in the base token and 50% in the quote token.**
  * *Example:* If you in put $100 in the margin box and you are going to market make HYPE/USDH (Spot), you must hold $50 worth of HYPE and $50 USDH in your wallet.
  * **Check Your Wallet:** Ensure these funds are in your **Spot Account, not your Perpetual/Futures** account.

**2. Input Margin**

<figure><img src="/files/8r2MDTjMG1oHWn8a7oMD" alt=""><figcaption></figcaption></figure>

You can calculate your trade size in two ways. Inputting one will automatically calculate the other:

* **Margin Allocation:** Specify the collateral amount you want to commit to this strategy. Increasing margin and leverage boosts volume but also raises the risk of liquidation under high volatility or  if prices move against you suddenly while the bot is active.
  * **For Spot:**&#x20;
    * **Leverage cannot be set for spot.**&#x20;
    * **If you in put $100 in the margin box and you are going to market-make HYPE/USDH (Spot), you must hold $50 worth of HYPE and $50 USDH in your wallet.**
* **Leverage**: Adjust your leverage slider if you are market making perps. The bot will automatically calculate the resulting Volume it aims to generate with the amount of collateral you are willing to commit.&#x20;

**3. Select Mode**&#x20;

Stick to **Normal** for your first trade.&#x20;

* Keep the default settings for **Reference Price, Spread, Directional Bias, and Stop Loss.**&#x20;
* *For detailed information on modifying these for advanced strategies, please see:*

{% content-ref url="/pages/GvPcLZ3aOiJc1n2GyhDD" %}
[Reference Price Modes and Risk Controls](/bots/market-maker-bot/reference-price-modes-and-risk-controls)
{% endcontent-ref %}

**4. Review Pre-Trade Analytics**&#x20;

Before you click start, check the following:

<figure><img src="/files/3hd7OgQGZMdlrQn4LGNY" alt=""><figcaption></figcaption></figure>

1. Ensure that the margin you have inputted is less than the your available margin.
2. Ensure that you are satisfied with the fees and max loss that you are estimated to incur with this trade.&#x20;
   1. Max Loss is the dollar amount calculated from your **Stop Loss** percentage and your inputted margin. For example, a 10% stop loss with $1,00 margin equals a $10 max loss. The bot monitors your profit/loss in real time and automatically cancels the order if your net loss reaches this amount, protecting the rest of your margin.

For more information on Margin Calculations please see:

{% content-ref url="/pages/gqN1BmsFZ6hRexLSg9IH" %}
[Margin Management](/bots/market-maker-bot/margin-management)
{% endcontent-ref %}

***

#### Supported Exchanges and Pairs

* **Supported Exchanges:** Perpetual DEXs, [Centralized Exchanges](https://docs.tread.fi/connecting-to-exchanges)
* **Supported Pair Types:** Spot, Perpetuals (Perps)
* **Excluded:** Futures contracts, options, and direct DEX contract addresses

**Fee Structure**

* **Builder Fee**: 2bps (0.02%)  for Extended, Hyperliquid (including HIP-3), Nado and Pacifica &#x20;
* **Maker Fee**: Exchange-specific maker rates
* **Total Estimated**: Builder fee + maker fee × notional amount

### Troubleshooting

**Insufficient Margin**

* If you receive an "Insufficient Margin" error (often indicated by a red warning), your available collateral is too low. Running the bot with insufficient margin will likely lead to your order being cancelled. To resolve this:
  * Add more funds (collateral) to your exchange account
  * Reduce the notional amount of your order
  * Check your account's margin settings (e.g., cross vs. isolated) on the exchange website
  * Check that your balance is in your perp account, not your spot account.

&#x20;**'Paused' Status**

* If you see your bot's status change to 'Paused', do not be alarmed. This is a built-in safety feature. The bot pauses itself automatically when its market exposure in one direction (long or short) grows too large. It will resume trading once its net exposure is reduced to a safe level

**Insufficient Balance for Spot**

* For spot market making, ensure you have at least half the recommended margin/balance in the base token to fund sell orders
* The 50/50 Rule: To market make a Spot pair, **you need 50% of the total value in the base token and 50% in the quote token.**
* *Example:* To market make $1,000 worth of HYPE/USDH, you must hold $500 worth of HYPE and $500 USDH in your wallet.
* **Check Your Wallet:** Ensure these funds are in your **Spot Account, not your Perpetual/Futures** account.

**Order Not Submitting**

* Verify all required fields are filled, check your API key permissions, and ensure you have a sufficient balance/margin

**Order with Residuals**

* Orders that are paused and later resumed may sometimes have small, unfilled residual amounts

**Cancelled Market Maker Orders**

* Upon canceling a market maker bot order, an automatic order will be placed to close any residual positions, ensuring a net zero balance.


# Participation Rate and Duration

<figure><img src="/files/SaAvhlvAMd6WZtNPVxOH" alt=""><figcaption></figcaption></figure>

**Participation Rate** controls how quickly the bot aims to complete your order by adjusting the size of the limit orders the bot places relative to the pair’s 24-hour trading volume. More aggressive means the bot targets a higher participation rate (percentage of volume): each limit order it tries to place is more sizeable than in Normal or Passive mode. Think of it as the bot placing $1000 notional chunks instead of $200 notional chunks: same total size, but done in bigger bites so the order finishes faster.

**Duration** is the same idea in time: it lets you set a custom run length (in minutes) within the range implied by the three participation presets. Treat the minutes displayed under Aggressive and Passive as your upper and lower bounds of the duration you can set.&#x20;

#### The Three Participation Rate Presets

**Aggressive**

* Fastest execution speed
* Uses a 0.1 rate multiplier against 24h volume.
* Results in the shortest order duration for a given order size
* **Best for:** Fast-moving markets, minimizing exposure time.
* **Trade-off:** Faster execution may result in higher market impact, less favorable average fill prices and potentially higher losses.

**Normal (Default)**

* Moderate execution speed; limit orders are smaller than Aggressive and larger than Passive. Roughly 4× longer duration than Aggressive for the same size.
* Uses a 0.05 rate multiplier against 24h volume.
* **Best for:** General-purpose market making with a balance of speed and impact.
* **Trade-off:** Middle ground between speed and execution quality.

**Passive**

* Longest order duration, approximately 10× longer than Aggressive for the same order size
* Uses a 0.01 rate multiplier against 24h volume.
* **Best for:** Minimizing market impact, trading lower-liquidity pairs, or strategies where time is less critical than execution quality
* **Trade-off:** Longer exposure to directional moves. May take you longer to rebalance your exposure and could mean higher risk of liquidation.&#x20;

### How duration works

Participation Rate and Duration are two sides of the same setting.

* **Participation Rate** gives you three presets. Each preset implies a duration in minutes (from your order size and the pair’s 24h volume).
* **Duration** is a custom number of minutes you can type in, as long as it stays between the Aggressive and Passive values. In the image above, "Aggressive" indicates \~5 minutes, which means the duration cannot be set for less than 5 minutes. Similarly, "Passive" shows \~30 minutes, so you cannot set a duration longer than 30 minutes.

**Restrictions:**

* Minimum value is derived by the duration calculated when you pick Aggressive as your participation rate preset.
* Maximum value is 10× the Passive-derived duration, where Passive is capped at 24 hours before that multiplication (so max can be up to 240 hours in theory).

The numbers shown for Aggressive and Passive are not only examples for those presets. They are the actual lower and upper bounds for the Duration field. Choosing Normal still shows a suggested duration, but you can override it with any value between those bounds.

**Reset**: If you’ve set a custom duration, a “Reset” control appears; use it to return to the auto-calculated duration for the currently selected participation preset.

#### Important Notes

* **Rate vs. Participation:** These settings control execution pace relative to 24h volume metrics, not literal real-time market participation percentages
* **Market Impact:** Aggressive mode consumes liquidity more quickly and may impact your average fill price, especially in low volume markets
* **Directional Risk:** Passive mode extends your exposure window, increasing sensitivity to directional price moves
* **Grid Mode and RGrid:** In Grid and RGrid modes, duration is a target, not a hard cap. Your order can run longer than the set duration while waiting for profit-based conditions (e.g. grid spread or take profit) to be met.


# Reference Price Modes and Risk Controls

<figure><img src="/files/21VwdBAR63HNp8qYu3Zb" alt=""><figcaption></figcaption></figure>

### Overview

While the default Market Maker Bot settings (Mid Mode) are designed to allow you to boost orderbook liquidity while remaining market-neutral, the **Reference Price Modes (Mid, Grid, Reverse Grid, Blend and Signal)** are advanced settings that allows you to express a specific view on the market and potentially make a profit in the process of your market making.&#x20;

The Reference Price determines the "center" point for your buy and sell orders. Your available spread options (see [below](#spread)) change depending on which reference mode you select.

> ⚠Risk Warning: Some reference price mode settings move the bot away from pure neutral market making/liquidity provision. For example, Revers Grid Mode allows the bot to also do market orders, not just limit orders. Furthermore, incorrect configurations (e.g., Grid Mode in a trending market) can lead to stalled orders or increased losses additional to fees.

Familiarize yourself with the other settings before adjusting these settings, then explore strategies for each use case on the following page.

{% content-ref url="/pages/DvZMf93lcCc7SI15AHhV" %}
[Participation Rate and Duration](/bots/market-maker-bot/participation-rate-and-duration)
{% endcontent-ref %}

{% content-ref url="/pages/PX9u2lJnsRD43RMhaNfa" %}
[Strategies & Configurations](/bots/market-maker-bot/strategies-and-configurations)
{% endcontent-ref %}

### Reference Price Modes

{% content-ref url="/pages/cpMoMjIFh6UNRHCDV9aD" %}
[Mid Mode](/bots/market-maker-bot/reference-price-modes-and-risk-controls/mid-mode)
{% endcontent-ref %}

{% content-ref url="/pages/myx82PFrsQymtArtbkXJ" %}
[Grid Mode](/bots/market-maker-bot/reference-price-modes-and-risk-controls/grid-mode)
{% endcontent-ref %}

{% content-ref url="/pages/B71RmuqYWiQhOM2XTJNm" %}
[Reverse Grid Mode (RGrid)](/bots/market-maker-bot/reference-price-modes-and-risk-controls/reverse-grid-mode-rgrid)
{% endcontent-ref %}

{% content-ref url="/pages/1NLsUyrxt4YydyTpSCbp" %}
[Blend Mode](/bots/market-maker-bot/reference-price-modes-and-risk-controls/blend-mode)
{% endcontent-ref %}

{% content-ref url="/pages/MPfE2jlPDZNTr5CuNSHw" %}
[Signal Mode](/bots/market-maker-bot/reference-price-modes-and-risk-controls/signal-mode)
{% endcontent-ref %}

### Risk Management Controls (Grid Reset and Stop Loss)

### Stop Loss

<figure><img src="/files/NXg2MyI5WVFtUXeo3tRp" alt=""><figcaption></figcaption></figure>

The Stop Loss setting allows you to set your maximum acceptable loss as a percentage of your margin. The bot monitors your profit/loss in real time and automatically cancels all orders if your net loss reaches this threshold, then closes any remaining positions to ensure zero directional exposure.

**How It Works:**

The bot continuously monitors your net PnL (realized and unrealized). The stop loss threshold is calculated as a percentage of your margin allocation:

* **Formula:** `Max Loss = (Stop Loss % ÷ 100) × Margin`
* **Example:** With a 5% stop loss and $1,000 margin, your Max Loss is $50. If your net PnL drops to -$50, the bot automatically cancels all orders and closes positions.
* 100% means you are willing to lose the entirety of your inputted margin from market making losses.

Losses from market making typically accumulate when one-sided exposure building up due to lack of fills from the opposite leg, and the market moves against your one-sided exposure.

> ⚠Risk Warning: Stop Loss may not prevent liquidation when using high leverage (>20x). During extreme moves, the exchange can liquidate your position before the stop loss triggers, especially if the bot is stuck with one-sided exposure. This can result in losses exceeding your Max Loss. Exercise caution with high leverage, particularly in volatile markets.

### Grid Reset Threshold (Only Available for Grid Mode)

<figure><img src="/files/iM8OEIFxuzf4TmMNZ05M" alt=""><figcaption></figcaption></figure>

The Soft Reset acts as a "circuit breaker" before your Stop Loss triggers, giving your position a chance to naturally rebalance without forcing a full exit.  Think of it as a stop loss before your stop loss.&#x20;

**Behavior:** When the market drifts from your last executed price (exposure price) by the configured threshold, the bot temporarily switches the "behind" leg (the side with less executed volume) from grid pricing to mid-market pricing. This helps the unfilled leg execute and rebalance exposure, potentially avoiding a Stop Loss trigger.&#x20;

Instead of waiting for the bot to hit the stop loss and forcefully cancelling the entire order at a loss, the grid reset threshold engages first. The bot temporarily switches to mid-market mode to accept a smaller loss, rebalances, then returns to grid mode to pursue profits again.

**How It Works:**

1. **Normal Operation:** Bot quotes based on your last executed price (Grid Mode) + some spread.&#x20;
   1. For example (assuming Grid 0): Bot last bought BTC at $90,000, it will place a sell limit order at $90,000&#x20;
2. **Soft Reset Triggered:** When price drifts by your configured percentage, bot temporarily switches to quoting on mid-market price
   1. Continuing from the same example: Bot is waiting to reduce it's long position, but BTC price falls below 90K. Instead of trying to sell BTC at $90,000, it places a sell limit order at the mid-market price instead.
3. **Position Resets:** The unfilled leg has a better chance to execute at current market levels
4. **Return to Normal:** Once exposure rebalances, bot returns to Grid Mode behavior

**What Each Setting Means:**

* **Lower Number = More Conservative:** Grid Reset triggers earlier, giving the position more chances to rebalance but potentially sacrificing some profit potential.
* **Higher Number = More Patient:** Grid Reset triggers later, allowing the market more room to revert but accepting deeper unrealized losses before intervention.

<figure><img src="/files/pZ1INPATKGLKYCmKGsx7" alt=""><figcaption></figcaption></figure>

The red and green numbers on the order monitoring page show the price levels at which Grid Reset triggers, based on your configured threshold as the order is live.

**How to Read Them:**

* <mark style="color:green;">**Green Number:**</mark> When you're overexposed on the sell/short leg, the green number shows the price level the market must rise by before Grid Reset triggers. The bot will then try to close  this short (through passive limit orders) at the prevailing mid price, preventing further losses.
* <mark style="color:red;">**Red Number:**</mark> When you're overexposed on the buy side, the red number shows the price level the market fall by before Grid Reset triggers. The bot will then try to close this long at the prevailing mid price, again preventing further losees.&#x20;

**Pros:**

* Provides some breathing room for adverse price movement before hitting hard stop loss
* Increases chances of completing round-trip trades in trending markets
* Helps avoid premature exits while still maintaining risk control

**Cons:**

* Incur a loss.
* May execute at less favorable prices compared to waiting for full reversion
* In strongly trending markets, even the soft reset might not prevent eventual stop loss


# Mid Mode

<figure><img src="/files/9JWLYH1QxbamSycLAFAP" alt=""><figcaption></figcaption></figure>

Mid Price Mode was the original mode and remains the most effective for general liquidity provision.

Quotes are placed based strictly on the current order book mid-price.

* **Behavior:** Orders float with the market price. It does not track the specific entry price of open positions when placing new quotes.
* **Best For:** General purpose market making, volume generation, and Point farming where liquidity provision and getting the order complete is a priority over per-trade PnL.
* **Pros:** High probability of fill, speed and follows the market trend.
* **Cons:** Profitable spreads are not guaranteed relative to your entry price for each leg (you might buy high and sell low if the market drops fast).

**Available Spread Options:**

**The Spread Scale (-50 bps to +50 bps):** The spread setting functions as a trade-off between **Fill Rate** and **Profit Margin.**

* **Lower Spreads (0 – 2 bps): Prioritizes Speed.** You place orders very close to the market price to maximize execution frequency and capture exchange fees/rebates. The trade-off is little to no profit from the spread itself.
* **Higher Spreads (-10 to + 100 bps): Prioritizes Margin.** You place orders further away ("fishing"), waiting for volatility to hit your price. You get fewer fills, but each fill captures a significantly larger profit. However this can amplify your losses significantly. Wider the spreads the further away you are from the mid price

#### **Directional Bias Control**

<figure><img src="/files/Qs6EvzC9OqbTfMtWVY4K" alt=""><figcaption></figcaption></figure>

Directional bias control allows you to influence the timing and distribution of your buy and sell orders based on your market outlook.

**How Directional Bias Works**

* **Long Bias**: Favors long positions by front-loading buy orders and back-loading sell orders
* **Short Bias:** Favors short positions by front-loading sell orders and back-loading buy orders
* **Neutral**: Equal timing distribution for both buy and sell orders

**Additional Notes on Directional Bias**

* **Alpha Tilt Adjustment**: Directional bias maps linearly to alpha tilt adjustments (±1 → ±0.2 alpha tilt)
* **Buy Orders**: Positive bias adds positive alpha tilt (front-loads), negative bias adds negative alpha tilt (back-loads)
* **Sell Orders**: Positive bias adds negative alpha tilt (back-loads), negative bias adds positive alpha tilt (front-loads)
* **Risk Management**: Extreme bias values (±1) require up to 20% additional margin to account for increased directional exposure

**Use Cases**

* **Bullish Outlook**: Set positive bias to capture upward price movements more aggressively
* **Bearish Outlook**: Set negative bias to benefit from downward price movements
* **Market Neutral**: Keep at 0 for balanced market making without directional exposure


# Grid Mode

<figure><img src="/files/kU6TaLYhuAZ5ppJCcjvE" alt=""><figcaption></figcaption></figure>

Grid mode prioritizes profit generation over simply placing limit orders. However, this approach may decrease the likelihood of order completion and an increaesd chance of getting stoplossed.

* **Behavior:** Uses your *last executed price* as the anchor. It follows the rule: *"Don't place buy orders higher than I sold, and don't place sell orders lower than I bought."*
* **Best For:** Range-bound (sideways) markets where you want to lock in profitable spreads.
* **Pros:** Guarantees a $0 PnL or better on the spread itself.
* **Cons:** Your order could stall. If the price trends strongly in one direction, your sell order is filled, but the price moves away from your buy order. The bot will wait for price to revert. If the price never comes back, the bot stalls and could result in cancellation of your order if your stoploss gets hit.

**Available Spread Options:**

**The Spread Scale (-50 bps to +50bps):** In Grid Mode, the spread acts as a control for Fill Probability vs. Profit.

* **Negative Spreads (-10 bps to -1bps): Price Concession.** Use these values when you need to "unstick" a stalled position and clear some of your invetory. By setting a negative spread, you are effectively paying a small premium to clear out some investory at a loss. The more negative the number (e.g., -10 bps or -50bps), the more aggressively the bot reaches to close the trade/the more you will lose.
* **Zero Spread (0 bps): Near Break-Even.** Both legs execute at the exact same price. You make no profit on the spread itself but may help you rebalance your exposure faster without a substantial loss. However, you will still be at a net-loss due to exchange and builder fee.
* **Positive Spreads (+1 bps to +50 bps): Profit Locking.** You set a desired profit margin above your entry price, which ensures a profitable round-trip trade. However, this increases the risk of the order stalling if the limit price isn't met. While wider spreads can lead to higher profits, they require patience as you wait for the price to reach your target. If prices do not move in your favor, you might face a stop-loss. Larger the positive spread, the higher the reward but comes at greater risk of getting your order stuck and closed at a loss.

### Stop Loss

<figure><img src="/files/NXg2MyI5WVFtUXeo3tRp" alt=""><figcaption></figcaption></figure>

The Stop Loss setting allows you to set your maximum acceptable loss as a percentage of your margin. The bot monitors your profit/loss in real time and automatically cancels all orders if your net loss reaches this threshold, then closes any remaining positions to ensure zero directional exposure.

**How It Works:**

The bot continuously monitors your net PnL (realized and unrealized). The stop loss threshold is calculated as a percentage of your margin allocation:

* **Formula:** `Max Loss = (Stop Loss % ÷ 100) × Margin`
* **Example:** With a 5% stop loss and $1,000 margin, your Max Loss is $50. If your net PnL drops to -$50, the bot automatically cancels all orders and closes positions.
* 100% means you are willing to lose the entirety of your inputted margin from market making losses.

Losses from market making typically accumulate when one-sided exposure building up due to lack of fills from the opposite leg, and the market moves against your one-sided exposure.

> ⚠Risk Warning: Stop Loss may not prevent liquidation when using high leverage (>20x). During extreme moves, the exchange can liquidate your position before the stop loss triggers, especially if the bot is stuck with one-sided exposure. This can result in losses exceeding your Max Loss. Exercise caution with high leverage, particularly in volatile markets.

### Grid Reset Threshold

<figure><img src="/files/iM8OEIFxuzf4TmMNZ05M" alt=""><figcaption></figcaption></figure>

The Soft Reset acts as a "circuit breaker" before your Stop Loss triggers, giving your position a chance to naturally rebalance without forcing a full exit.  Think of it as a stop loss before your stop loss.&#x20;

**Behavior:** When the market drifts from your last executed price (exposure price) by the configured threshold, the bot temporarily switches the "behind" leg (the side with less executed volume) from grid pricing to mid-market pricing. This helps the unfilled leg execute and rebalance exposure, potentially avoiding a Stop Loss trigger.&#x20;

Instead of waiting for the bot to hit the stop loss and forcefully cancelling the entire order at a loss, the grid reset threshold engages first. The bot temporarily switches to mid-market mode to accept a smaller loss, rebalances, then returns to grid mode to pursue profits again.

**How It Works:**

1. **Normal Operation:** Bot quotes based on your last executed price (Grid Mode) + some spread.&#x20;
   1. For example (assuming Grid 0): Bot last bought BTC at $90,000, it will place a sell limit order at $90,000&#x20;
2. **Soft Reset Triggered:** When price drifts by your configured percentage, bot temporarily switches to quoting on mid-market price
   1. Continuing from the same example: Bot is waiting to reduce it's long position, but BTC price falls below 90K. Instead of trying to sell BTC at $90,000, it places a sell limit order at the mid-market price instead.
3. **Position Resets:** The unfilled leg has a better chance to execute at current market levels
4. **Return to Normal:** Once exposure rebalances, bot returns to Grid Mode behavior

**What Each Setting Means:**

* **Lower Number = More Conservative (Resets to Mid Sooner):** Grid Reset triggers earlier, giving the position more chances to rebalance but potentially sacrificing some profit potential.
* **Higher Number = More Patient (Resets to Mid Later):** Grid Reset triggers later, allowing the market more room to revert but accepting deeper unrealized losses before intervention.

<figure><img src="/files/pZ1INPATKGLKYCmKGsx7" alt=""><figcaption></figcaption></figure>

The red and green numbers on the order monitoring page show the price levels at which Grid Reset triggers, based on your configured threshold as the order is live.

**How to Read Them:**

* <mark style="color:green;">**Green Number:**</mark> When you're overexposed on the sell/short leg, the green number shows the price level the market must rise by before Grid Reset triggers. The bot will then try to close  this short (through passive limit orders) at the prevailing mid price, preventing further losses.
* <mark style="color:red;">**Red Number:**</mark> When you're overexposed on the buy side, the red number shows the price level the market fall by before Grid Reset triggers. The bot will then try to close this long at the prevailing mid price, again preventing further losees.&#x20;

**Pros:**

* Provides some breathing room for adverse price movement before hitting hard stop loss
* Increases chances of completing round-trip trades in trending markets
* Helps avoid premature exits while still maintaining risk control

**Cons:**

* Incur a loss.
* May execute at less favorable prices compared to waiting for full reversion
* In strongly trending markets, even the soft reset might not prevent eventual stop loss


# Reverse Grid Mode (RGrid)

<figure><img src="/files/27SeSkSan9OYgfreqwE3" alt=""><figcaption></figcaption></figure>

If you recall, grid mode, follows the rule:&#x20;

> *"Don't place buy orders higher than I sold, and don't place sell orders lower than I bought.*

This works well if prices are bouncing between a range, but causes you to get stuck if prices trend out of range. Reverse grid helps you profit during price trending movements:&#x20;

**Behavior:** Uses the average of both your executed prices as the anchor. With reverse grid:

* **Buy orders** are placed at a price equal to or above the average of your buy and sell **exposure prices:** `(average × (1 + spread))`. They only fill when the market price rises above this buy limit price.
* **Sell orders** are placed at a price equal to or below the average of your buy and sell **exposure prices:** `(average × (1 - spread))`. They only fill when the market price falls below this sell limit price.

Both orders reference the midpoint between where you've bought and sold, rather than mirroring each other like in Grid mode (Grid uses the opposite leg's price directly; Reverse Grid uses the average of both legs).

The bot will do taker orders to capture profits. [**Passive Only**](/creating-and-submitting-orders/advanced-settings/passive-only) **is turned off.**&#x20;

**What is "exposure price"?:** For each leg (buy or sell), exposure price is a rolling VWAP over the most recent portion of filled volume (e.g. last 12% of quantity when discretion is 0.06), instead of using just the last fill price (like grid mode). This gives a more stable reference point that reflects your recent trading activity rather than a single fill.

**Best For:** Trending markets where you want to automatically take profits when price moves in your favor.

**Pros:**

* Automatically locks in profits when trends continue
* Only fills orders when price crosses limits in favorable directions (buy fills when price rises above limit, sell fills when price falls below limit)
* Has both stop loss and take profit protection

**Cons:**

* Your order could stall if the market moves sideways or reverses (if market starts trending, you should consider changing back to grid mode).
* If price trends strongly in one direction and then reverses, you might miss fills on the opposite side

**Safety Mechanisms:**

* **Stop Loss:** Automatically cancels the order if your PnL drops below a configured threshold (e.g., -2% of margin)
* **Take Profit:** Automatically completes the order if your PnL rises above a configured threshold (e.g., +5% of margin)
* **Soft Reset:** When price drifts favorably and you're in profit, the system adjusts the opposite leg to follow the trend and lock in profits


# Dynamic Grid Mode (DGrid)

Dynamic Grid is an adaptive version of Grid and Reverse Grid mode. Instead of having to manually switch between the two, DGrid continuously reads the market's volatility regime and automatically switches between **Grid** (mean-reverting) and **Reverse Grid** (trending) behavior, while also resizing its own spread to match recent price movement.

Think of it as a Grid bot that adjusts its own dials. While the market is relatively calm and ranging sideways, it stays in Grid mode. As volatility spikes and price starts trending.

#### How it works

Every 30 seconds, DGrid pulls two pieces of market information:

1. **Variance ratio** of a chosen volatility proxy - the bot's signal for whether the market is ranging or trending.
2. **Realized move** on the pair you're trading, measured as the average 5-minute price change over the last hour - the bot's signal for how much price is actually moving.

It then makes two decisions:

1. **Which mode to be in.** Using a hysteresis band to avoid flip-flopping:

* Variance ratio at or above **1.25** - switch to **Reverse Grid** (trend regime)
* Variance ratio at or below **1.15** - switch to **Grid** (mean-reverting regime)
* Anything in between - hold the current mode

2. **What spread to quote.** Sized automatically from realized move, capped at 50 bps. In Reverse Grid phase the spread is forced to zero, since the two directional legs create the offset themselves.

* **Soft reset threshold.** Automatically derived as roughly 4x the current spread, snapped to the nearest standard option (5, 12.5, 25, 50, 100 bps), so the grid recenters at the right sensitivity for current volatility.

#### Configuration

| Setting                    | What it does                                                                                                                                                                 |
| -------------------------- | ---------------------------------------------------------------------------------------------------------------------------------------------------------------------------- |
| **Volatility asset class** | The proxy DGrid watches to detect regime: **Crypto** (BTC), **Metals** (XAUT), **Stocks** (S\&P 500), or **Oil** (CL). Choose the one most correlated with your traded pair. |
| **Spread (bps)**           | Optional starting value. DGrid overwrites this on the first 30-second tick using realized-move sizing.                                                                       |
| **Stop loss %**            | Standard MM stop loss. Default 10%.                                                                                                                                          |
| **Take profit %**          | Optional. Same behavior as other modes.                                                                                                                                      |
| **Grid soft reset**        | Auto-derived by DGrid when set to a percentage. If you set explicit price bounds instead, those are respected.                                                               |
| **POV preset**             | Aggressive / Normal / Passive, same as other modes.                                                                                                                          |

#### Risk controls

DGrid inherits the same protections as Grid and Reverse Grid, applied automatically based on which phase it is currently in:

* **In Grid phase:** stop loss watches **realized PnL** - cancels if losses exceed your threshold.
* **In Reverse Grid phase:** stop loss watches **unrealized PnL** - cancels if open exposure moves against you.
* **Take profit:** evaluated against total PnL across both phases.
* **Soft reset:** triggers when mid-price drifts beyond the auto-derived threshold, recentering the grid around the new price.

#### When to use DGrid

DGrid is best for pairs whose behavior shifts between ranging and trending throughout the day. If you find yourself manually toggling between Grid and Reverse Grid, or constantly retuning your spread as volatility changes, DGrid automates that process.

It is less suited for situations where you have a strong view on market direction (use Grid or Reverse Grid directly) or where the pair's behavior is very stable (a static mode is simpler and more predictable).

#### Comparison

|                    | Grid            | Reverse Grid     | DGrid                      |
| ------------------ | --------------- | ---------------- | -------------------------- |
| **Mode switching** | Static          | Static           | Automatic every 30s        |
| **Spread sizing**  | User-set        | User-set         | Auto from realized move    |
| **Soft reset**     | User-set        | User-set         | Auto-derived (\~4x spread) |
| **Best for**       | Ranging markets | Trending markets | Shifting / mixed regimes   |


# Blend Mode

<figure><img src="/files/PvRvwMmQV2ZPNXn8mI2n" alt=""><figcaption></figcaption></figure>

Blend Mode allows you to quote based on a blend of prices from two exchanges (the exchange you want to market make on and an exchange of your choosing). You can adjust the weighting of the average of prices used. This is particularly useful when trading on less liquid exchanges where local price volatility may not accurately reflect market pricing.

**Blend Weight Modes**

**0% =** Uses prices from the exchange you are going to market make on

**50% (Default) =** Equal weighted average of prices bewteen your exchange and another exchange's pricing

**100% =** Uses the prices of another exchange completely.

**Behavior:** Instead of quoting purely based on your chosen exchange's mid price, the bot averages it with a reference price from another exchange (typically a larger, more liquid venue). Orders adjust as both prices change, helping your bot position its limit order for mean reversion when your chosen exchange prices diverge from the broader market.

You're still market making on your original exchange, but your quotes are informed by the reference market's pricing.

**Use-case:**&#x20;

For a given asset, price should theoretically be the same on different exchanges, however in practice there is often minor divergences. Occasionally these price divergences could be particularly large especially between smaller exchanges and bigger ones, or for less liquid tokens across different exchanges.&#x20;

By blending with a more liquid reference market, your bot quotes at prices that anticipate convergence rather than following potentially misleading local movements.

**Example Use Case:**

You're market making ETH:PERP-USDT on a smaller exchange where:

* Local mid price: $2,000 (but volatile due to thin liquidity)
* Reference price (larger exchange): $2,050 (more stable, higher volume)
* Blended price: $2,025

Your bot quotes around $2,005 instead of $2,000, positioning to profit when the smaller exchange's price converges toward the larger market's price.

### Numerical Examples of Spreads

**Example with Mid Price + 5 bps:**

* Reference Price (Mid): $50,050
* Buy Limit: $50,050 × 0.9995 = $50,024.98
* Sell Limit: $50,050 × 1.0005 = $50,075.03
* Profit per unit: $50.05 (minus fees)

**Example with Grid Mode + 1 bps:**

* Sell executes at: $50,000
* Buy Limit: $50,000 × 0.9998 = $49,990 (2 bps below sell's executed price)
* Gap maintained: $10 between the limit prices
* If buy executes at $49,990, profit = $10 per unit (minus fees)

**Example with Grid Mode + 0 bps:**

* Sell executes at: $50,000
* Buy Limit: $50,000 (no spread adjustment)
* Both legs can execute at the same price, but the limit prices maintain the grid structure


# Signal Mode

<figure><img src="/files/qNCkCYrqhiZLRIdRF8o0" alt=""><figcaption></figcaption></figure>

Signal Mode lets the Market Maker bot quote around your **native exchange mid price**, adjusted by a by the Relative Strenght Index (RSI) technical indicator from a reference market. Limit prices move with the indicator so you can lean against overbought/oversold conditions while still providing liquidity.

***

### Overview

In Signal Mode, the bot still posts limit orders on the pair and exchange you chose, but the **level** of those orders is shifted by the current **RSI (Relative Strength Index)** of a selected **signal pair**. The signal pair is in the form `Pair@Exchange` (e.g. `BTC:PERP-USDT@Binance` or `BTC:PERP-USDT@Hyperliquid`). RSI can come from a different exchange than the one you are trading on.

* **RSI > 50 (overbought):** prices are shifted **down** → more aggressive sells, more passive buys.
* **RSI < 50 (oversold):** prices are shifted **up** → more aggressive buys, more passive sells.
* **RSI = 50 (neutral):** no RSI shift; behaviour is like Mid Price with your chosen spread only.

So you are still **market making on your exchange**, but your quotes are **tilted by the indicator** to fade short-term extremes.

***

### How It Works

1. **Choose Signal Mode** in the Reference Price selector (alongside Mid, Grid, Reverse Grid, Blend).
2. **Pick a signal** from the dropdown. The list shows only **signal pairs that match the base asset** of your trading pair (e.g. if you trade `ETH:PERP-USDT`, you see signals like `ETH:PERP-USDT@Binance`, `ETH-USDT@OKX`). Each option is labeled like “BTC:PERP-USDT · RSI” and is tied to a specific exchange’s RSI feed.
3. **Set the spread** (see below). The bot then sets limit prices as:\
   **native mid price × RSI adjustment × spread multiplier.**

The **RSI adjustment** is:

* Formula: `(1 - (RSI - 50) / 10000)`\
  So:
  * RSI = 50 → factor **1** (no shift).
  * RSI = 70 → factor **0.998** (prices down 20 bps).
  * RSI = 30 → factor **1.002** (prices up 20 bps).
* The divisor **10000** gives a **maximum ±50 bps** shift when RSI is at 0 or 100. Between 30 and 70, the shift is ±20 bps.

Both buy and sell limits use the **same** RSI factor (prices move in one direction), and your normal spread (buy below mid, sell above mid) is applied on top of that.

***

### Availability

* **Availability:** If no signals exist for your pair’s base asset, Signal Mode is disabled for that pair; you must select an account and a pair first, and only pairs with at least one matching signal show the Signal option.
* **Exchanges:** RSI is supported for a fixed set of venues (e.g. Binance, Bybit, OKX, Bitget, Gate, and Hyperliquid)

***

### Spread in Signal Mode

* **Range:** **3 bps to 20 bps** (no negative spread in the UI).
* **Marks:** 3, 5, 10, 15, 20 bps.
* The spread is applied **symmetrically** around the RSI-adjusted mid: buy limit = adjusted mid × (1 − spread), sell limit = adjusted mid × (1 + spread), with spread in decimal (e.g. 10 bps = 0.001).

So Signal Mode combines:

* **RSI tilt:** ±50 bps max (from the formula above).
* **Your spread:** 3–20 bps for margin and fill control.

***

### Pros and Cons

**Pros**

* Quotes adapt to RSI in real time without changing the reference price mode.
* Keeps liquidity provision on your chosen exchange; only the level is signal-driven.
* Simple rule: high RSI → lower quotes, low RSI → higher quotes.
* Works with the same risk controls (e.g. Stop Loss, optional Take Profit) as other Market Maker modes.

**Cons**

* **Depends on signal availability:** If the RSI feed has no data for your pair/exchange, the limit price expression can evaluate to “not available” and the bot may not place or update orders until data exists.
* Signal is from a **reference market** (possibly another exchange); it may lag or diverge from the exchange you trade on.

***

### Relation to Other Modes

* **Mid Price:** No RSI; quotes are purely mid ± spread. Signal = Mid + RSI adjustment.
* **Grid / Reverse Grid:** Anchor is your own fills (exec / exposure price), not RSI. Different use case (mean reversion vs. indicator tilt).
* **Blend:** Blends **prices** (native mid vs. reference exchange price). Signal blends **native mid** with an **indicator value** (RSI) to shift levels; no second exchange price in the formula.


# Pre-Trade Analytics and Summary

<figure><img src="/files/R2cFJD7FgCMEN2uXVVno" alt=""><figcaption></figcaption></figure>

* **Real-time margin calculations:**
  * **Available Margin:** The total amount of cash/stablecoin you have. No leverage mupltipliers are applied to this figure.&#x20;
  * **Leverage:** The leverage you have set.
  * **Participation Rate/POV:** Target share of market volume the engine aims to execute at any moment for each leg.
  * **Duration:** An estimate of how long the bot will run for to complete the targeted volume. Treat this purely as an estimate, especially if you are running on Grid Mode; Grid mode can stall for much longer than the estimated duration if prices do not move drastically and persistently out of your range and against your open leg.

#### Duration Calculations

Calculated based on:

* Selected Participation rate (aggressive, normal and passive)
* 24-hour trading volume of the selected pair
* Notional amount entered
* Mode-specific minimum duration requirements

**Real-Time Monitoring**

* Live order status tracking with 3-second updates
* Realized PNL (RPNL) calculations based on executed spreads
* Historical performance analytics and detailed table of fills

<figure><img src="/files/Bym2L4DIgjbwxGg7q2hq" alt=""><figcaption></figcaption></figure>

**Order List**

* Paginated list of all market making orders
* Status updates every 3 seconds
* Click to view detailed order information
* Color coding on the pair text to indicate your bias: short, neutral bias
* Mode column to indicate between mid price mode or reference mode.&#x20;

**Order Details**

* **Pair**: Trading pair used
* **Accounts**: Exchange accounts involved
* **Volume**: Total volume generated
* **Fees**: Total fees paid
* **PnL**: Calculated profit/loss from spreads
* **Filled:** Percent of order filled
* **Status**: Active, Completed, Cancelled, etc.

### Lifetime Summary

The Lifetime Summary shows cumulative statistics across all your Market Maker Bot orders.&#x20;

**Volume**: Sum total of executed traded volume (in USD) across all your Volume Bot orders.

**Net Fees:** The cumulative net fees (or PnL) across all your Volume Bot orders. This represents your total maker fees - MM PnL<br>


# Margin Management

### **Margin Calculations**

The Market Maker Bot features sophisticated margin calculations that account for directional bias and updated exposure tolerances.

**Base Margin Requirements**

**Spot Markets:**

* **Exposure Tolerance**: 8% (increased from 6%)
* **Formula**: `baseMargin = notional × 0.08`
* **Rationale**: Higher tolerance accounts for spot market volatility and margin requirements

**Perpetual Markets:**

* **Formula**: `baseMargin = (notional ÷ leverage) × safetyBuffer`
* **Safety Buffers by Mode:**
  * **Aggressive**: 2.0x safety buffer for higher risk tolerance
  * **Normal**: 1.0x safety buffer for balanced risk management
  * **Passive**: 0.5x safety buffer for conservative trading

**Directional Bias Adjustments**

* **Additional Margin**: Up to 20% more margin for extreme bias
* **Formula**: `adjustedMargin = baseMargin × (1 + |directionalBias| × 0.2)`
* **Examples:**
  * **Neutral (0)**: No additional margin
  * **Moderate Bias (±0.5)**: 10% additional margin
  * **Extreme Bias (±1.0)**: 20% additional margin

**Risk Monitoring**

* **Critical Warning**: Triggered when available margin < 10% of recommended margin
* **Color-coded Indicators:**
  * **Green**: Safe (recommended < available)
  * **Orange**: Caution (recommended ≤ 5× available)
  * **Red**: Insufficient (recommended > 5× available)

**Real-time Updates**

Margin requirements automatically recalculate when you change:

* Notional amount
* Trading pair
* Trading mode
* Directional bias setting
* Account selection

**Best Practices**

* **Conservative Approach**: Use moderate directional bias (±0.3 to ±0.5) to minimize additional margin requirements
* **Adequate Funding**: Maintain available margin at least 20% above recommended margin
* **Mode Selection**: Choose trading modes based on your risk tolerance and available capital
* **Regular Monitoring**: Check margin requirements when market conditions or account balances change


# Scheduling Orders

Scheduling lets you set the bot to start later instead of starting immediately. You can also optionally set it to repeat multiple times.

#### Where to find it

On the Market Maker (Volume Bot) page, next to the main Start Trading / Schedule button, you’ll see two icons:

<figure><img src="/files/FLqi4pPIcRMP9JXgGZKI" alt=""><figcaption></figcaption></figure>

* **Clock icon:** choose a start time
  * Start times are in 15‑minute increments (:00, :15, :30, :45).
  * If you pick a time that already passed today, the app automatically schedules it for tomorrow at the same time.

<figure><img src="/files/yir7sYKJhdd4di4Kmwzm" alt=""><figcaption></figcaption></figure>

* **Repeat icon:** choose how many times to run, and when to trigger the next run

  #### Trigger types

  **On Complete (back‑to‑back)**

  * The next run starts after the previous run finishes.
  * This is best if you want consecutive runs without overlap.
  * **Repeat limit:** maximum 5 total runs.

  **Use this when:** you want “run again as soon as it’s done.”

  **Daily (same time each day)**

  * The bot starts at the scheduled start time each day.
  * This requires you to set a scheduled start time.
  * In the example below, the setting is 4x repeat, on complete. This means the order will run repeat 4 times after successively after each completion. The 4 boars denote the status for each order.&#x20;

  **Use this when:** when you want to for example, start an order everyday at 9:00am

As soon as you set a schedule or a repeat, the order will appear under the **Scheduled tab** in the order table.

* You can delete it before it starts by pressing the x icon.

<figure><img src="/files/gm263CZilrMGyyEG9jjn" alt=""><figcaption></figcaption></figure>

### Important Notes

* **Timezone:** You always pick the time in your local timezone; our engine handles the rest. Around daylight savings changes, “Daily” schedules may appear to shift by an hour depending on your local timezone rules.
* **If you schedule a past time:** it automatically rolls to tomorrow.
* **Overlap risk:** Daily can overlap if a run lasts longer than a day; On Complete won’t overlap because it waits for completion.

<br>


# Analytics

<figure><img src="/files/NLU6N4D0dz4zqYygf6LG" alt=""><figcaption></figcaption></figure>

## Overview

The Analytics tab provides a comprehensive performance dashboard for your market maker bot activity. It pulls data from all your\
completed and active bot orders and presents insights across multiple dimensions — volume, profitability, timing, execution\
quality, and more.

### Filters

At the top of the analytics panel, you can apply filters to narrow down the data you're viewing. Click the filter icon to open the filter modal. Available filters:

* **Exchanges:** View performance on specific exchanges only (e.g., Hyperliquid, Binance, OKX)
* **Bot Type:** Filter by reference price mode (Mid, Grid, Reverse Grid, Blend, Signal)
* **Tokens:** Search and select specific tokens/pairs
* **Spread Buckets:** Filter by the spread (in bps) your bots were configured with
* **Date Range:** Set a from/to date to view a specific time window
* **Hours (UTC):** Select specific hours of the day to analyze (useful for comparing peak vs. off-peak performance)

All sections update to reflect the active filters. Filters are combined; if you select both "Hyperliquid" and "Grid", you'll see only Grid mode orders on Hyperliquid.

### Analytics Sections

#### Summary Stats

Four headline cards at the top showing your overall performance:

* **Total Volume**: The total dollar volume traded across all your market maker orders, with the number of completed pairs shown\
  below
* **Gross P\&L**: Your cumulative profit and loss, with the volume-weighted P\&L in basis points (bps). This tells you on average\
  how many bps you're making or losing per dollar traded
* **Win Rate**: The percentage of completed pairs that were profitable
* **Fees**: Total exchange fees paid, with fee rate in bps

#### Daily Volume by Exchange

A time-series chart showing your daily trading volume, stacked by exchange. A 7-day moving average line helps you spot trends.\
This section helps you understand how your activity has evolved over time and which exchanges drive the most volume.

#### Volume Breakdown

Two side-by-side tables breaking down your activity:

* **By Exchange**: Orders, completed pairs, volume, volume-weighted P\&L (bps), and win rate per exchange
* **By Bot Type**: The same metrics grouped by which reference price mode you used

Both tables are sortable: click any column header to sort. This helps you quickly identify which exchange or strategy is\
performing best.

#### Pair Performance

<figure><img src="/files/iJXOLQCWhqFKOxNjwuVK" alt=""><figcaption></figcaption></figure>

A table showing your top trading pairs ranked by volume. For each pair you can see:

* Volume traded
* Number of completed pairs
* Gross P\&L
* Volume-weighted P\&L (bps)
* Win rate
* Execution quality score

This helps you identify which tokens have been most profitable (or costly) to market make.

#### Spread Performance

Groups your orders by the spread setting (in bps) you configured. Shows how different spread settings affect your profitability and win rate.

A tighter spread means your buy and sell quotes are closer to the mid price: you'll get filled more often, but each fill captures less edge. A wider spread means fewer fills but more profit per fill. This table helps you find the sweet spot.

#### Duration Performance

Shows how order duration affects performance. Orders are bucketed into time ranges (0–1 min, 1–5 min, 5–15 min, up to 8+ hours).\
Each row shows:

* What percentage of your volume falls in that duration
* Volume-weighted P\&L
* Fee rate

This helps you understand whether your bots perform better on shorter or longer runs.

#### Hourly Performance

A heatmap showing your performance by hour of day (UTC) and by day of week. Uses z-scores (a way of normalizing values to show how far above or below average each cell is) to highlight your best and worst times.

**Features:**

* **Timezone toggle**: Switch between UTC, New York, and your local timezone
* **View toggle**: Switch between hourly view and day-of-week view
* **Per-bot legend**: Toggle individual bot types on/off

This section is especially useful for DMM Campaign participants: it shows you which hours and days you tend to perform best, helping you pick optimal slots.

#### Execution Quality

An overall score from 0 to 100 measuring how well your orders execute, broken down into three components:

* **P\&L score (40% weight)**: How profitable your fills are relative to other strategies
* **Fee score (30% weight)**: How efficiently you manage trading fees
* **Speed score (30% weight)**: How quickly your orders complete

A pie chart shows the distribution of your orders across quality tiers: Excellent (80–100), Good (60–80), Average (40–60), and Poor (below 40). A strategy-level breakdown table shows which configurations score highest.

#### Participation Rate

Shows what percentage of the platform's total market maker volume your activity represents. Broken down three ways:

* **By Exchange**: Your share of volume on each exchange
* **By Bot Type**: Your share by strategy mode
* **By Exchange + Bot**: Combined view

Each view shows your volume, the platform total, and your participation rate as a percentage. This gives you a sense of scale: how much of the overall Tread market making activity is yours.

#### Stop Loss / Take Profit Analysis

Heatmaps showing how often your stop loss and take profit triggers, broken down by leverage level. Three tabs:

* **Stop Loss**: Shows SL trigger rates across leverage buckets
* **Take Profit**: Shows TP trigger rates across leverage buckets
* **Combined**: Shows both SL and TP rates side by side, color-coded (red = SL dominant, green = TP dominant)

This helps you calibrate your risk settings. If you see high SL trigger rates at a particular leverage level, you may want towiden your stop loss or reduce leverage.

#### Strategy Rankings

A ranked table of your strategies (unique combinations of pair, bot type, spread, exchange, and leverage), sorted by volume-weighted P\&L. Your best-performing strategy is rank 1. Columns include:

* Pair, bot type, spread, exchange, leverage
* Volume and completed pairs
* VW Gross P\&L (bps)
* Win rate

This is your leaderboard: it shows which specific configurations are working best for you.

#### Trade Rankings

Highlights your individual best and worst trades:

* **Top 5 Best Trades** and **Top 5 Worst Trades** with links to the parent order details
* **Summary stats**: best single trade, worst single trade, average P\&L, median P\&L
* **P\&L Distribution Histogram**: shows how your individual trade P\&Ls are distributed

This helps you understand the range and skew of your results: whether your profits come from many small wins or a few large ones.

#### Directional Bias

Breaks down performance by directional bias setting:

* **Neutral**: Bot quotes symmetrically on both sides
* **Long Bias**: Bot leans toward accumulating the base asset
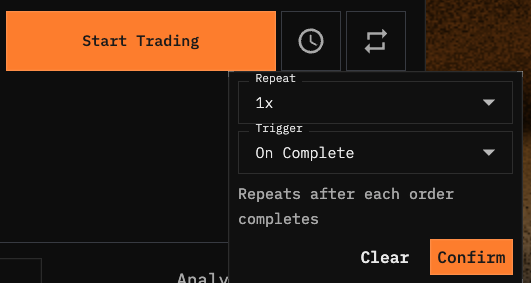
* **Short Bias**: Bot leans toward selling the base asset

Shows orders, completed pairs, volume, gross P\&L, VW P\&L (bps), and win rate for each bias. Helps you understand whether a directional lean has been helping or hurting your results.

#### Order Outcomes

Shows the distribution of how your orders ended:

* **Complete**: Ran to natural completion
* **Hit Stop Loss**: Stopped out by your SL setting
* **Hit Take Profit**: Exited after reaching your TP target
* **Canceled Manually**: You or the system canceled before completion

Broken down further by exchange and bot type, showing the rate of each outcome. High manual cancellation rates might indicate\
you're cutting bots short; high SL rates might suggest your risk settings need adjusting.

***

### Key Terms

| Term                  | Meaning                                                                                                                 |
| --------------------- | ----------------------------------------------------------------------------------------------------------------------- |
| **Completed pair**    | A buy + sell order that both filled on the same pair (the round trip that determines your P\&L)                         |
| **VW P\&L (bps)**     | Volume-weighted profit and loss in basis points: your average profit per dollar traded, expressed in bps (1bps = 0.01%) |
| **Win rate**          | Percentage of completed pairs where you made a profit                                                                   |
| **Execution quality** | A composite score (0–100) measuring P\&L efficiency, fee management, and speed                                          |
| **Z-score**           | A statistical measure showing how far a value is from the average: positive means above average, negative means below   |
| **Spread (bps)**      | The distance between your buy and sell quotes, measured in basis points off the reference price                         |

***

### Notes

* Analytics data refreshes with a short delay: recently completed orders may take a few minutes to appear.
* Data is cached for 15 minutes per filter combination, so you may not see real-time changes immediately after adjusting filters.
* The analytics cover **all** your market maker bot activity, not just campaign-related orders.


# Campaigns

Campaigns allow tread users to coordinate their market making bots to act as a collective **designated**\
**market maker (DMM)** for token projects.

Designated market makers are third-party liquidity providers who quote on the limit order book around the clock, ensuring efficient and liquid markets. Traditionally, this role has been filled by large firms with dedicated infrastructure and capital.  Campaigns change that by pooling together individual market maker bots, our community can deliver the same consistent liquidity that token projects need, while each participant earns a share of the rewards.

This opens the door for tread market makers to unlock the rewards that historically only large market\
making firms could access.

### How it Works

<figure><img src="/files/RioiLAGeC1gvYTGR232h" alt=""><figcaption></figcaption></figure>

Navigate to Market Maker Bot → Campaigns tab. You'll see a table of active campaigns showing:

* **Name:** The campaign title (e.g., "ZAMA/USDC on Hyperliquid")

* **Pair**: The trading pair being quoted

* **Exchange:** The venue(s) where orders are placed

* **Rewards:** The reward pool for the campaign period (e.g., "$2,500/week")

* **Min Deposit:** &#x20;
  * **Spot pairs (most DMM campaigns):**\
    You need to hold both the base token and the quote token in a 50/50 split by value.

    **Example:** If a campaign for ZAMA/USDC has a min deposit of $5,000, you need:

    * $2,500 worth of ZAMA
    * $2,500 worth of USDC

    This is because your bot places limit orders on both sides of the book — buy orders (using USDC) and sell orders (using ZAMA). It needs inventory of both assets to quote in both directions.
  * **Perpetual/margin pairs:**\
    You only need the margin collateral (typically USDC or USDT); you do not need to hold the base asset. This is because perpetual contracts are settled in the margin asset and don't require physical delivery of the underlying token.

* DMM campaigns, especially for new token launches, will run on spot markets, so plan for the 50/50 split when preparing your capital.

* **Important:** You are not spending this capital. Your bot uses it as working inventory to place limit orders. As fills happen, your mix of the two assets will shift (e.g., you may end up with more ZAMA and less USDC, or vice versa), but the total value stays with you. Think of it as deploying capital, not paying a cost.

#### Understanding the Slot Grid

Click on a campaign row to expand it and view the slot grid, a schedule of available time slots.

The purpose of these slots is to ensure that rewards are not overly diluted for each given timeslot and that there is consistent liquidity provision that means the demands of the market throughout all hours..

The grid shows slots organized by day and time. Slots are color-coded:

* <mark style="color:blue;">Blue</mark> — Available. You can reserve this slot.
* <mark style="color:green;">Green</mark> — Your slot. You have an active reservation or running bot.
* <mark style="color:orange;">Orange</mark> — Full. All participant spots for this slot are taken.
* <mark style="color:$info;">Grey</mark> — Past. This slot has already ended.

A pulsing glow indicates the currently active slot (the one happening right now).

Each slot shows the time range (e.g., "14:00–15:00") and a capacity indicator (e.g., "2/5" meaning 2 of 5 spots filled).&#x20;

#### Boost Multipliers

Some slots offer boost multipliers that increase your reward share. These appear as an orange badge (e.g., "2x") on the slot. Boosts may apply to:

* **Specific time slots:** Weekend or off-peak slots carry higher multipliers to incentivize coverage during quieter periods, because consistent liquidity around the clock is the entire point of a DMM arrangement
* **Specific configurations:** Tighter spread settings may carry higher multipliers, rewarding participants who provide closer quotes and therefore better execution for traders

The total boost is the product of both: for example, a 1.5x slot boost with a 2x configuration boost gives you a 3x reward multiplier for that slot.

#### Reserving a Slot

1. Click an <mark style="color:blue;">available</mark> slot in the grid
2. A dialog appears showing:&#x20;

   ![](/files/gRfLuO4QcM1aeRsyYjK1)

   1. **Time Slot:** The exact start and end time (displayed in your local timezone)&#x20;
   2. **Capacity**: How many spots are filled vs. available
   3. **Required Notional :** The minimum capital your bot needs to work with.
   4. **Configuration options:** The pre-set bot configurations available for this campaign, this is determined by the campaign managers based on how they would like to orchestrate market makers during those periods.
3. Click Reserve

This takes you to the Market Maker Bot order form, pre-filled with the campaign's locked parameters. Review the settings, confirm your capital amount, and submit.

Your bot will be scheduled to start automatically at the slot's start time and will run until the slot ends, no manual intervention needed.

### Campaign Configurations

Each campaign has one or more pre-configured bot settings defined by the campaign administrator. These lock certain parameters to ensure consistent quoting across all participants. The configuration card shows:

* [**Mode**](/bots/market-maker-bot/reference-price-modes-and-risk-controls)**:** The reference price mode (e.g., Mid, Grid, Blend)
* **Spread** The spread in basis points (bps) off the reference price
* **Directional Bias:**  Whether the bot quotes neutrally, or leans long or short
* **Boost:** The reward multiplier for choosing this configuration

You choose which configuration to run when you reserve a slot. Different configurations may have separate capacity limits (e.g., only 3 slots available for the "tight spread" config).

#### Managing Your Reservation

Click on a green (owned) slot to open the Manage Slot dialog, where you can:

* **View Order:** Jump to the live order details page to see real-time performance
* **Cancel Schedule:** If the slot hasn't started yet, cancel your reservation and free the slot for someone else
* **Cancel Bot: I**f the bot is currently running, stop it early

Note: Cancelling a running bot or scheduled order releases your slot immediately, making it available for another participant.

***

### Reward Distribution

Rewards are distributed weekly based on three factors:

1. **Quoting Uptime:** The percentage of your reserved slot time that your bot was actively running and quoting. Running your bot for the full duration of every reserved slot maximizes your uptime score.
2. **Boosted Slots:** Slots with higher multipliers (tighter spreads, weekend/off-peak hours) earn proportionally more rewards. Choosing harder configurations is rewarded.
3. **Volume Traded:** The total volume your bot executes during the campaign period. More fills = higher reward share.

tread.fi reserves the right to modify, suspend, or terminate the points program at any time, including program rules, eligibility requirements, points rates, exchange multiplier policies, and these terms and conditions. Continued participation after any such change constitutes acceptance of the modified terms.

***

### Eligibility

Exact eligibility criteria for coming campaign TBC.

***

### FAQ

**Do I lose my capital when I participate?**

The min deposit is working capital, not a fee. Your bot places limit orders using these funds, and you retain ownership of all assets throughout. You may end up holding a different mix of the base token and quote asset as orders fill, but no capital is taken from you as a cost of participation. However, note that exchange and/or builder fees may still apply on filled orders — whether these fees are waived or reduced depends on the specific campaign and exchange arrangement.

**What happens if my bot stops early?**

Your slot is released and becomes available for someone else. Your uptime score for that slot will reflect the partial coverage, which affects your reward share.

**Can I change my configuration after reserving?**&#x20;

You would need to cancel your existing reservation and re-reserve with a different configuration (subject to availability).

**What's the minimum commitment?**&#x20;

Each campaign specifies a minimum deposit amount shown in the campaign table and reservation dialog. This is the minimum capital your bot needs available to place and maintain quotes.


# Troubleshooting

#### Insufficient Margin

If you receive an "Insufficient Margin" error (often indicated by a red warning), your available collateral is too low. Running the bot with insufficient margin will likely lead to your order being cancelled. To resolve this:

* Add more funds to your exchange account
* Reduce the notional amount of your order
* Check your account's margin settings (e.g., cross vs. isolated) on the exchange website
* Check that your balance is in your perp account, not your spot account (common issue for Hyperliquid where the balances are separted).

**Common Issue: Using Nearly All Available Margin** Another common issue occurs when users try to use almost their entire margin balance for market making. For example, if you only have $10 of available margin and you input $10 in Margin. While our system allows this, during the order execution it has a high chance of getting stuck with the insufficient margin error because there is insufficient margin left to open up new orders to help keep your exposure balanced during the bot's operation. To avoid this, we recommend leaving a buffer (e.g., use only 50%of your available margin) to allow the bot to manage exposure adjustments.

#### 'Paused' Status

If you see your bot's status change to 'Paused', do not be alarmed. This is a built-in safety feature. The bot pauses itself automatically when its market exposure in one direction (long or short) grows too large. It will resume trading once its net exposure is reduced to a safe level.

#### Insufficient Balance for Spot

For spot market making, ensure you have at least half the recommended margin/balance in the base token to fund sell orders:

* **The 50/50 Rule**: To market make a Spot pair, you need 50% of the total value in the base token and 50% in the quote token.
  * Example: To market make $1,000 worth of HYPE/USDH, you must hold $500 worth of HYPE and $500 USDH in your wallet.
* **Check Your Wallet**: Ensure these funds are in your Spot Account, not your Perpetual/Futures account.

#### Order Not Submitting

Verify all required fields are filled, check your API key permissions, and ensure you have a sufficient balance/margin.

#### Cancelled Market Maker Orders

Upon canceling a market maker bot order, an automatic order will be placed to close any residual positions known as a clean-up order. This ensures you finish with a net zero balance. However, if you are seeing that your bots are not fully closing your position upon stop loss or cancel:

1. **Wait at least 15 seconds:** It takes a couple of seconds for the order to close out your position to be visible on the UI and to start executing. This is by design to ensure that there are no pending fills coming in for the bot.&#x20;
2. **Verify if  clean-up was submitted:**
   * Go to the Orders tab (from the top nav bar) and filter for single orders
   * Find order with `Strategy: TWAP` , clicking into it, under the notes section it should also say  say "Exposure cleanup for order:..." and if it is not fully filled → click into it to see further order details
   * View the order messages for any error messages.
3. **Common Error Messages:** If there is an order message that says something along the lines of:

   * "Reduce only order increases position"
   * "Position is missing for reduce-only order"

   The problem is that you had an open position for the pair before the bot ran.
4. **How Cleanup Works:** When the bot is canceled, it looks at the last state of total exposure (the size of the position that the bot has opened). It will create a **REDUCE ONLY TWAP** over 1-15 minutes (depending on the size of the exposure) which will close out the exposure.
5. **Why Cleanup Fails:** The main reasons why some cleanups fail are:
   * **Pre-existing position**: If you had an open position before starting the bot, let's say you had 1 ETH long, and the net exposure was -2 ETH at the end of the bot, your position on the exchange is -1 ETH. The cleanup of +2 ETH will fail because the order will try to reduce only buy 2 ETH, but you only have -1 ETH. This can happen with even a small amount of dust.
   * **Manual position closure**: You manually closed out a position while the bot was running. The exposure is not accurate and this can happen for the same reason as above.
   * **Outages**: There was an outage where the bot lost track of orders (unexpected exchange or Tread outages).
6. **How to Mitigate:**
   * Don't leave dust (small residual orders) when starting bots
   * Don't manually trade the same asset while the bots are trading
   * If all fails, close out the exposure manually and (optional) cancel the clean-up TWAP. The second step is optional because reduce only orders will automatically fail anyway if you don't have an open position on the exchange.


# Strategies & Configurations

### Recap of Spread Settings for Grid Mode

\
+5 = wait for \~5 bps profit before locking in\
0 = locks profit as soon as it’s positive. May still lead to a net loss after exchange fees.

–1 = accept up to –1 bp loss to avoid stalling

### The "Grid -1 bps" Strategy

The Grid -1 bps configuration is generally recommended for a balance of risk and reward for active markets. While it may seem counterintuitive to set a negative spread, this tactical concession is often statistically safer than waiting for larger profits.

#### Why It Works

* **Reduces Stalling:** It acts as a form of 'insurance' where you accept a tiny spread concession (-1 bp) on your limit order to improve fill probability instead of waiting for a profitable spread that may never materialize, which can result in stalling and eventually hitting the 50 bps hard stop-loss.
* **Profit Clustering:** In practice, results tend to cluster tightly around -1 bps to +1 bps. The high turnover volume often compensates for the smaller per-trade margin.

### Recommended Strategies

#### Highly Liquid Majors during fast price action&#x20;

* **Example Assets:** BTC-PERP or ETH-PERP
* **Price Reference Mode:** Grid Mode
* **Spread:** -1 bps
* **Execution Mode:** Aggressive (Passive means higher chance of 50 bp stop-loss)
* **Trading Session: During** New York trading Session (Monday–Friday, 9:30 a.m.–4:00 p.m. ET) during mid session with chop/non-trending environments but avoid:
  * **Around US Market Open Bell (9:30 a.m. ET)**
  * **NY Closing Auction (4:00pm ET)**
  * **Major Macro Events:** For example, Fed meetings, CPI Prints, major market fills.&#x20;
* **Rationale:**
  * **Faster In & Out:** Majors move quickly. You want to enter and exit positions rapidly to minimize the chance of large directional trends building up against you.
  * **Aggressive Execution:** Ensuring priority in the queue is critical to getting the exit fill before the price moves.
  * **Avoids Exposure Buildup:** Short durations keep inventory lean, preventing the bot from accumulating a massive position that becomes hard/costly to unwind.

#### Range-Bound / Low-OI Assets&#x20;

**Price Reference Mode:** Grid Mode

**Spread: +**&#x35; bps

**Execution Mode:** Normal or Passive

**Rationale:**

* **Perfect Grid Environment:** Assets that exhibit clean, range-bound price action with minimal directional movement (chopping sideways with minimal directional trend) are exactly where Grid Bots excel. They will generate consistently positive PNL with assets that reliably respect support/resistance levels.
* **Wider Spreads:** Because these pairs lack strong directional drive, you can afford to wait. Setting a +5 bps spread allows you to capture significantly more profit per loop without a high risk of the price running away.

#### General Points Farming (e.g. Ventuals Maker Points Program)

For such low liquidity assets/markets, adjust your mindset before proceeding.

1. **Check the Chart:** Confirm the pair is actually sideways. If it is trending, **do not run a Grid Bot.**
2. **Patience:** Expect longer bot durations. Fills will be sporadic.
3. **Trade-Off:** Accept lower/zero profits (or even losses) in exchange for higher XP/Points.

**Recommended Setup**

* **Reference:** Mid Price Mode
* **Spread:** > +10 bps (or widest available)

**Rationale:**

* **Objective:** Specific to the Ventuals Maker program, points are awarded based on several factors, including but not limited to:

  * **Size**: The total volume of liquidity posted via maker/limit orders.
  * **Distance**: Limit orders placed away from the mid price still within a "reasonable range" of the mid-price to count.
  * **Uptime**: How continuously your quotes are present in the book throughout the week.
  * **Two-Sidedness**: Consistent activity on both Bid and Ask sides (Note: *Asks are currently weighted more heavily than Bids*, per Ventuals documentation).
  * **Fill Quality**: While the primary goal is providing liquidity, Ventuals also accounts for volume traded at competitive prices to prevent quotes from being "ghost liquidity" that never fills.

  The specific factor attribution to wards points distribution methodology is not disclosed. For comprehensive details on their program, please refer to their official [**documentation**](https://docs.ventuals.com/liquidity/maker-points)**.**
* **Optimization:**&#x20;

  Placing orders at a moderate distance (e.g., +10 bps) is potentially optimal for this scoring model:

  1. **Maximizes Uptime:** It prevents your orders from being filled too quickly (which would remove your liquidity from the book and stop your "Uptime" clock).
  2. **Optimizes Distance:** It keeps your orders close enough to the mid-price to score well on the "Distance" metric, without being so close that you constantly cluster at the top level.
  3. **Ensures Two-Sidedness:** By sitting wider, you are more likely to maintain a balanced book on both sides for longer durations

&#x20;


# Delta Neutral Bot

## Overview

The Delta Neutral Bot lets you open simultaneous long and short positions to capture funding rate differentials while neutralizing directional price risk. The bot executes both legs using a [TWAP (Time-Weighted Average Price)](/creating-and-submitting-orders/advanced-settings/trajectories/twap) strategy.

***

<figure><img src="/files/8ZT4x650orxsnEokJ2np" alt=""><figcaption></figcaption></figure>

### Key Terms and Definitions

#### Entry Form Definitions

**Long Leg / Short Leg**

* **Long Leg**: The buy side of the delta neutral position. You profit when the asset price increases, but in a delta neutral strategy this is offset by the short leg.
* **Short Leg**: The sell side of the delta neutral position. You profit when the asset price decreases, but in a delta neutral strategy this is offset by the long leg.

**Account**

* The exchange account  used for each leg. You can use different accounts for cross-exchange arbitrage

**Pair**

* The trading pair (e.g., `BTC:PERP-USDT`, `ETH:PERP-USDT`). Each leg can use a different pair, allowing cross-asset delta neutral strategies.

**Leverage**

* The leverage multiplier for the position. Higher leverage increases position size but also risk. Only applicable to perpetual futures contracts, not spot markets.

**Notional**

* The total dollar value of the delta neutral position. This amount is split equally between the long and short legs (each leg receives 50% of the notional value).

**Duration**

* How long the bot should run. Minimum duration is based on 50% percent of volume (POV) for the slower leg (the leg with higher POV). Maximum duration is 1 day.

### Stop Loss

The Delta Neutral Bot includes an optional stop loss that automatically unwinds your position if losses grow past a threshold you choose. Because a delta neutral position is made up of two legs (a long and a short), the stop loss is designed to close **both legs together** so you don't end up with a lopsided, directional position after it fires.

#### How you configure it

When you set up a Delta Neutral order, you'll see four stop loss options:

| Option              | Behavior                                                                 |
| ------------------- | ------------------------------------------------------------------------ |
| **50%**             | Unwind if losses reach 50% of deployed margin                            |
| **75%** *(default)* | Unwind if losses reach 75% of deployed margin                            |
| **90%**             | Unwind if losses reach 90% of deployed margin                            |
| **Uncapped**        | No stop loss. Position runs until duration ends or you close it manually |

The percentage is measured against the **margin deployed on filled quantity**, not your full account balance. So a 75% stop loss on a position that's only half-filled is measured against the margin used by the filled portion.

#### How it's triggered

Once your opening order starts executing, the bot creates a paired "closing order" that sits in the background watching market prices. It checks roughly every 10 seconds whether either leg has moved far enough against your average fill price to breach the threshold:

* **Long leg** triggers if market price falls to `avg_fill_price × (1 - stop_loss_%)`
* **Short leg** triggers if market price rises to `avg_fill_price × (1 + stop_loss_%)`

If **either leg** crosses its threshold, the stop loss fires for the whole position. You don't need both legs to move against you.

#### What happens when it fires

1. The still-running opening order is canceled, so no new exposure is added.
2. A closing order unwinds both legs by sending opposite-side orders (reduce-only, so it can't accidentally flip you into a new position).
3. The closing order is given 5 to 10 minutes to exit in an orderly way rather than market-slamming out.

#### Things worth knowing

* **Before any fills happen**, the stop loss condition is inert. There's no average fill price yet, so nothing can trigger.
* **Partial fills are handled correctly.** The threshold uses your actual average fill price, so it scales with what's actually been executed.
* **System maintenance windows** will delay the closing order from starting, but it resumes automatically afterward.
* **Stop loss is independent of position duration.** If you also set a duration, whichever condition hits first (stop loss breach or duration expiry) closes the position.
* Choosing **Uncapped** disables the mechanism entirely. Use it only if you plan to manage exits manually.

#### Pre-Trade Analytics Definitions

<figure><img src="/files/zfhwLAqaENQ2PN8SXNol" alt=""><figcaption></figcaption></figure>

**Inventory**

* Dollar value of your inventory for each of your respective legs

**Target Amount**

* The notional value allocated to each leg (long or short). This equals half of your total notional input.

**Estimated Fees**

* The total estimated trading fees for each leg, including:
  * **Builder Fee**: A fixed 2 basis points (0.02%) fee (specific for: Extended, Hyperliquid, Pacfica)P
  * **Maker Fee**: Exchange-specific maker fees (varies by exchange and VIP Tier)

**Percentage of Volume (POV)**

* The percentage of total market volume the bot aims to participate in over a specified period.

**Sided Funding Rate**&#x20;

* The funding rate displayed for the each of the respective legs. Shows the rate you would pay (negative) or receive (positive) for that leg. Funding rates are typically paid every 8 hours.

**Net Sided Funding Rate**

* The combined funding rate across both legs. This represents your net funding income (positive) or cost (negative) for the entire delta neutral position. Calculated as: Long Sided Funding Rate + Short Sided Funding Rate.

#### Order History Definitions

<figure><img src="/files/71SW5LI1RNg7X6nJyX8g" alt=""><figcaption></figcaption></figure>

**Total Exposure**

* The total executed notional value of the position, calculated as the sum of both legs' executed notional values. This represents the total capital deployed in the delta neutral strategy.

**Net Exposure**

* The net directional exposure of your position, expressed as a percentage of total exposure. In a perfectly balanced delta neutral position, this should be close to 0%.
* **Positive values** indicate you have more long exposure than short
* **Negative values** indicate you have more short exposure than long
* Values above 1% may trigger an "Unbalanced" warning

**Funding Rate**

* The net combined funding rate for the position (same as Net Sided Funding Rate). Shows your net funding income (green/positive) or cost (red/negative) for the entire position.

**Status**

* The current state of the position:
  * **Opening**: The bot is executing the order to open your position
  * **Open (Green Tick)**: The opening order is complete and the positions are active
  * **Closing**: A closing/wind-down order is executing
  * **Complete**: The positions have been fully closed
  * **Unbalanced (Yellow Warning)**: Warning indicator when net exposure exceeds 1% of total exposure

**Orders**

* Links to view the opening and closing orders:
  * **↑ (Up Arrow)**: Opens the opening order details
  * **↓ (Down Arrow)**: Opens the closing order details (if applicable)

**Actions**

* Available actions for each position:
  * **Cancel (X icon)**: Cancels any active opening or closing orders
  * **Wind Down (Swap icon)**: Reverses the position by submitting a closing order that unwinds both legs
  * **Delete:** This deletes the order from the table **but does not close the order on the exchange.**&#x20;

***

### How It Works

1. **Setup**: Select accounts and pairs for both long and short legs, set your total notional value, and choose an execution mode.
2. **Execution**: The bot simultaneously places buy orders for the long leg and sell orders for the short leg using a TWAP strategy to minimize market impact.
3. **Funding Capture**: While the position is open, you earn or pay funding rates based on the net difference between the long and short funding rates.
4. **Wind Down**: When ready to close, use the "Wind Down" action to reverse both positions simultaneously.

***

### Important Notes

* **Delta Neutral Strategy**: This strategy aims to be market-neutral, profiting from funding rate differentials rather than price movements.
* **Cross-Asset Support**: You can use different pairs for long and short legs, enabling cross-asset delta neutral strategies.
* **Unbalanced Positions**: If net exposure exceeds 1%, the position is marked as "Unbalanced" and you may have directional risk.
* **Funding Rates**: Funding rates change every 8 hours and can be positive or negative. Monitor the net funding rate to ensure profitability.
* **Fees**: Both legs incur trading fees, which reduce your net funding income. Consider fees when evaluating profitability.

***


# Multi/Spread/Basis/Portfolio Trading

The **Multi-Order** feature allows traders to execute **complex, multi-leg strategies**—such as **spread trades, arbitrage, and hedging**—in a **single streamlined action**. This tool is designed for traders managing **multiple positions simultaneously**, eliminating the need for manual coordination while ensuring **efficient and balanced execution**.

All **multi-leg trades require at least one buy and one sell order**, maintaining **risk control** and strategic balance. The system **optimizes execution across all legs**, adapting dynamically to market conditions. Traders can further refine their strategies using **advanced settings** like [**Dynamic Limit Spread**](/other-trading-modes/multi-spread-basis-portfolio-trading/dynamic-limit-spread) and [**Exposure Tolerance**](/other-trading-modes/multi-spread-basis-portfolio-trading/exposure-tolerance), which provide greater control over **pricing thresholds and execution balance**.

#### **Common Use Cases**

<figure><img src="/files/PiXINEqBeLd5KgC31WrI" alt="" width="375"><figcaption></figcaption></figure>

* **Funding Rate Trades**– You can quickly set up a funding rate arbitrage trade by using the funding rate pair picker. Clicking a rate auto-fills the order form weith the relevant exchange and pairs.
* **Arbitrage Opportunities** – Capture price inefficiencies by executing **cross-exchange arbitrage**—buying an asset on one exchange and selling it on another. The system ensures **simultaneous execution** to minimize risk.
* **Hedging Strategies** – Reduce exposure to market fluctuations by **pairing long and short positions** in correlated assets. Multi-leg execution ensures both sides of the hedge remain balanced **in real time**.
* **Paired Portfolio Trades** – Rebalance portfolios by **pairing asset purchases with corresponding sell orders**. This ensures trades **maintain target allocations** while avoiding unnecessary exposure.
* **Two-Leg Arbitrage Variations** – Execute more complex strategies, such as:
  * Buying two assets while **simultaneously selling a related asset**
  * Commonly used in **triangular arbitrage** to maintain **balanced exposure**

This feature is ideal for traders who need **automated, efficient execution of multi-leg trades**, ensuring **risk control, optimal pricing, and market adaptability**.


# Dynamic Limit Spread

<figure><img src="/files/QrPBzFmebDhGlEEVLtBD" alt="Dynamic Limit Spread Setting"><figcaption></figcaption></figure>

The **Dynamic Limit Spread** is an **optional setting** that allows traders to define the **minimum price difference (spread)** required between the **buy and sell legs** before executing a trade. This ensures that **spread or basis trades** only execute when the **price differential aligns with the trader’s profitability criteria**.

**How It Works**

* Traders set a **minimum spread threshold** for execution.
* If the market spread is **too narrow**, the system **pauses execution** until the price difference meets or exceeds the defined threshold.
* This prevents trades from being executed **at unprofitable spreads**, ensuring **favorable pricing** for spread and basis strategies.

**When to Use This Setting**

* **Spread Trading** – Ensures that **buy and sell legs** of a trade execute **only when the spread is sufficient**.
* **Basis Trades** – Helps traders avoid executing **futures vs. spot trades** at an unprofitable basis.
* **Controlled Arbitrage** – Allows traders to **lock in profits** by only executing **when the price difference justifies the trade**.

This feature is useful for traders looking to **optimize trade execution** by ensuring that **spreads meet profitability requirements before execution**.


# Exposure Tolerance

<figure><img src="/files/eBHQLBbYIzK362siwA6O" alt=""><figcaption><p>Exposure Tolerance Setting</p></figcaption></figure>

**Exposure Tolerance** is an **execution control feature** that **adjusts the pace of execution** between legs in **spread trades**, preventing one side from **filling significantly faster than the other**. Instead of reactively sending **aggressive orders** to balance the legs, the system **proactively modifies execution schedules** to ensure the spread remains within **desired limits**. This helps reduce **unnecessary market exposure**, **minimize slippage**, and **maintain strategic balance**.

### **Key Benefits**

<figure><img src="/files/lYhrhXR9k4drqpIkU1B0" alt=""><figcaption><p>Net exposure  during execution</p></figcaption></figure>

* **Optimized Spread Execution** – Ensures that **one leg doesn’t outpace the other**, reducing unwanted exposure and maintaining more accurate spread pricing.
* **Control and Predictability** – Provides traders with **better control** over trade execution, improving predictability compared to **reactive systems**.
* **Minimized Slippage** – Keeps both legs of the trade in **proximity during execution**, reducing the risk of **price slippage** and imbalanced orders.

This feature is ideal for traders executing **spread, arbitrage, or hedging trades**, ensuring that **both legs remain in sync** while maintaining **optimal market positioning**.

### Dynamic Tolerance

<figure><img src="/files/IQtafNzJDNGzNOA3AlYl" alt=""><figcaption><p>More notional on the longs than on the shorts</p></figcaption></figure>

In the case that the longs and shorts are not equal in size, the exposure target will be based on a linearly increasing exposure that utlimately ends up at the net $ long - $ short amount. The exposure tolerance will be constant throughout the duration of the order, such as in cases when portfolio rebalances where the rebalance adds or removes the cash balance or multi-legged spreader trades where the notionals do not match.&#x20;


# Directional Bias

Directional bias control allows you to influence the timing and distribution of your buy and sell orders based on your market outlook.

**How Directional Bias Works**

* **Range**: -1 to +1 (neutral at 0)
* **Positive Bias (+1)**: Favors long positions by front-loading buy orders and back-loading sell orders
* **Negative Bias (-1)**: Favors short positions by front-loading sell orders and back-loading buy orders
* **Neutral (0)**: Equal timing distribution for both buy and sell orders

**Additional Notes on Directional Bias**

* **Alpha Tilt Adjustment**: Directional bias maps linearly to alpha tilt adjustments (±1 → ±0.2 alpha tilt)
* **Buy Orders**: Positive bias adds positive alpha tilt (front-loads), negative bias adds negative alpha tilt (back-loads)
* **Sell Orders**: Positive bias adds negative alpha tilt (back-loads), negative bias adds positive alpha tilt (front-loads)
* **Risk Management**: Extreme bias values (±1) require up to 20% additional margin to account for increased directional exposure

**Use Cases**

* **Bullish Outlook**: Set positive bias to capture upward price movements more aggressively
* **Bearish Outlook**: Set negative bias to benefit from downward price movements
* **Market Neutral**: Keep at 0 for balanced market making without directional exposure


# Chained Orders (Batch Trading)

<figure><img src="/files/Zek38MpnZdDmRF4NVEUY" alt=""><figcaption><p>Chained Order Interface</p></figcaption></figure>

**Chained Orders** allow traders to **execute multiple trades in a predefined sequence**, ensuring that each order **triggers only after the previous one is completed**. This feature is useful for structuring **complex execution strategies**, such as **staggered entries and exits** or executing trades based on sequential logic rather than simple price triggers.

#### **How It Works**

* Orders are grouped into **batches**:
  * **Orders within the same batch execute simultaneously**.
  * **Subsequent batches begin execution only after the preceding batch is fully completed**.
* The sequence progresses as follows:
  * Once all orders in **Batch n** are **fully filled**, **Batch n+1** begins execution.
* A common use case is **scaling into a position over multiple orders** and then **exiting in structured steps** based on execution logic. Unlike a **Take Profit order**, which triggers an exit solely based on price, **Chained Orders provide execution control**, ensuring each step completes before proceeding to the next.

#### **Configuring Chained Orders**

1. **Add Orders to the Chain** – Use the order entry form to create and structure orders in sequence.
2. **Assign Batches** – Set a **batch number** for each order to define execution priority. Orders within the **same batch execute concurrently**.
3. **Submit the Chain** – Click **"Submit Chained Orders"** to start execution. The engine will process each batch in order.

<figure><img src="/files/ZDqbQISSqCPqX2p9QzRV" alt=""><figcaption><p>Chained Order Execution</p></figcaption></figure>

#### **Key Considerations**

* **Order Completion Requirement** – An order is considered **complete only when fully filled**. If an order is **not fully filled**, the chain **stops**, and an **error is raised**.
* **No Conditional Execution** – Chained orders **do not support conditional triggers** (e.g., price-based activation).
* **Editing Orders** – Once submitted, orders **cannot be edited**. To modify an order, it must be **deleted and re-added**.
* **Monitoring Execution** – Traders can track order progression via the **Chained Orders Monitoring Page**, which provides insights into each step of execution. Clicking on an order opens its **detailed analytics page**.
* **Pausing Orders** – The **chain cannot be paused as a whole**. However, **individual orders** can be paused if needed.


---

[Next Page](/llms-full.txt/1)